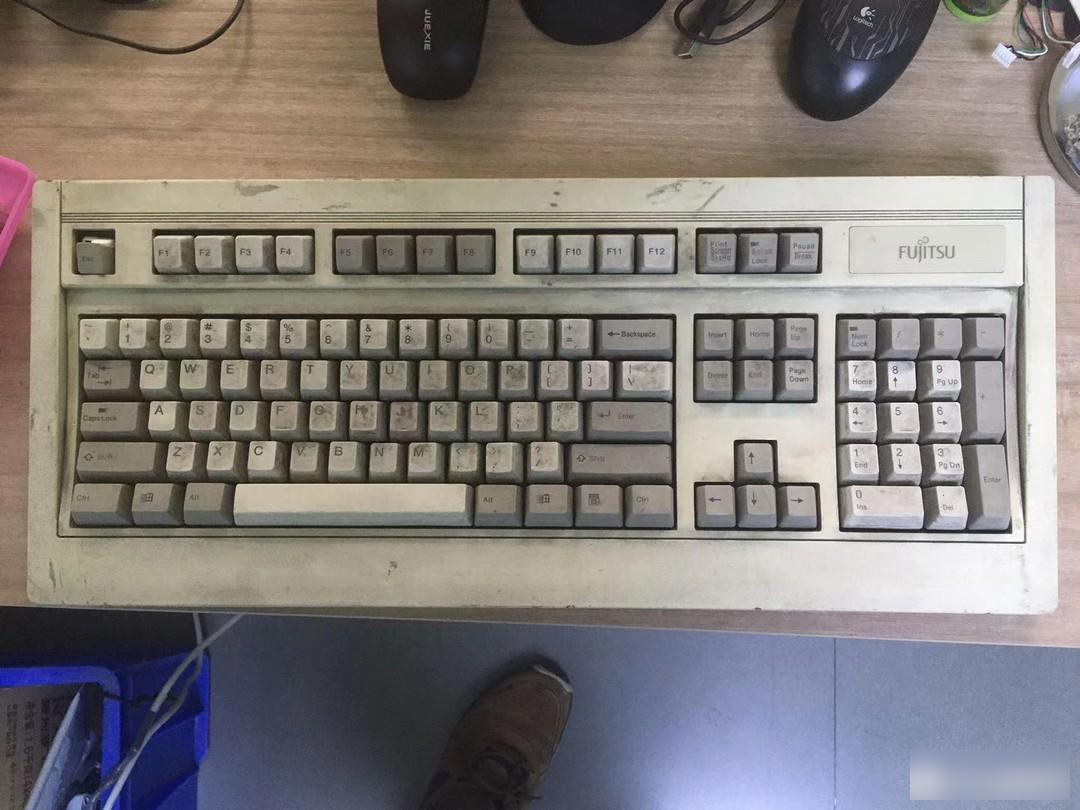
A Rollover of a Fujitsu FKB-4725 Cable Trimmer Keyboard
Wandering around in Xianyu, I accidentally discovered a certain trash guy hanging out a Fujitsu cord-cutting keyboard. The seller did not mark the model number of the keyboard, but from the blurred writing on the back label paper, it can be seen that this keyboard is the legendary king of membrane keyboards FKB-4725. I haven't played with Fujitsu's keyboard before, so I gave it a try.
When I got it, I found that the keyboard was quite dirty and covered with dust. Although the keycaps are complete, the ESC key has been broken. Pressing a few buttons casually, the experience is very bad, and the jam is serious. I also bought an IBM Model M before, and the buttons of the Model M are still very crisp and neat even when it is covered with dust. The legendary film king, is this level?
The shell of this keyboard has no screws at all, and the upper and lower covers are connected by snaps. Use a crowbar to carefully pry open the buckle, then you can separate the upper and lower covers, and take out the inner tank in the middle.
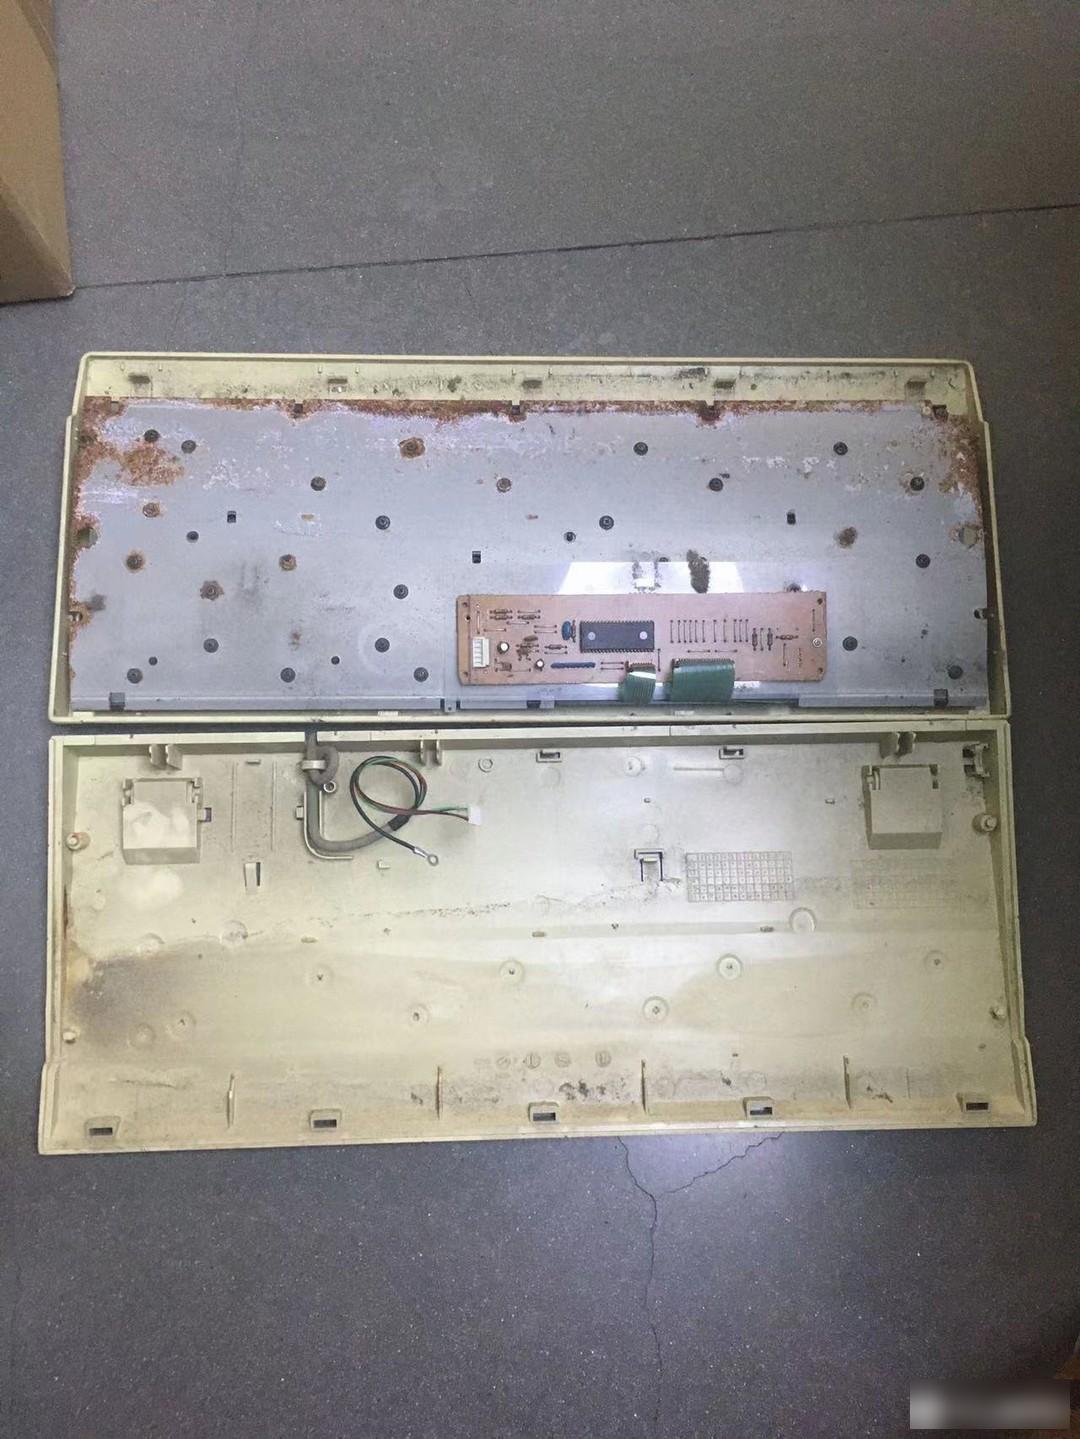
The moment I saw the liner, I deeply felt a chill down my back. In addition to the serious dust in the keyboard, the steel plate is also seriously rusted. If it can rust like this, it is likely to have been in water, or it has been stored in a humid environment for a long time. This time, there is a high probability that the car will overturn.

The main control circuit board of the keyboard is positioned on the back of the steel plate through screws. The membrane circuit of the keyboard is connected with the main control circuit board through the membrane cable. On the far right of the main control circuit board, there is also a 5P plug, which is connected to the keyboard cable of the PS2 interface.
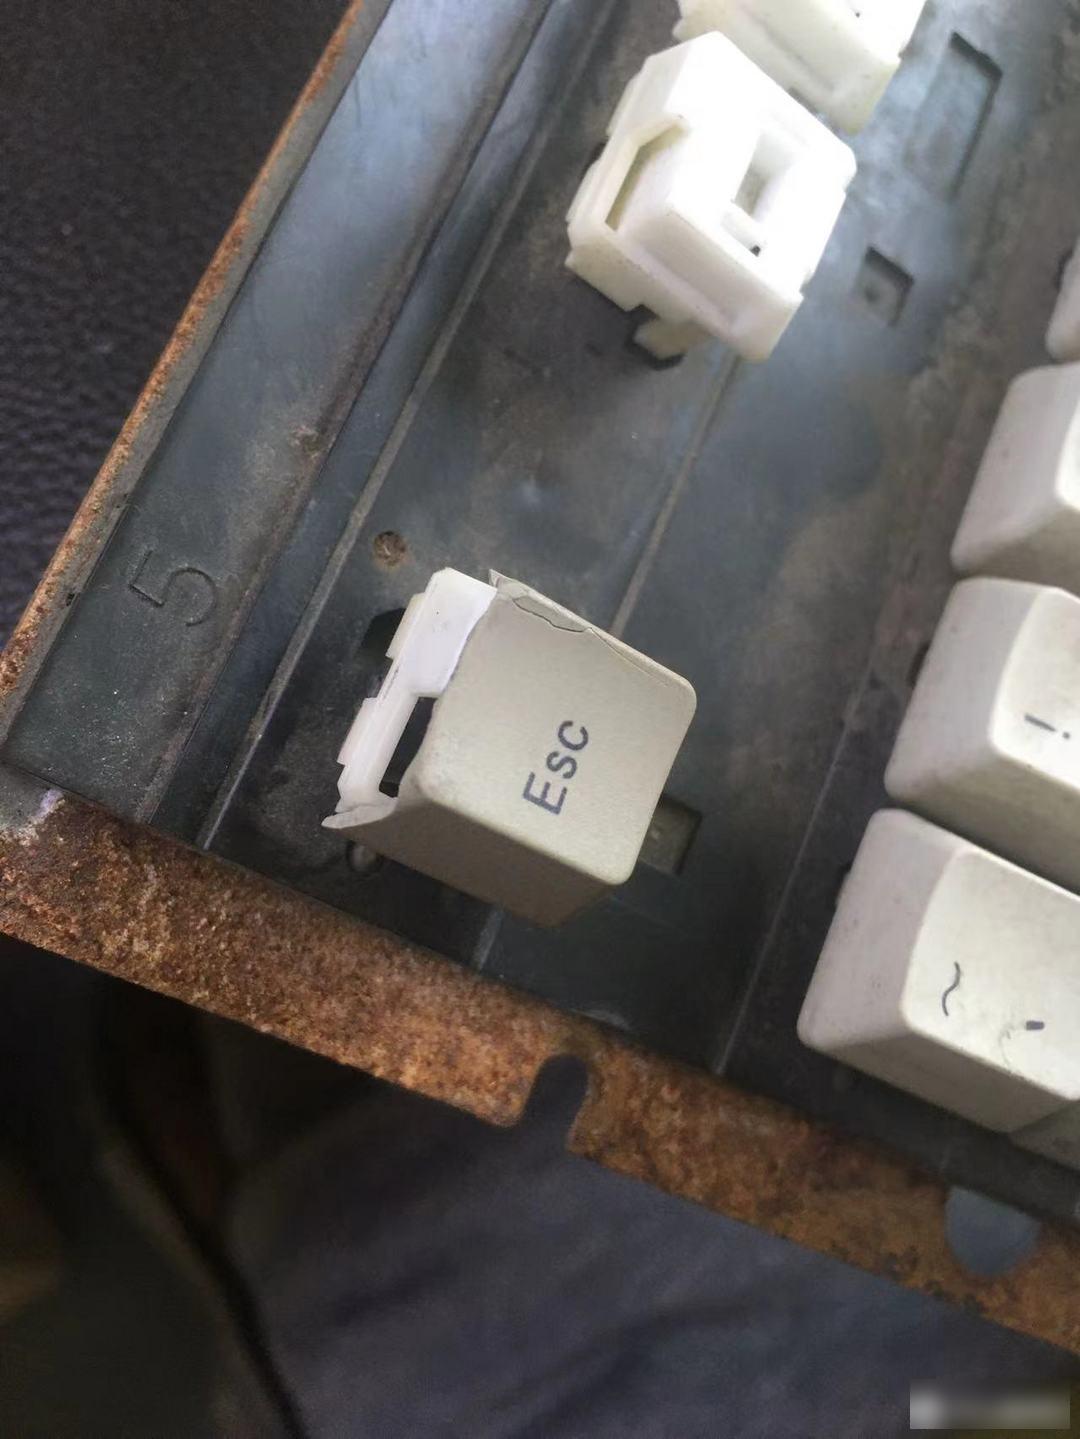
Take a closer look at this rotten ESC key. It can be seen that the top of the box board is covered with dust, and the steel plate underneath is also rusty. The key sticking is probably due to too much dust ingress, resulting in serious friction between the key and the guide rail. Since several keys could not be played, I decided to clean the keyboard first, let the keys recover, and then test whether the keys are good or bad.
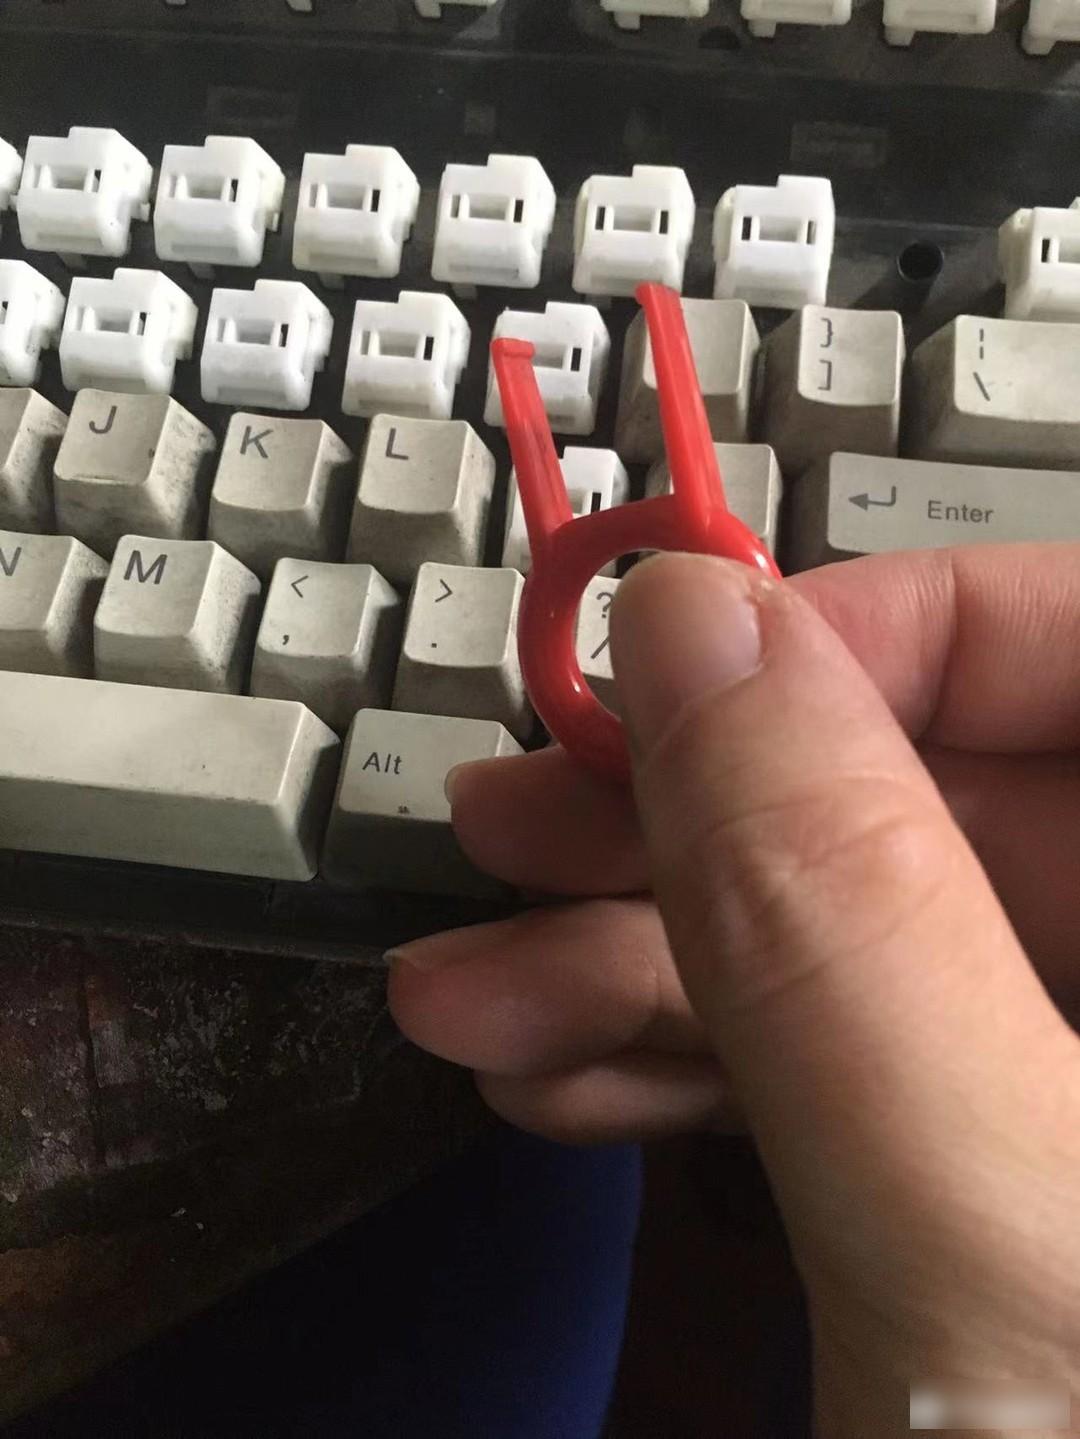
This Fujitsu Peerless button, like the IBM Model M, has a double-layer keycap. But its keycap is tighter than that of Model M, and it is not easy to pull out. The upper keycaps of the Model M can basically be broken off with bare hands, while the Fujitsu peerless has to rely on a cap puller. According to my personal experience, using a cap puller like the one pictured above is easier to insert into the keycap because of its thinner outer wall.

It is easier to pull the cap puller stuck at the upper and lower ends of the button than at the left and right ends. First, put the cap puller in a position a little to the left, pull it out, and pull out the left side of the keycap, then move the cap puller to a position a little to the right, and pull out the right side, so that the entire keycap is completely Pulled out.
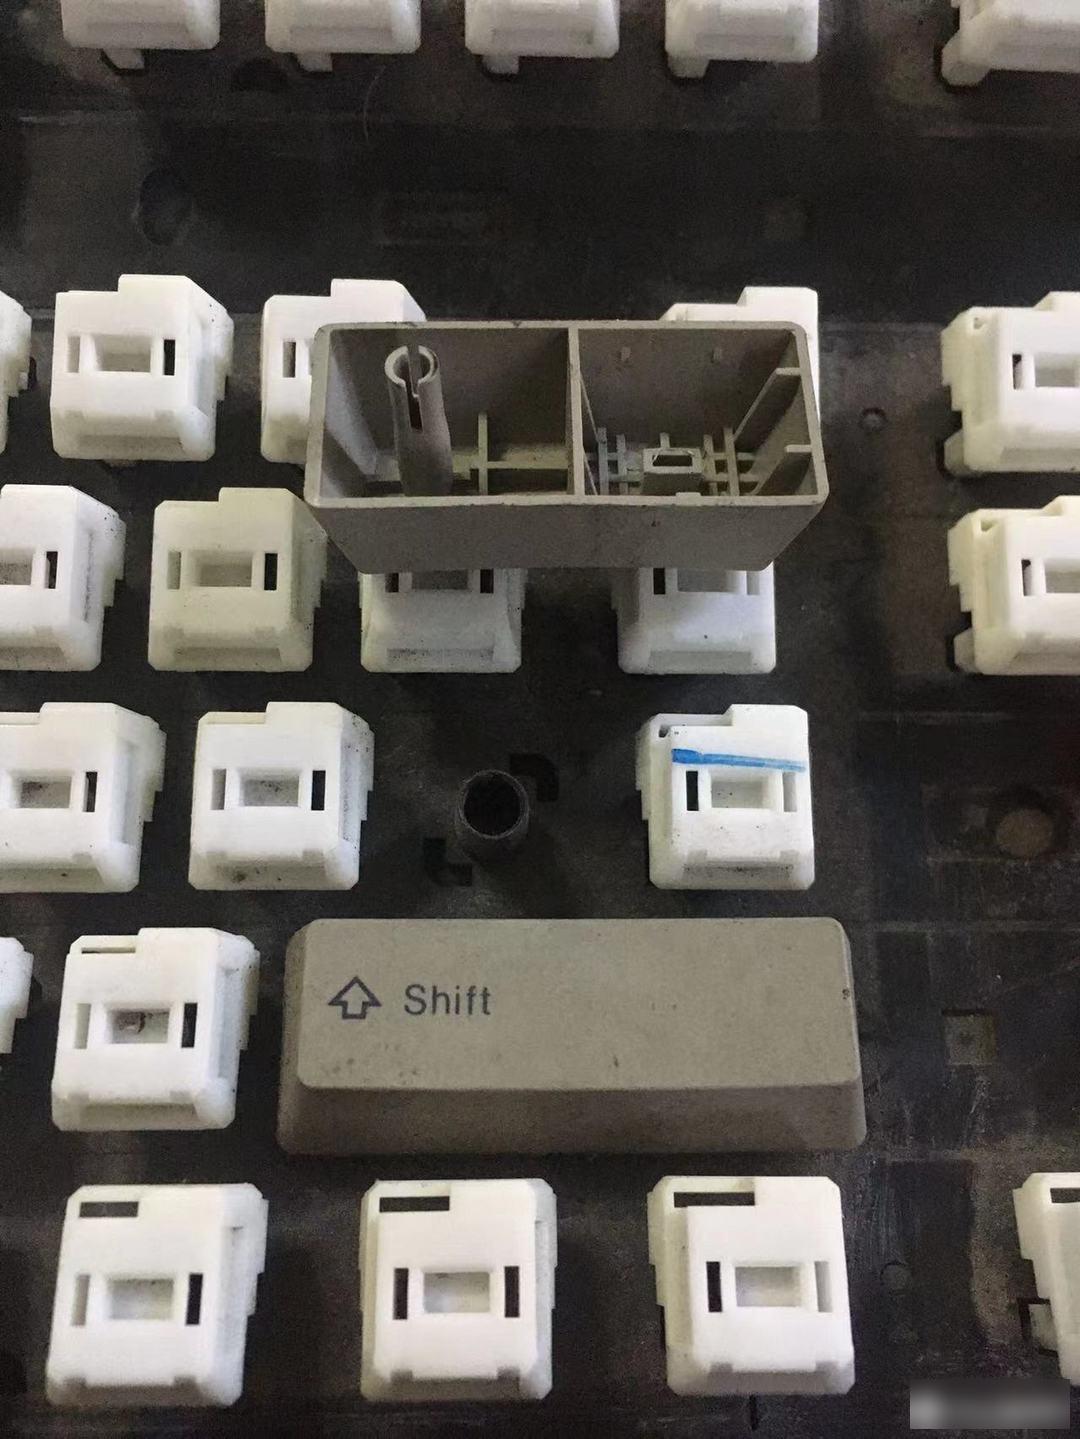
Its big key is buckled on the bottom keycap on one side, and inserted into the next cylinder through a round rod on the other side.
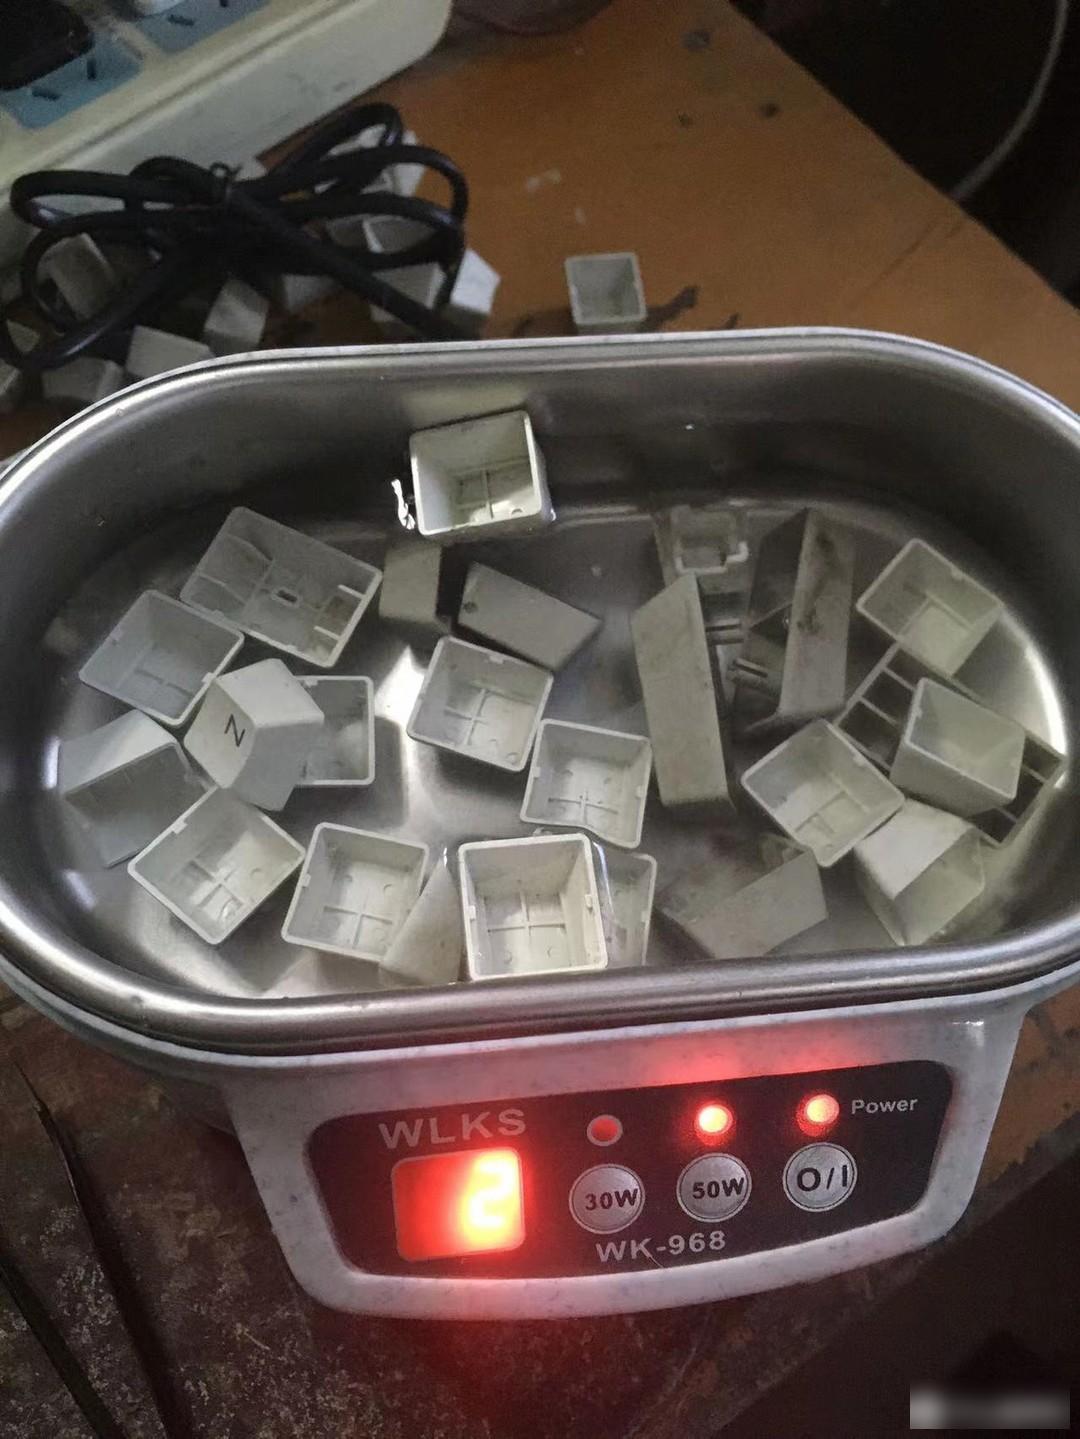
The keycaps that were pulled out were really dirty. Take a bath with the advanced ultrasonic cleaning machine.
Under the action of ultrasonic waves, a large amount of dust immediately muddied the water.
The keycaps on the bottom layer are stuck on the top of the casing board through buckles, and it is difficult to pull them out if they are hard to pull out. You need to use other tools to pry the buckles. But because there are both left and right sides of the buckle, if you pry the left side open, the left side will slide back if you are not careful when you get the right side. Since it is too difficult to handle, let's first disassemble the steel plate on the back to see if it is better to remove it from the back of the box board.
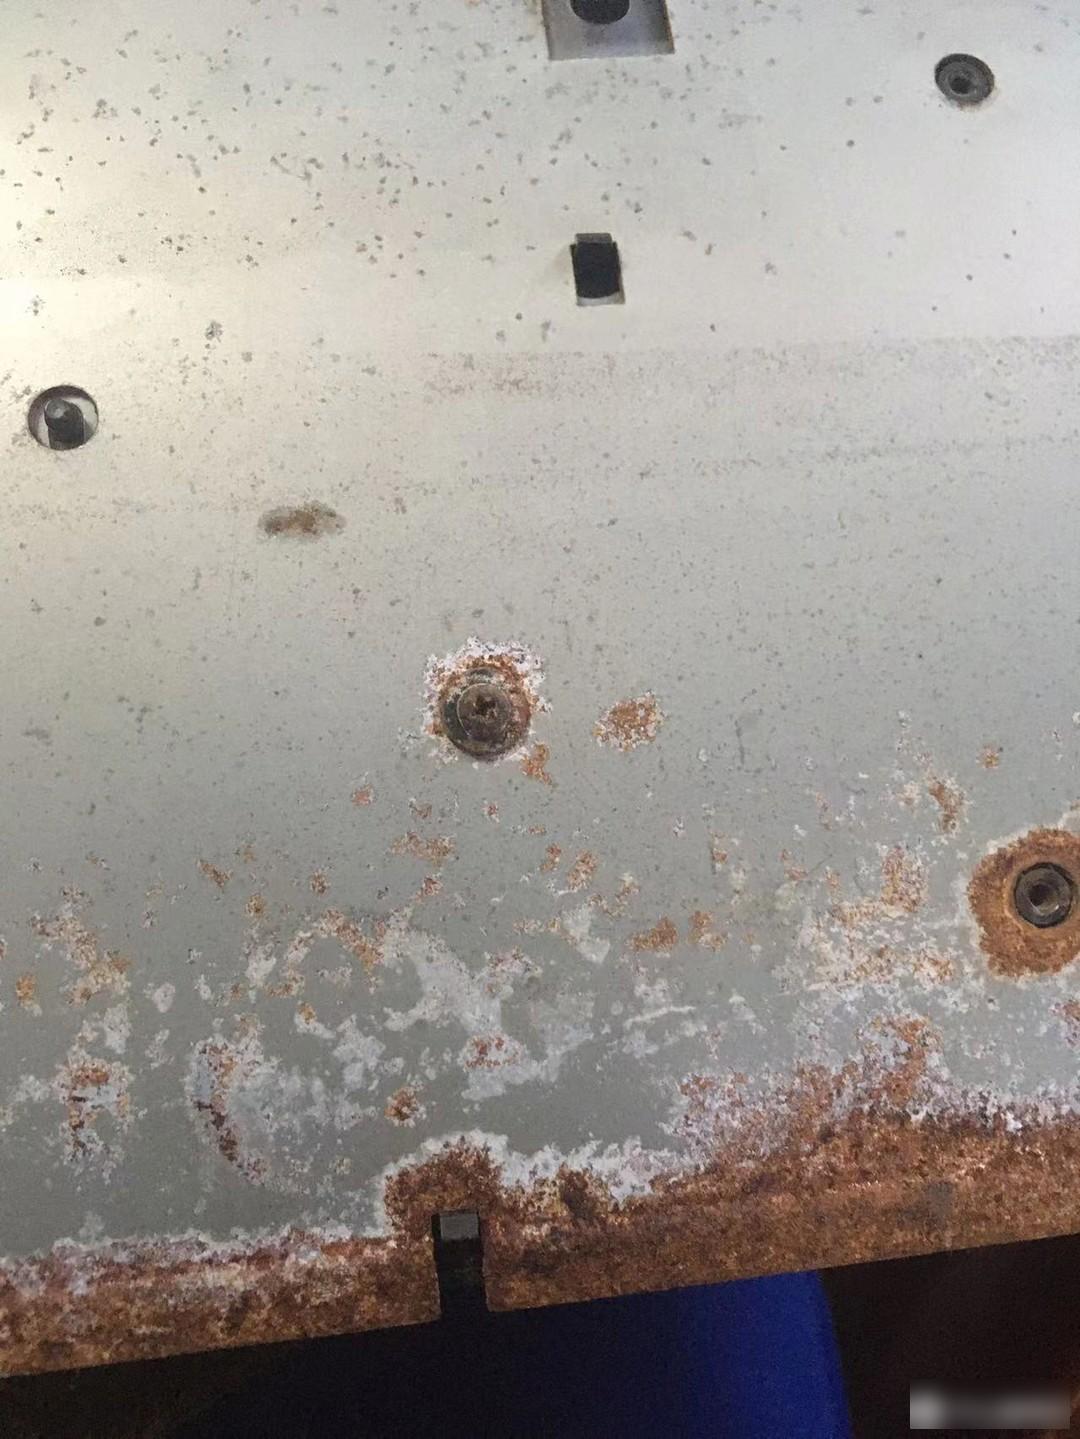
Unlike Model M, Fujitsu's steel plate and casing are fixed by screws and buckles and are detachable. However, there is a huge problem here, that is, due to the rust of the screws, several of them have slipped. In the end, I had to use an electric grinder to re-carve slots on a few rusty screws, and then unscrew them with a flat-head screwdriver. It took a full night to remove these rusty screws.

Remove the steel plate, and there are two layers of thin film circuits underneath. It can be seen that the rust stains on the steel plate have also corroded to the film.
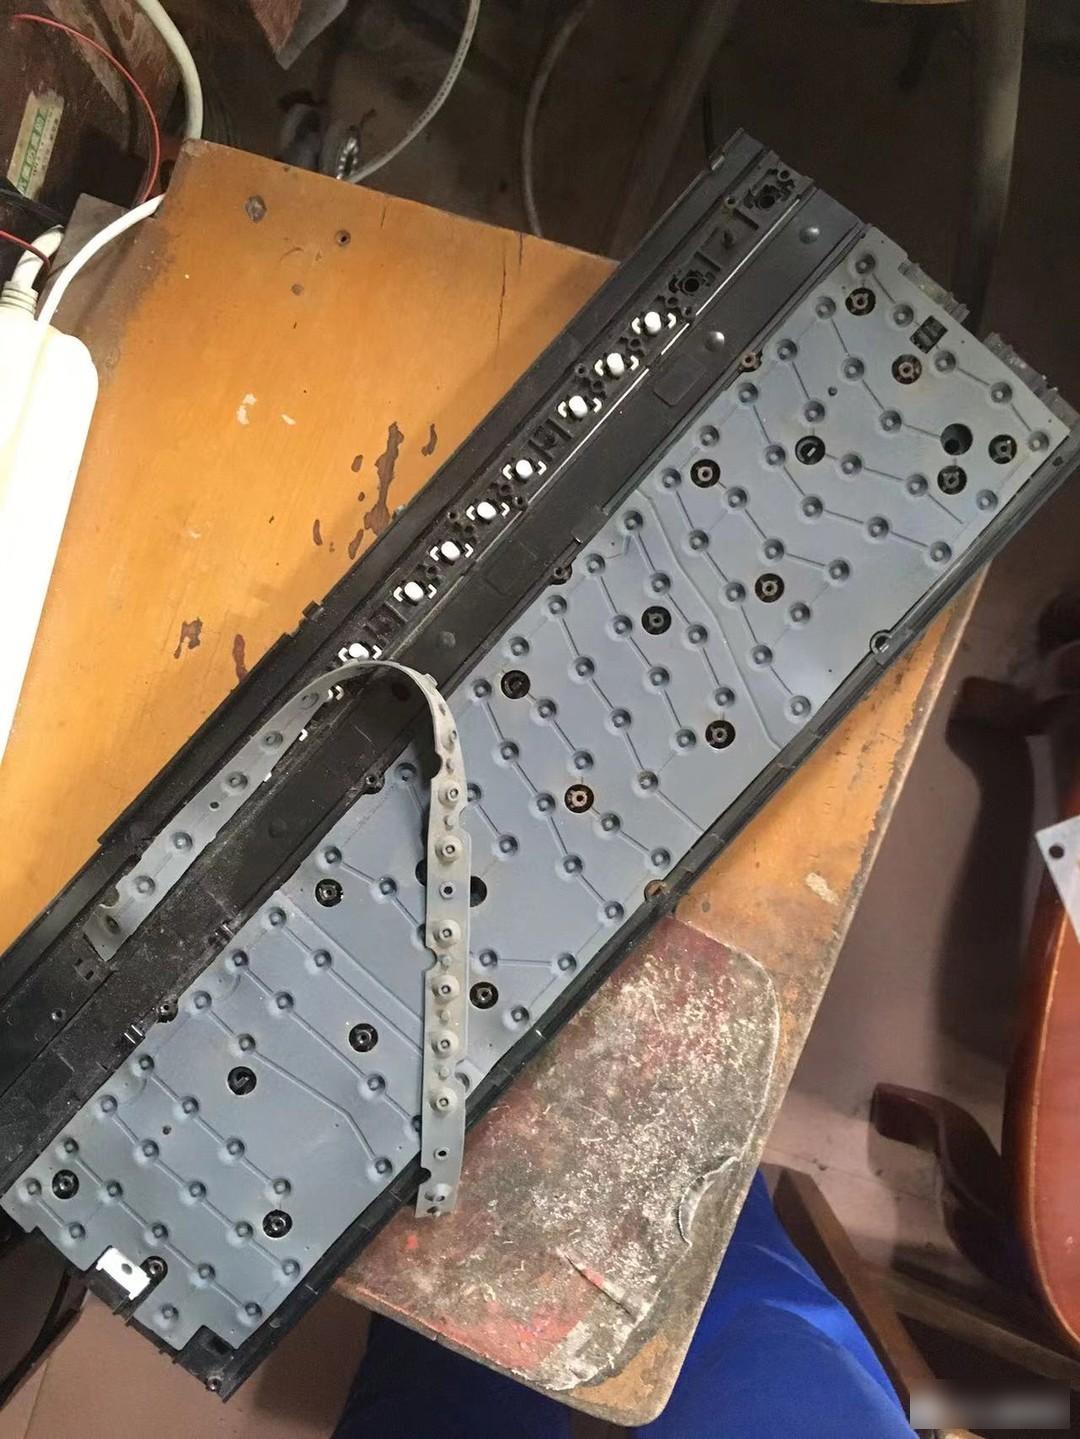
Remove the film, and you can see the bobbin board and the rubber bowl layer.
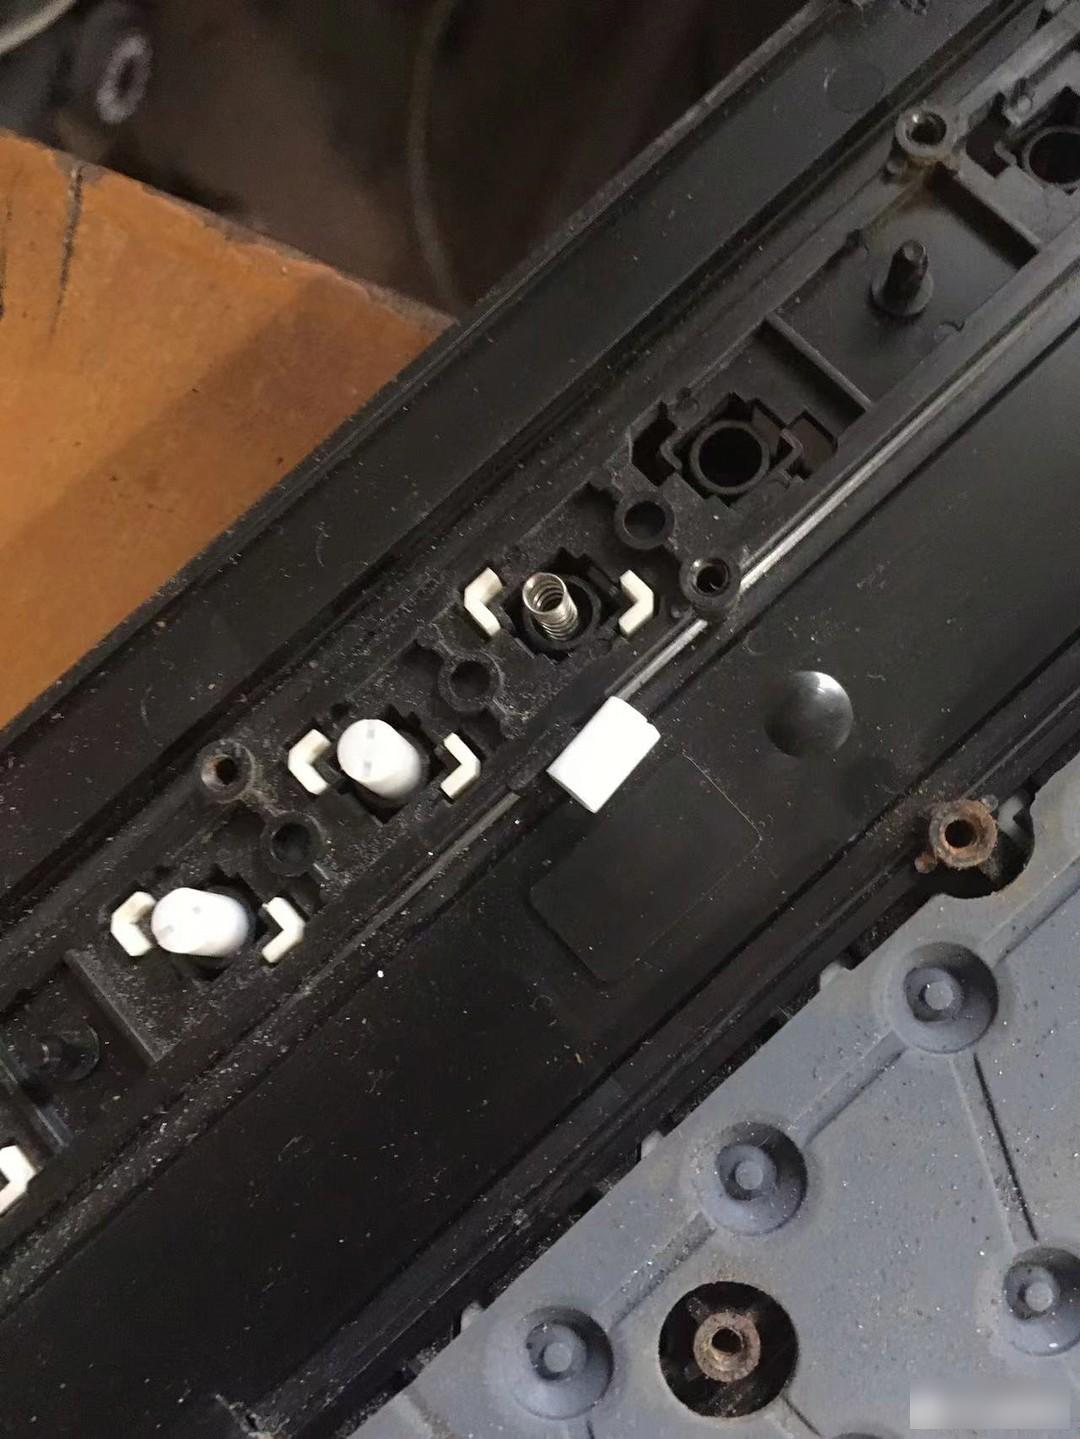
Under each lower keycap, there is a short spring. There is also a section of white tube under the spring, which is used to press down the rubber bowl, so that the two layers of film are in contact to complete the triggering of the button.
The key structure taken from the front, upper keycap--lower keycap--spring--white tube
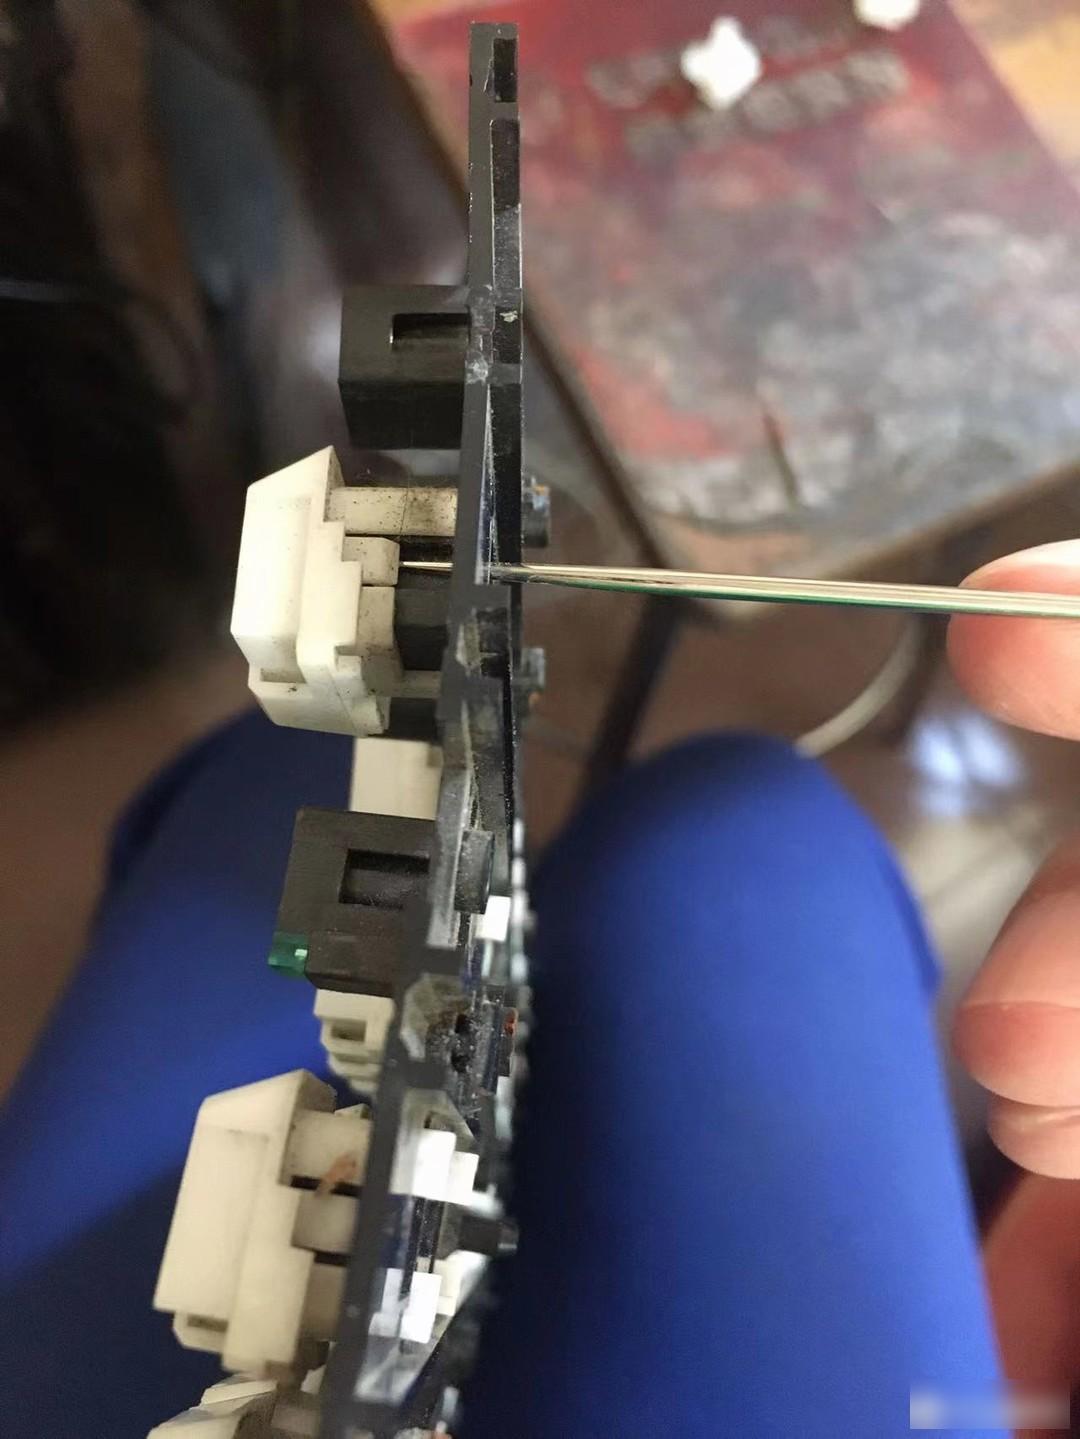
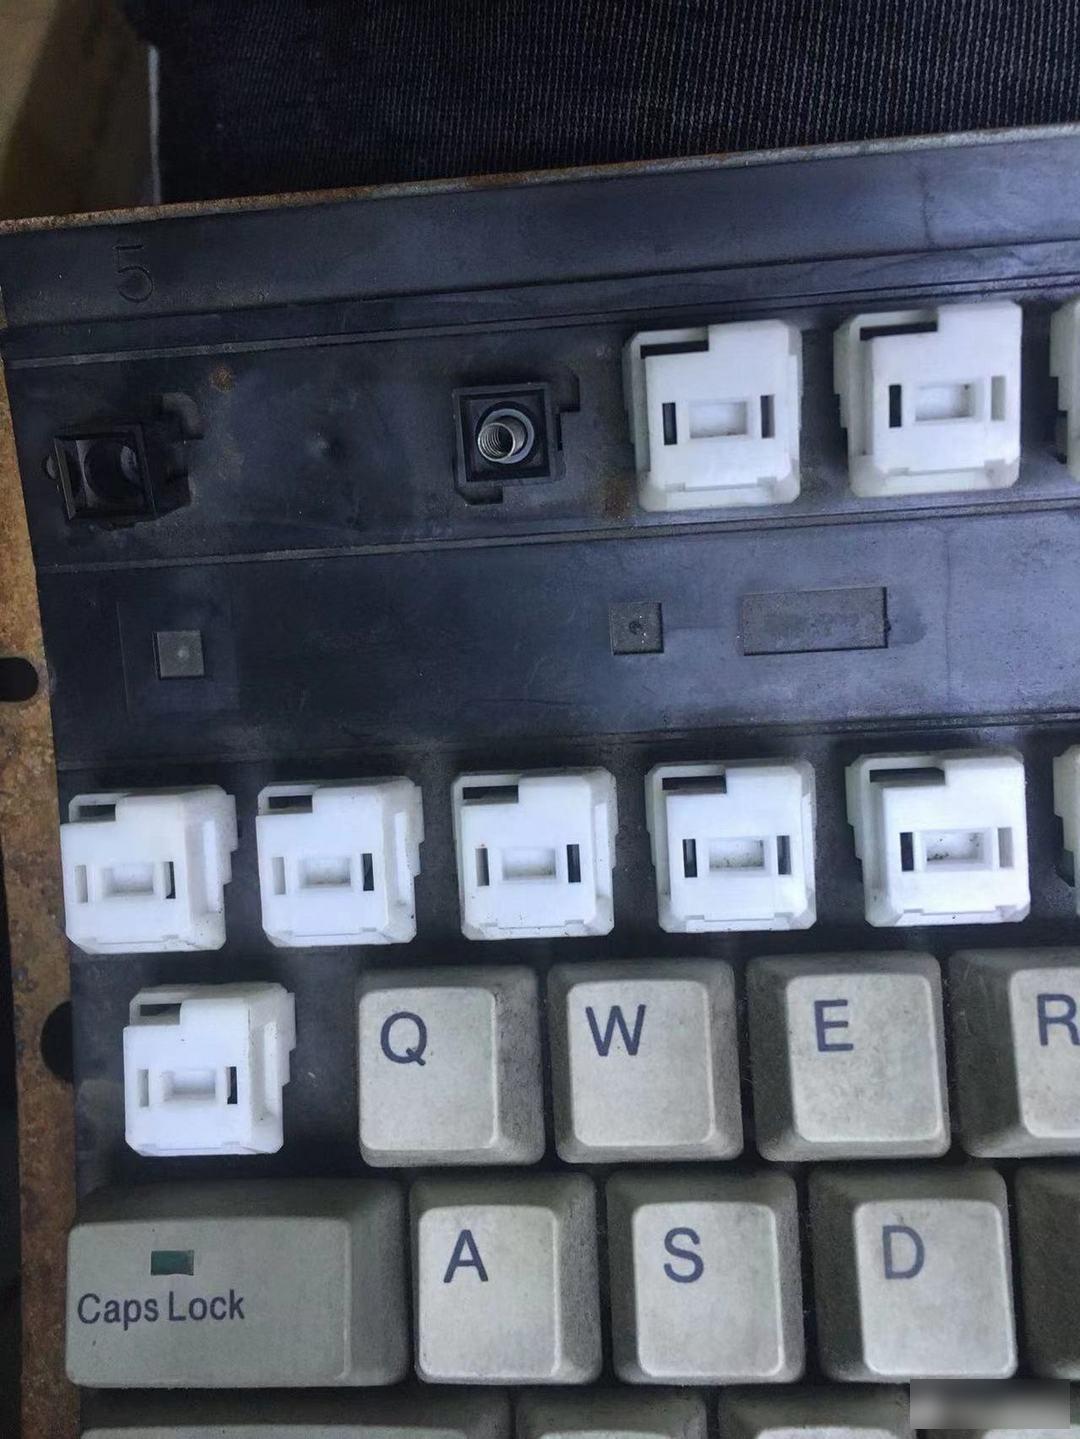
After completely removing the plastic bowl, spring and other accessories, I studied it and found that it is easier to pry the lower keycap with a long and thin hard object extending from the back of the tube board. When prying, pull the keycap up with one hand to prevent the snapped buckle from sliding back, and then quickly pry the buckle on the other side.
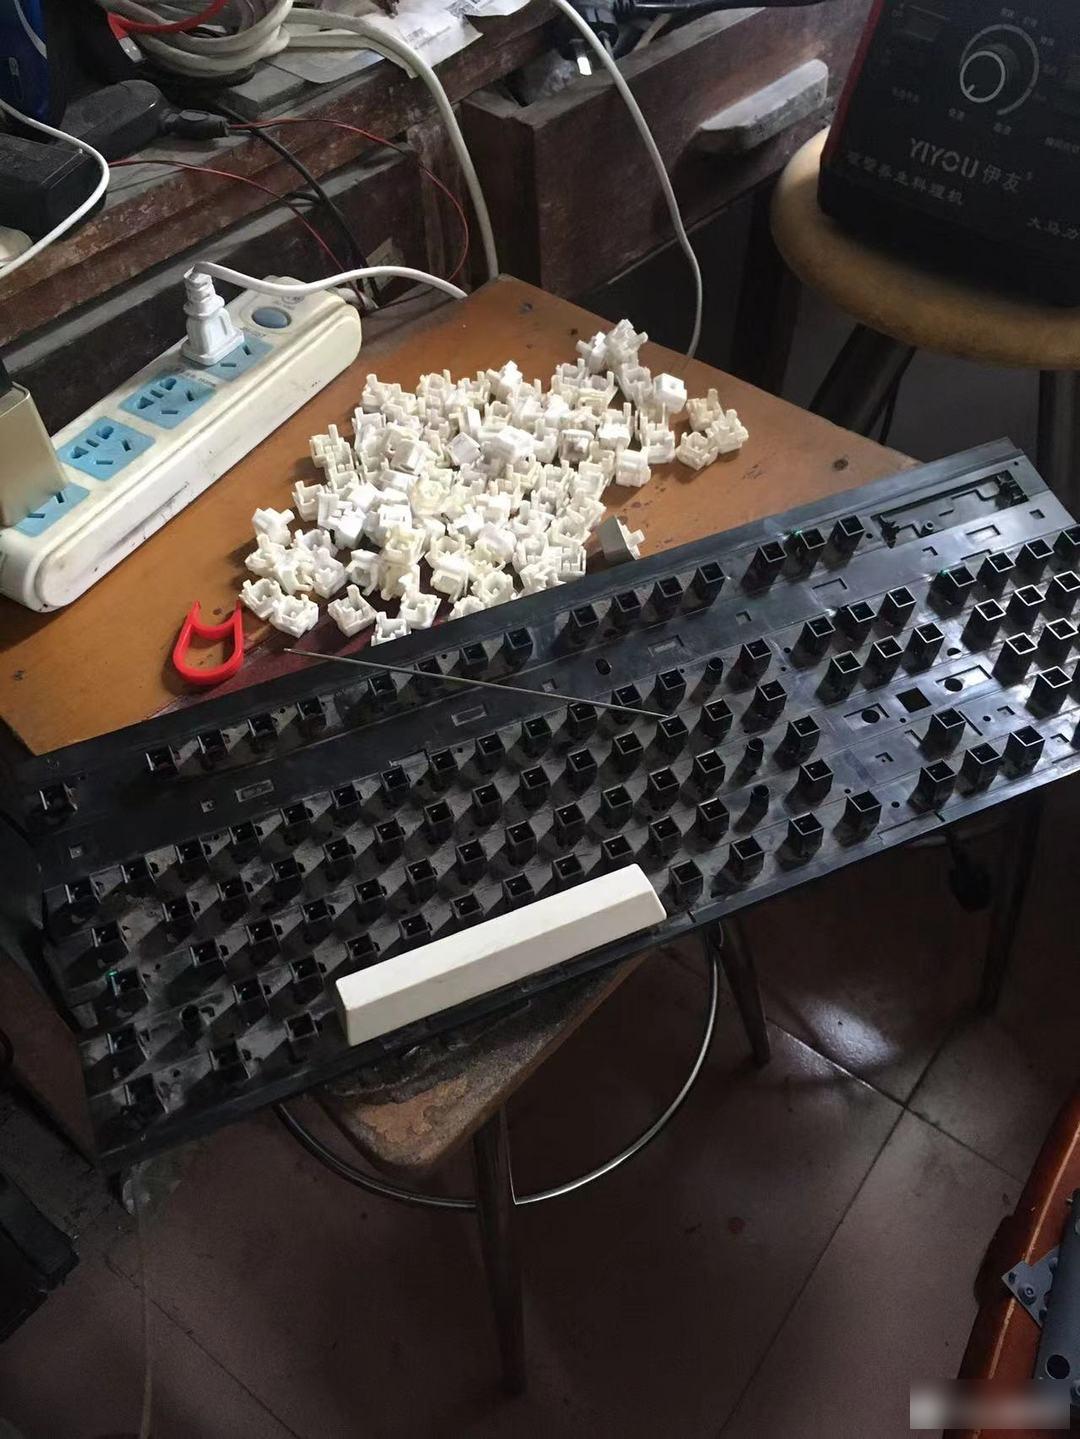
It took another two hours to pull out all the lower keycaps except the space. There is a balance bar on the blank, and the balance bar is stuck on the top of the tube board. I was afraid that the balance bar would be damaged when pulling out the keycap, so I didn't touch it. And the space bar itself is not too astringent, it is estimated that it can be washed with water.
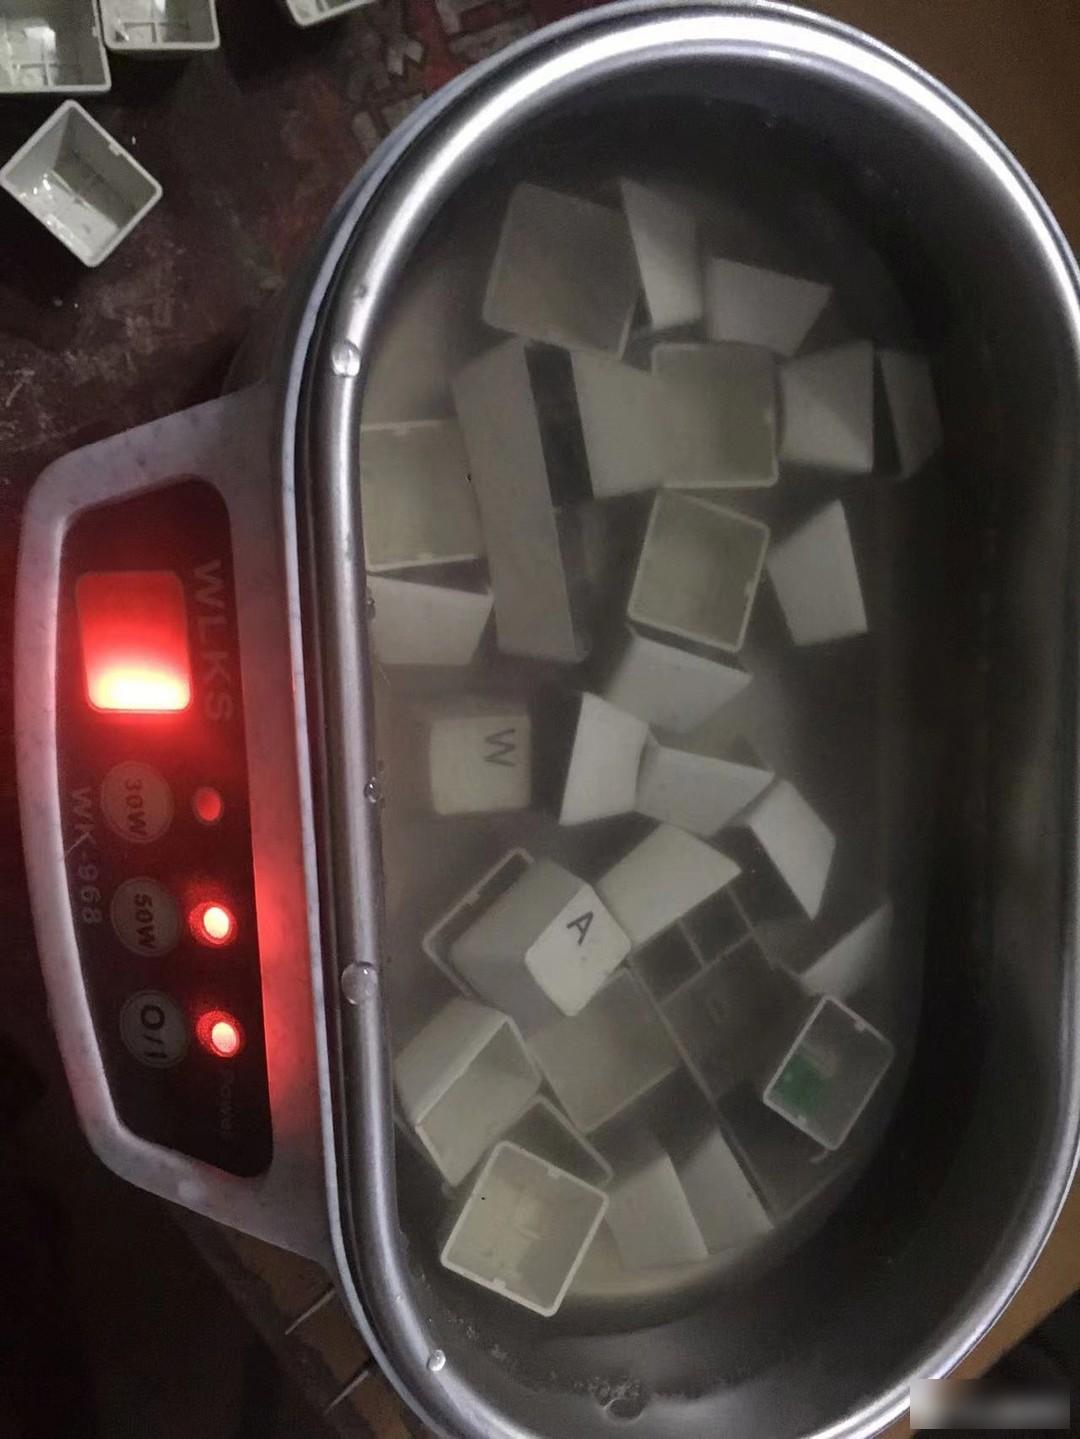
All keycaps are cleaned with an ultrasonic cleaner. Rinse the entire cheese board with a tap, and then brush it with a soft brush. The keyboard is cleaned and the keys are finally not jammed. Ready to try the keys. This keyboard has a PS2 interface and cannot be connected to a laptop. A PS2-to-USB converter is required. Before connecting to the converter, you need to determine the line sequence of the keyboard.
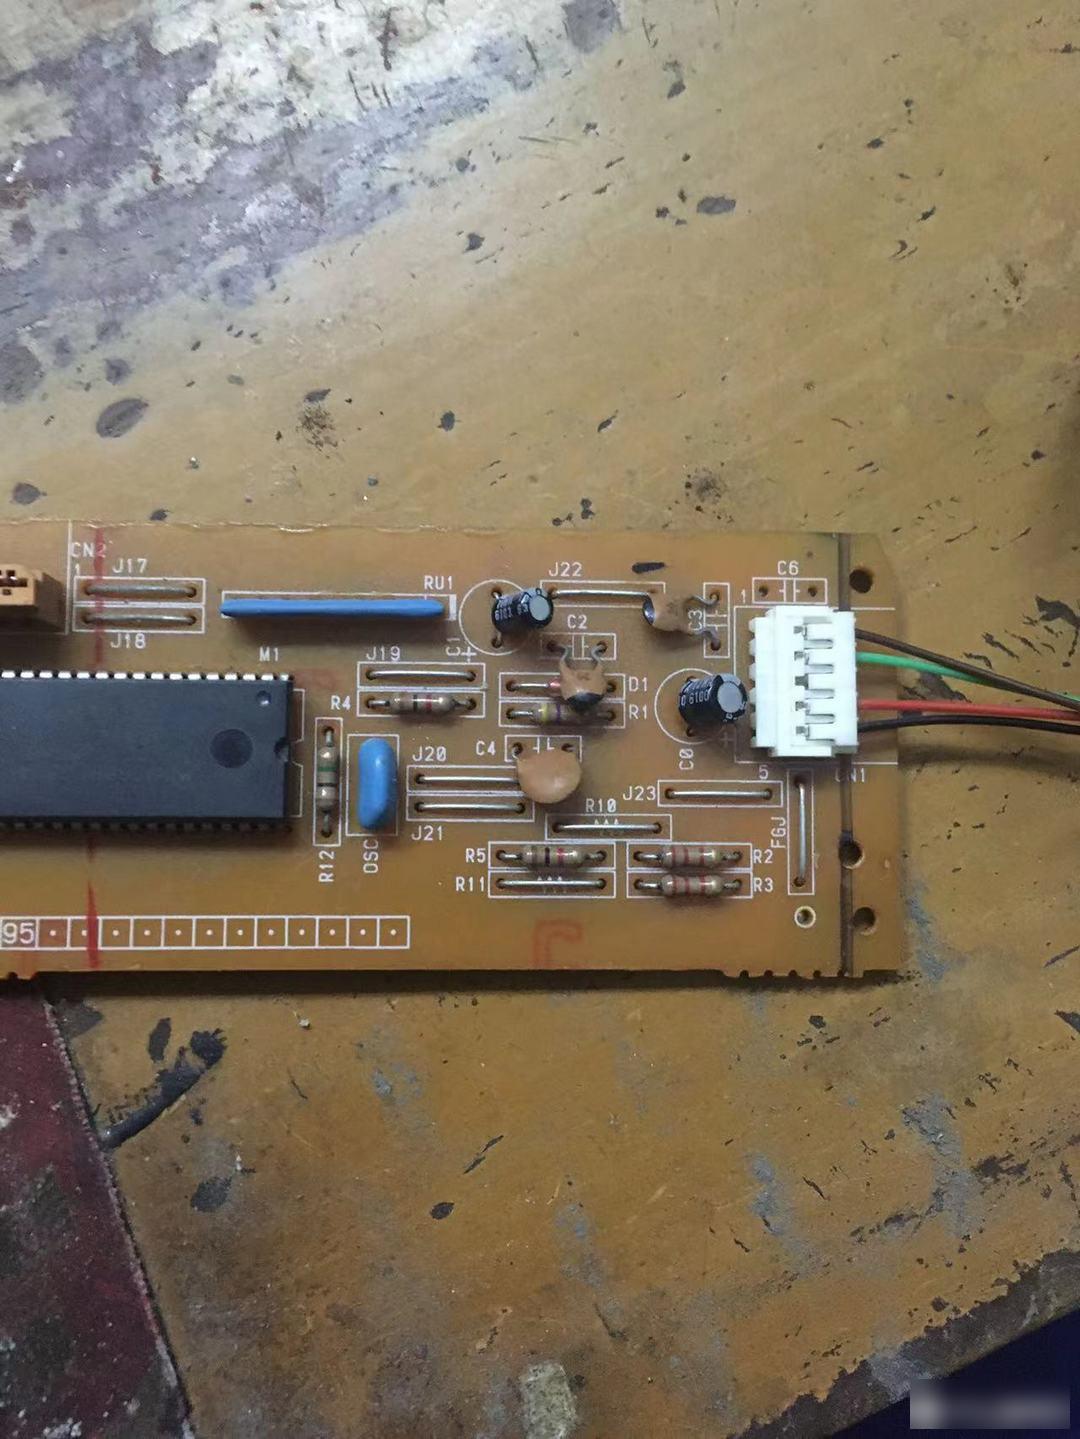
Here also share the method of determining the line sequence of the PS2 keyboard. The primary goal of determining the line sequence is to determine which is VCC and which is GND. The two poles of the power supply are confirmed, and the keyboard will not burn. It can be seen that there is an electrolytic capacitor next to the 5P keyboard cable socket. This large capacitor is usually directly connected to both ends of VCC and GND to stabilize the input voltage. Use the on-off gear of the multimeter to see which terminal on the 5P socket is connected to the positive and negative poles of the capacitor, and you can judge which is GND and which is VCC.
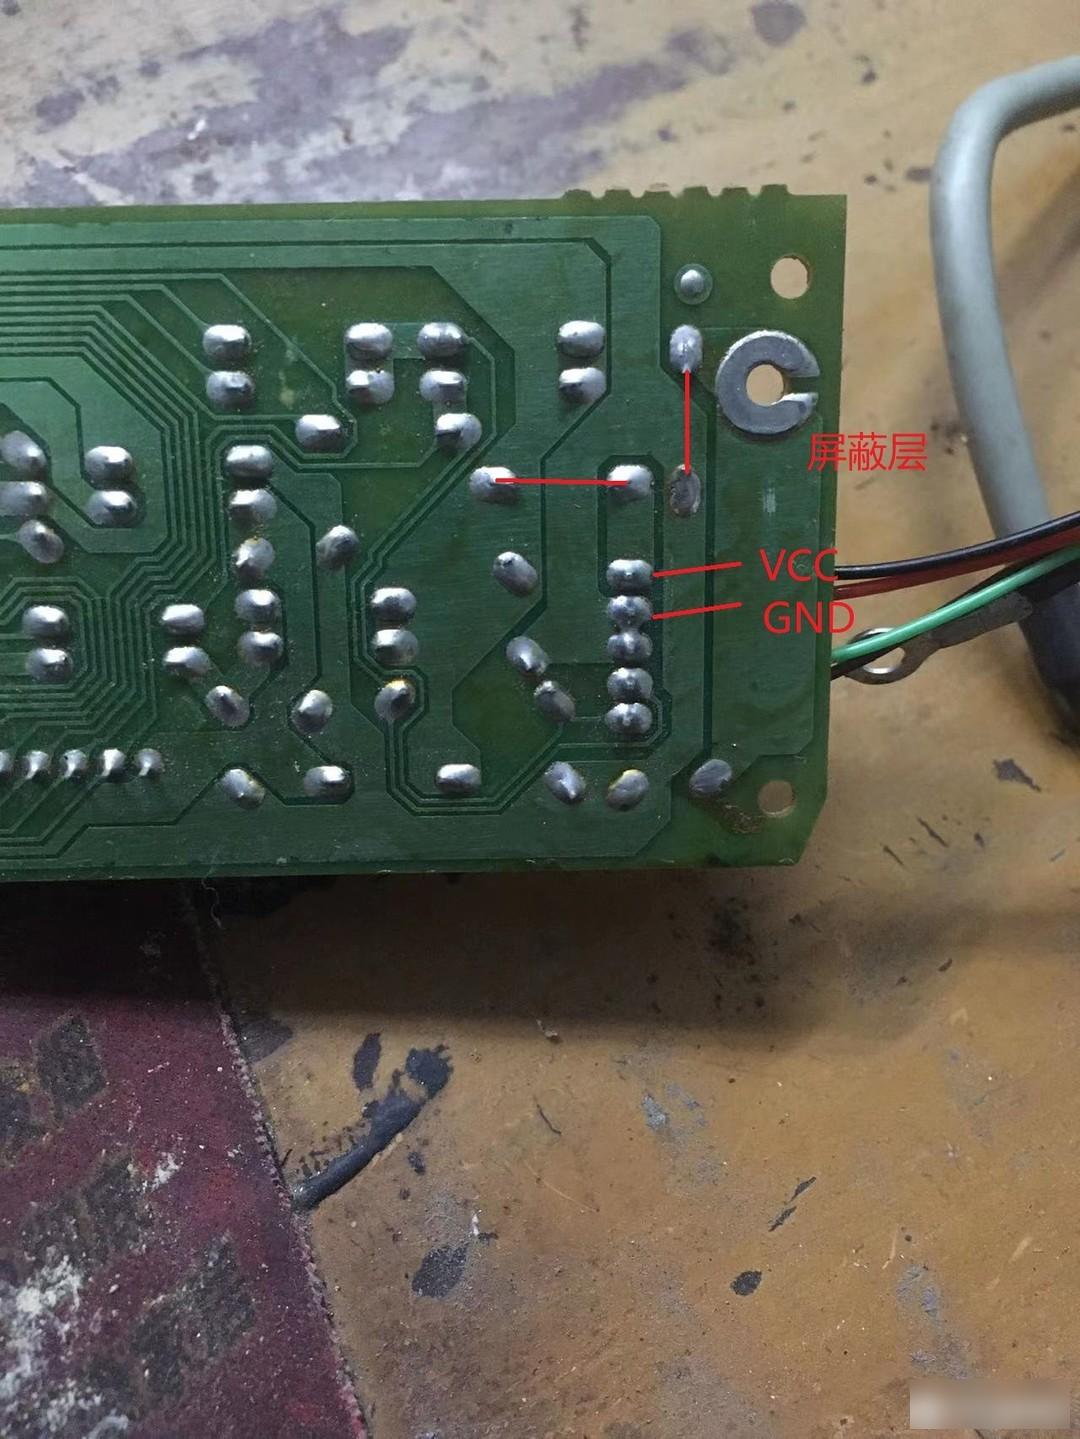
Even without a multimeter, the positive and negative poles of the power supply can be judged through the lines on the circuit board. It can be seen from the circuit board that there are two sets of lines that are particularly thick, and these two sets must be the positive and negative poles of the power supply. On the far right of the circuit board is a large metal ring (tinned copper?), which is used to conduct electricity with the steel plate on the back, and is a shielding layer. The shielding layer is connected to the left layer of wiring through the front wire, and finally connected to the second and third pins of the socket. It can be judged that the second and third pins are both GND. And the first pin is connected to another very thick line through the front wire, which must be the positive pole of the power supply.

After confirming VCC and GND, CLOCK and DATA will depend on it. If you are not right, reverse CLOCK and DATA. The final line sequence tested is black VCC, red GND, green DATA, and brown CLOCK. The bullshit chip in the picture above is a PS2-to-USB conversion chip, which was removed from the PS2-to-USB converter on Taobao.
Although the wiring sequence of the keyboard was successfully tested, the old keyboard was overturned. Connected to the computer test, it was found that more than half of the buttons were not triggered. Due to long-term moisture corrosion, there are disconnections in many places on the thin film circuit. The most terrible thing is that the wires on the film are covered by a green protective film. If you want to repair it with conductive silver paste, you must first remove the green protective film. There is no way to remove the protective film except for sanding. It is too difficult to use sandpaper to just wear off the protective layer without damaging the underlying circuit.
As far as my personal experience is concerned, I feel that the playability of Fujitsu FKB-4725 is far worse than that of IBM Model M. First of all, Fujitsu's ability to resist dust is far worse than that of Model M, and it is much more difficult for Fujitsu to disassemble the keycap for cleaning than Model M. Even if Fujitsu is in a normal state, its input experience is far inferior to that of the Model M squat spring. Its input feeling is probably on the basis of ordinary membranes. Due to the addition of springs, the keys are more handy when they rebound. I think its input experience is not as comfortable as the large paragraph feeling of a high-quality plastic bowl membrane keyboard.
Factory Adress: No.11,FengpingRoad