Customization 105——Hands-on implementation of ideas (lightspeed, wired, wireless charging, dry battery emergency, weather clock, knob volume)
In January, I posted a post about repairing the small yellow croaker G613, and changed the cross axis. The lightspeed office is really cool. But there are also obvious slots:
1. The G key on the left is in the underworld, and it is often touched by mistake. Currently, the shaft is not installed, and it is plugged with a plug.
2. The palm rest is not detachable and takes up a lot of space.
3. The cavity sound and steel wire sound are obvious, especially the big key, the space is 5.75U, and the steel wire does not have to be replaced.
So I wanted to transplant the lightspeed to the 104 or 108 series. I happened to see the video of me called the leader of the beggar gang at station B, and I started to "add ingredients", so I got the current 105 (104+knob).
I don't know how to draw blueprints, so I can only assemble them with various superficial experiences.
Arrangement 104-108 (Majia or Xiaohuangyu look for one with PCB), PC positioning board, P cotton and so on. Skip
Change the volume control to a knob (actually useless, usually use a power amplifier)
Master porting lightspeed
Add a small oled screen to check the time (actually, in order to install X, there is a Xun M1 detector for checking the time)
Optimized esp8266 code
Change to jog trigger, reference: Nemo_ssc bilibili UID:12772522
ESP8266 uses WeChat Anxin applet or esptouch to configure the network, and the configuration will not be lost after power failure (the codes of all the big guys are written to death wifi, and the SSIDs on both sides of the office and home are different)
With the addition of wireless charging, the leader’s Corsair is powered by separate keys and wires. It is definitely not possible to plug in the wires every day with lightspeed.
Power supply scheme, lithium battery 2500mAh*2, dry battery. The sent W210 shell and dry battery compartment should also be used.
Painted industrial gray, with minimalist white keycaps, ash wood switch V2, cheap artifact (mainly poor, G silver Pro used up)
8266 plus touch switch, start when wireless charging is enabled, touch switch when wired charging or battery powered.
Transplant the main control first, be careful not to solder, and test it before powering on. The patch LED on the board can be repaired, and the battery holder is repaired and welded as needed to facilitate power supply. Try not to fly wires on the board, and first ensure that the dry battery can be used.
Spray painting tutorial reference station B: Two small cakes, novices will learn at once
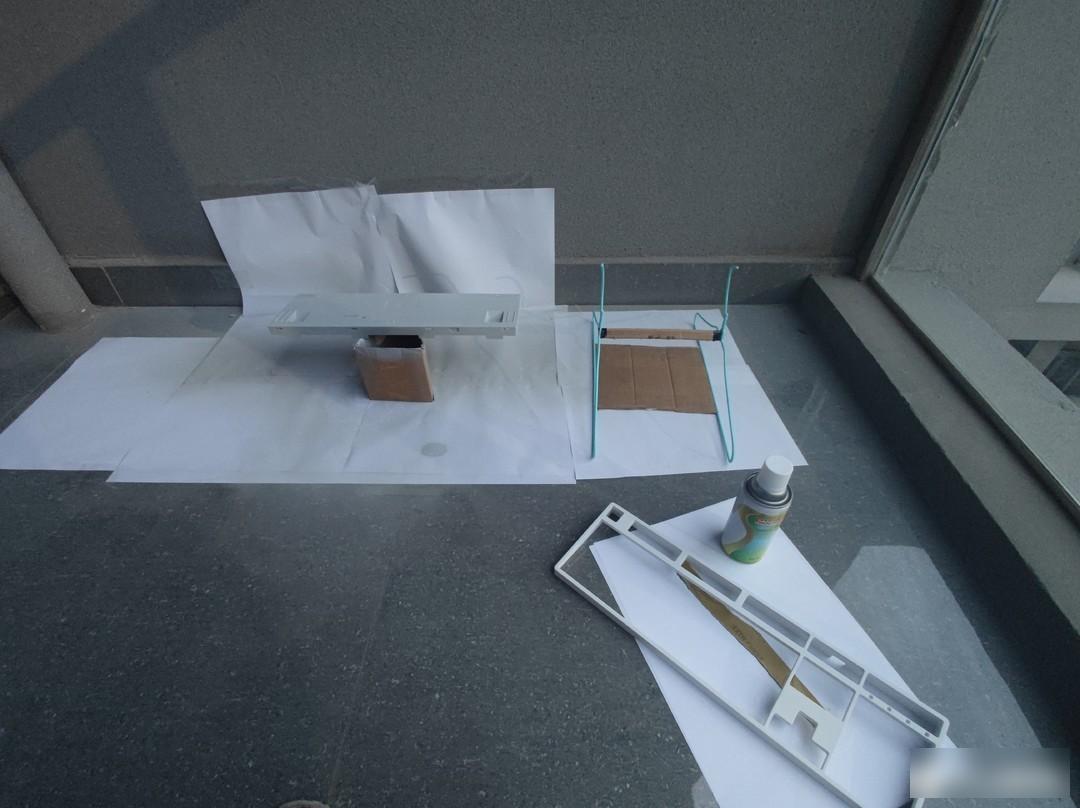 No clean environment
For lithium batteries, I have been using Sony 315586 (2500mAh), two in parallel, one of which removes the protective board and then connects, the capacity is proportional to the volume.
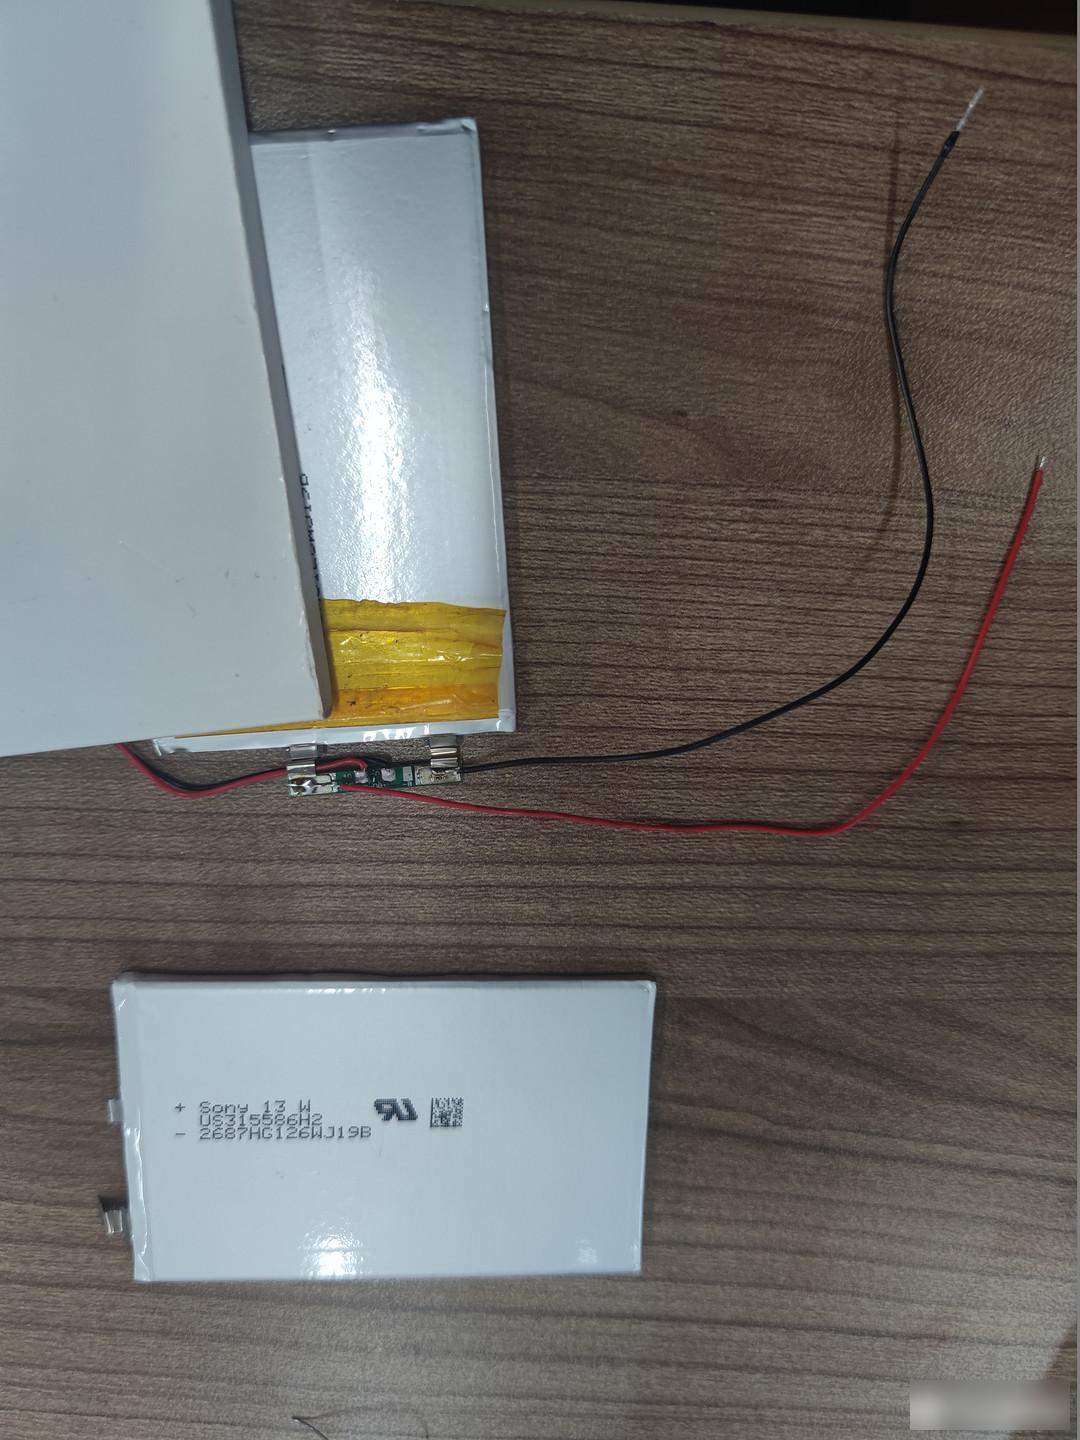 2500mAh*2
The lithium battery is connected to the charging and discharging module, and a 5V input terminal is found on the module to connect to the 5V output of the wireless charging coil. A 1N5819 diode is connected to the positive pole to ensure the current direction (if there is a dry battery power supply, the positive pole of the dry battery is connected to a diode) to prevent plugging. Circulating current occurs when charging by wire or multi-battery power supply.
For the wireless charging transmitter module, I chose the 12V input coil, which can be within 17MM, and the receiving end is 5V1A. So far the power supply solution is solved.
 Wireless charging
The esp8266 D1 mini+oled code is at the end of the article, and the power supply is divided into two ways:
A 5V wireless charging coil comes out to connect to the 3.3V LDO module. The output current of the module must exceed 500mA, otherwise the 8266 will not start. In addition, the 8266 power supply should not be directly connected to 5V! Don't go directly to 5V! Don't go directly to 5V!
The battery seat repaired on the other PCB is powered by 3V, and the positive electrode uses a diode to prevent circulating current. I added a touch switch to control the on-off in order to save power.
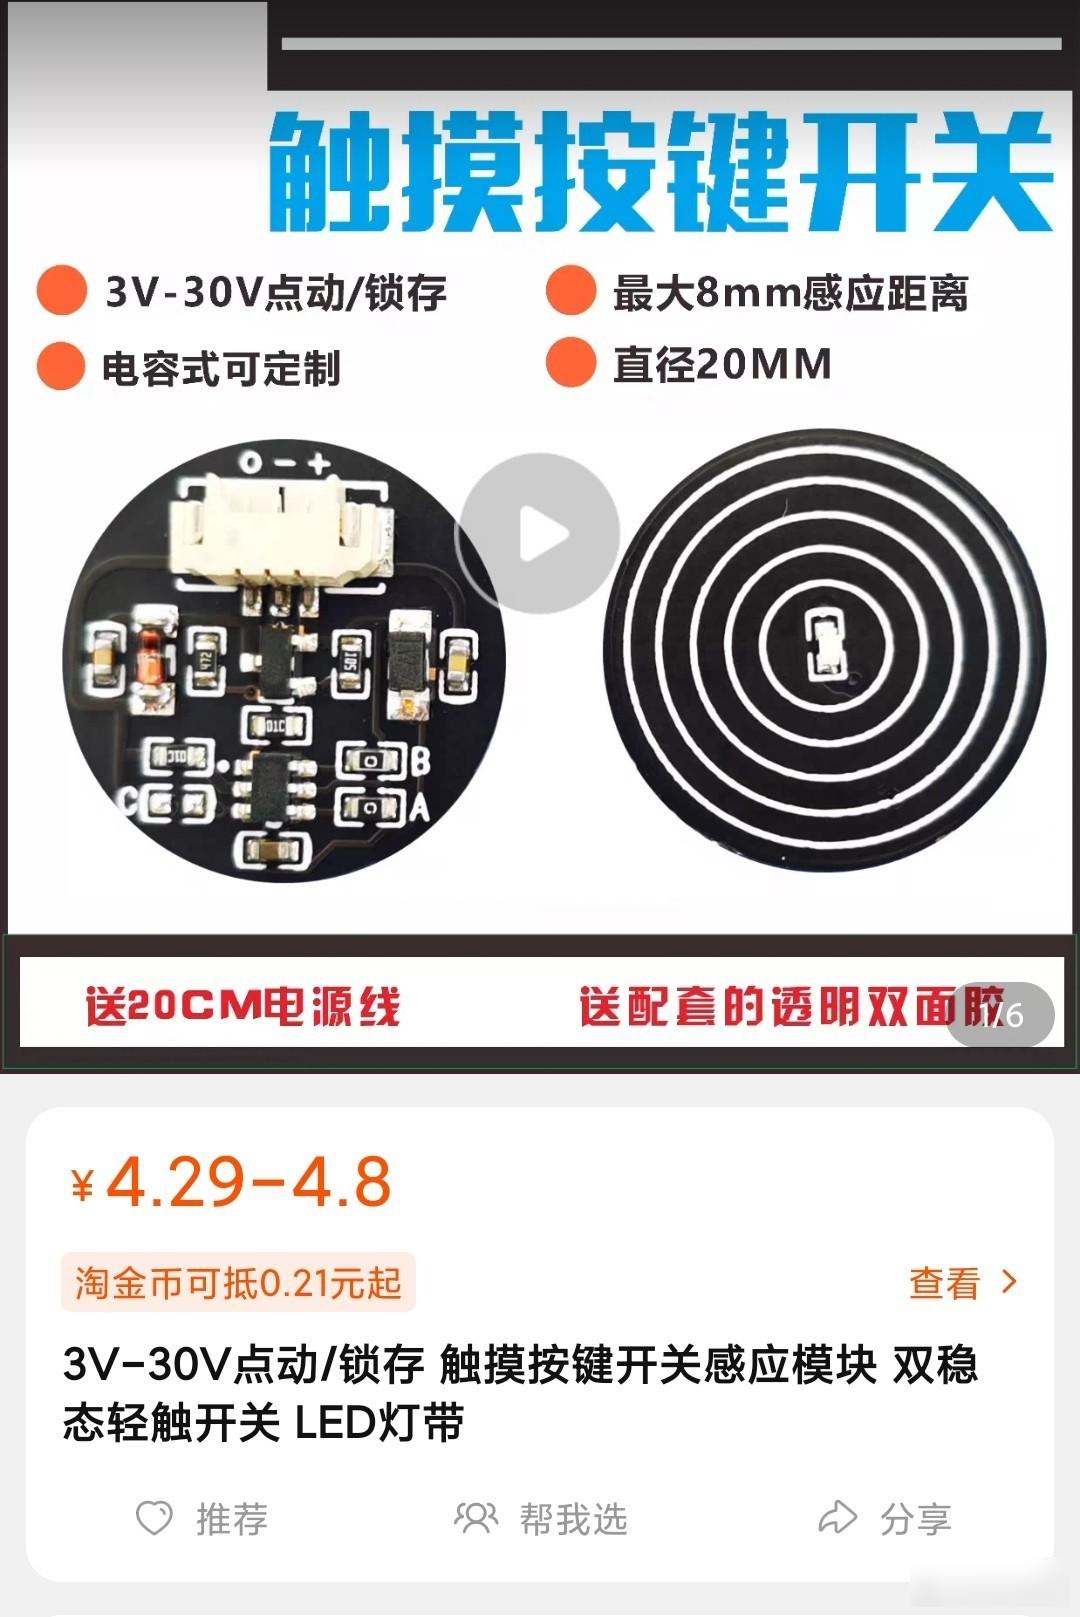 touch switch
Regarding jogging switching, refer to the video of Nemo_ssc at station B. The interrupt pin GPIO15 is D8, and at least one resistor above 10K should be connected in series. At the output end of the yellow line, no matter what kind of power supply is used, the 3.3V of the 8266 must be behind the negative terminal of the diode.
The last is the knob, which depends on individual needs. There is a mechanical keyboard button knob module on the small yellow croaker. When it is powered, the battery holder leads to a 3V, and then the corresponding pin flying wires, there are only four wires.
The last step is to put it in. The electronic components should be pasted with high-temperature tape, especially the coil, which will definitely heat up. It will be safer if the bottom cotton is placed
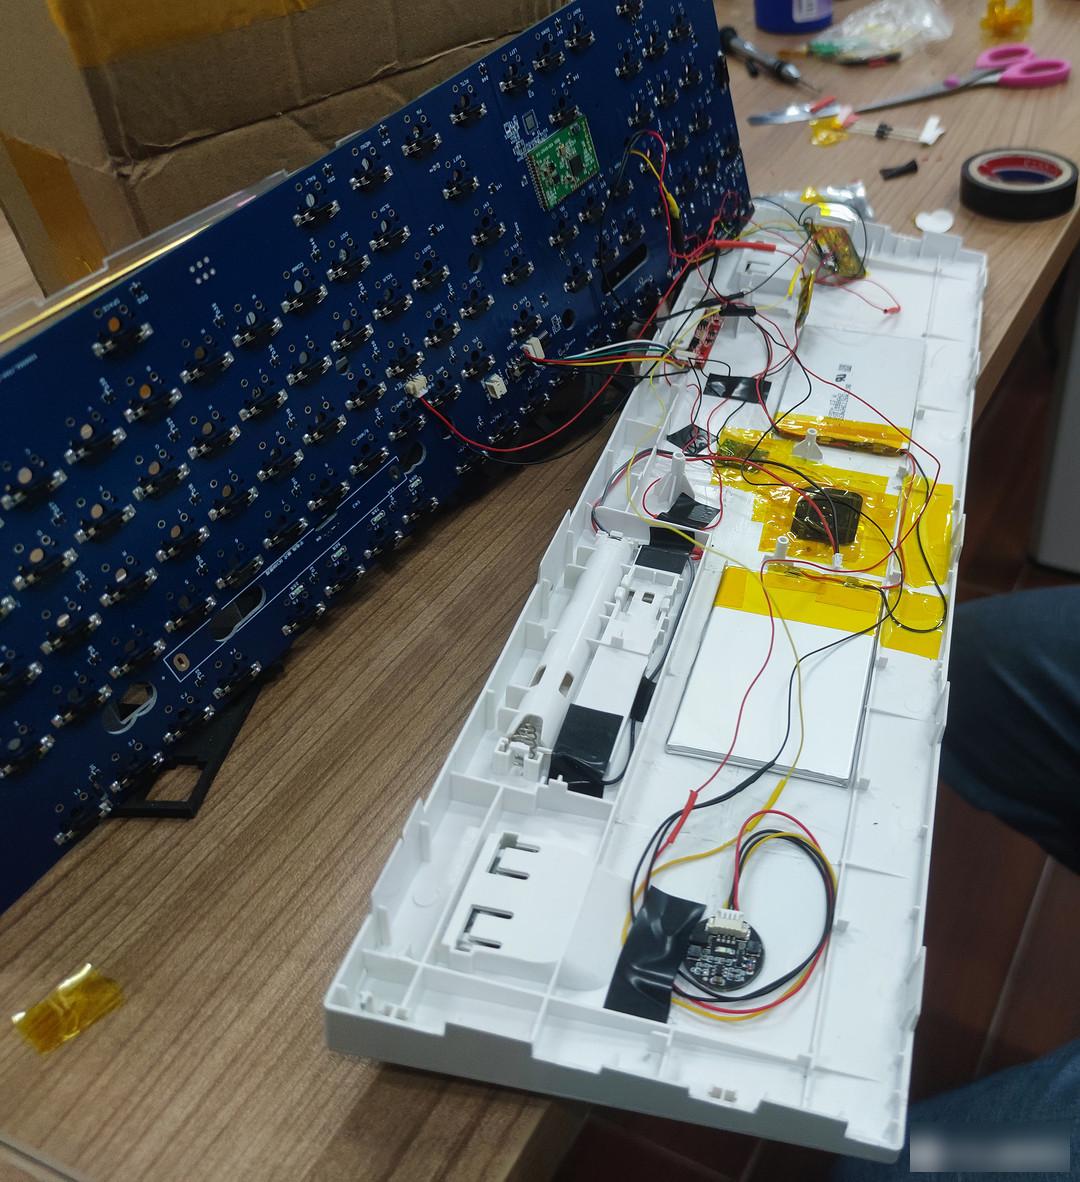 The function is normal, then reconnect the wire
Finally, cut a cover for the knob and the screen. If you don’t know CAD, you can only draw it by hand. Go to Ma’s house and find someone to cut it.
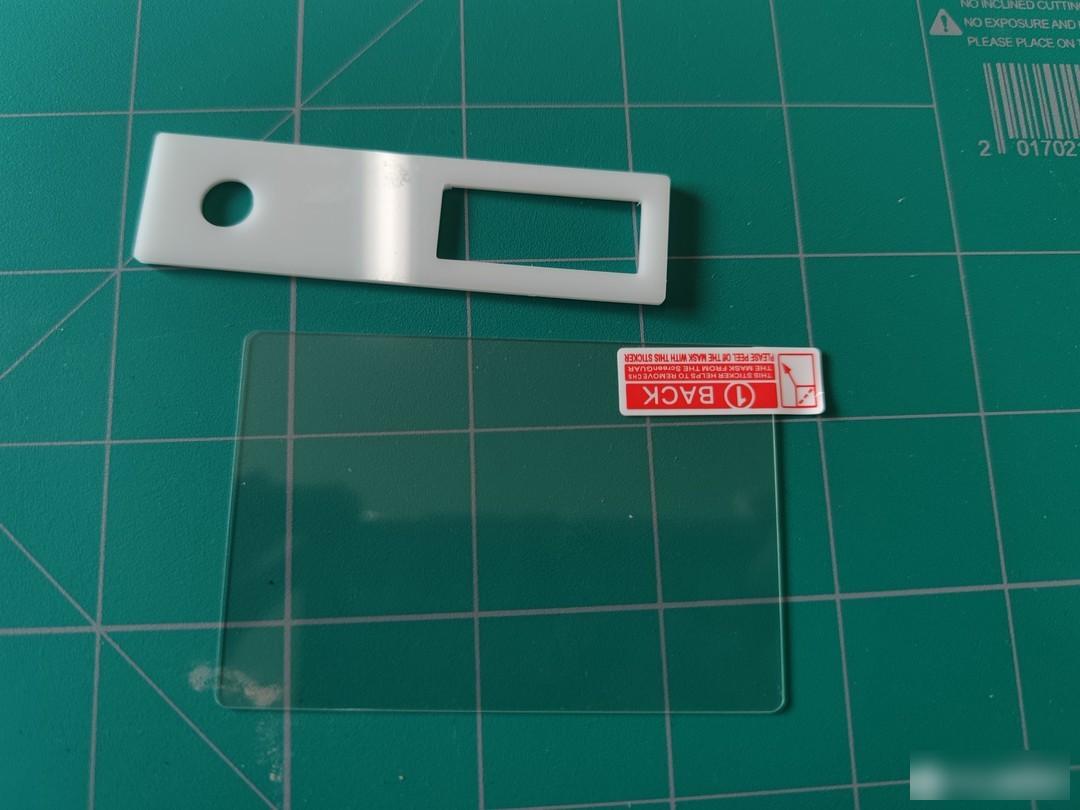 The POM material is also painted
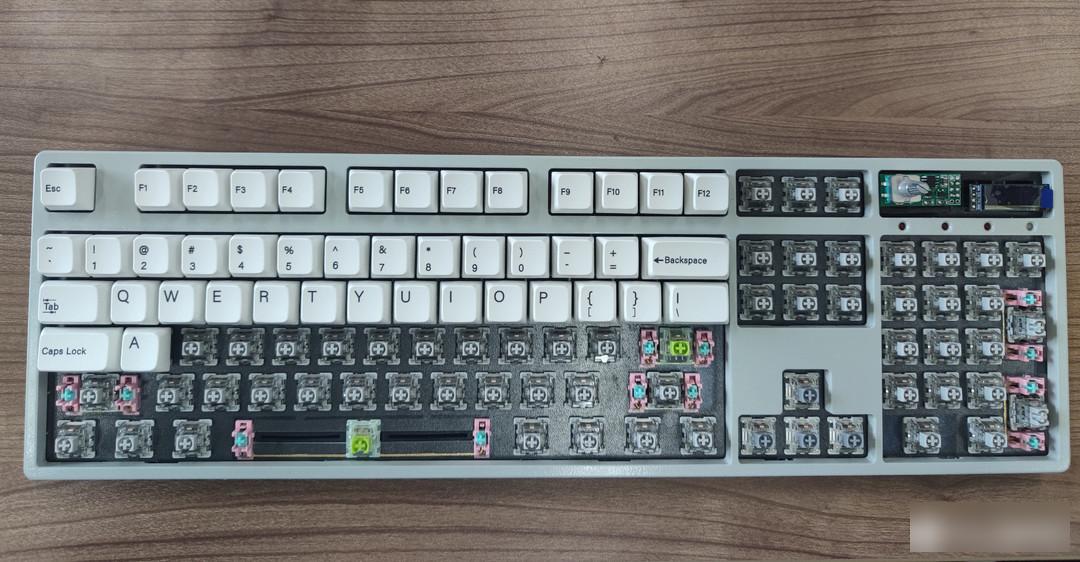 Four leftover second-generation G Silver Pros are placed on the arrow keys
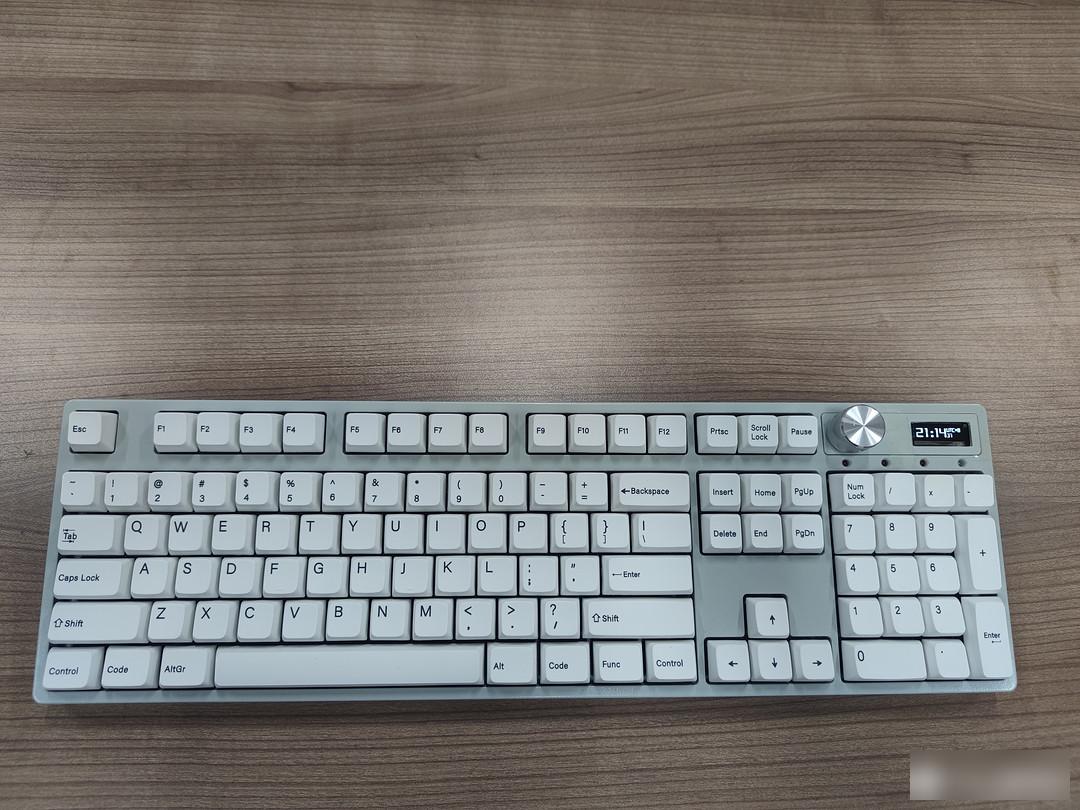 final completion
Lightspeed still has no obvious delay under the wifi connection of ESP8266 (Logitech masters the core technology).
Ash wood shaft V2 is really worth buying.
Let’s not talk about battery life, it’s top-notch.
The W210 shell obtained from local materials does not have a hole for separating the key wires, and you need to open the hole yourself. If you assemble it yourself, the conventional shell is the first choice.
Try not to take power from the flying wires on the PCB, and only need to plug and unplug the terminals when repairing the dry battery socket in the later stage of troubleshooting.
Pay special attention to the flow of current, 8266 must not use 5V directly!
https://gitee.com/sweetstzw/ESP8266 The ESP8266 code is not professionally learned in C language, so it can only be simply transplanted and optimized. Although the "feed the dog" code is added, it still triggers WDT sometimes, and the delay has been added to 1000. No, I hope you guys can give me some advice.
Factory Adress: No.11,FengpingRoad