Life is a toss - spend 70 to change IKBC C104 into K375s Union master control
The company is equipped with an unlimited number of membrane keyboards, but the feel is really touching
 , the domestic keyboard is very popular now, it seems that I want to buy Kezhi and use it in the company. My daughter-in-law reminded me that my IKBC C104 has been idle for two or three years at home. I wanted to use it directly. I happened to see an article about C87 being changed to Logitech Unified in the office. There are two Unified receivers in the office. Didn’t you fall asleep and meet the pillow? WOW also stopped serving (Blizzard can’t house)
 , I usually don’t need a liver for games, and I’m idle when I’m idle, so I started to study the keyboard transformation, thinking about building a wireless keyboard for myself
 。
。
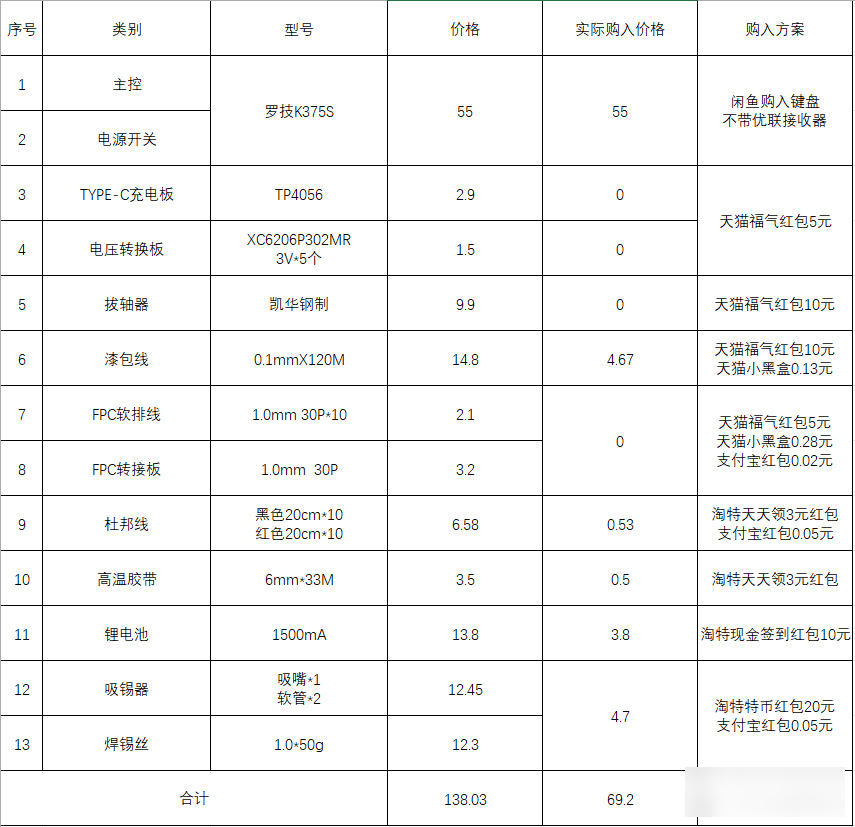
As a novice craftsman who only added lights to the keyboard, I don’t have any materials at home except electric soldering iron and lamp beads. As an extreme wool party, it is definitely impossible to buy finished PCBs directly, so I keep the wool in stock. All out, a total cost of 70 yuan.
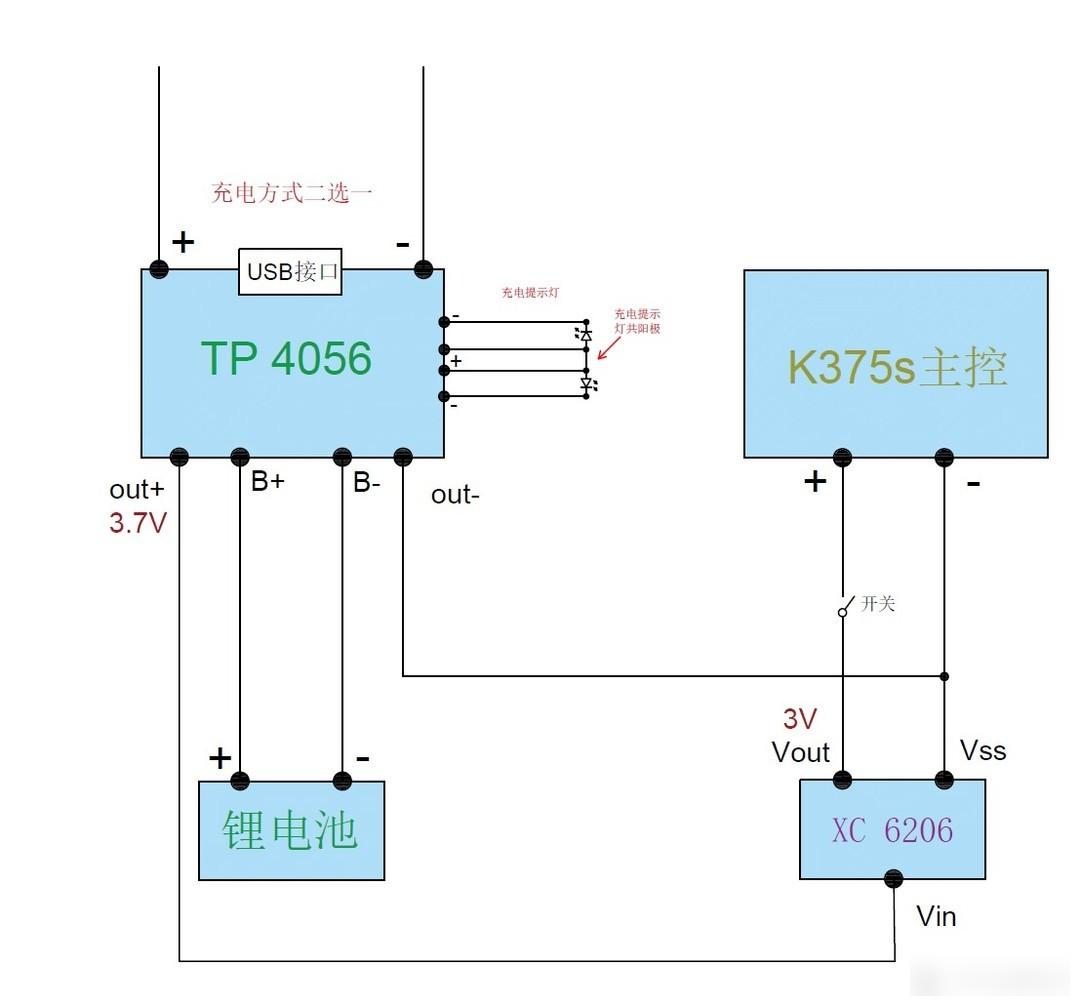
 (In actual use, I found that the K375s master control does support lithium battery power supply, so there is no need to use XC6206 to step down to 3V, and I feel that I am at a loss.)
The list of materials is as follows ↷
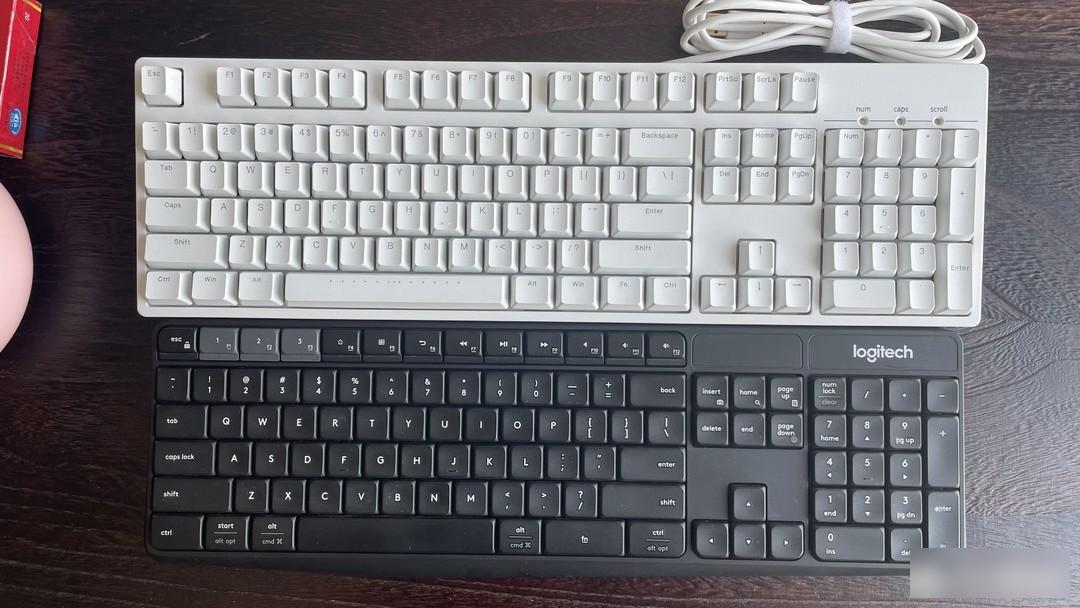
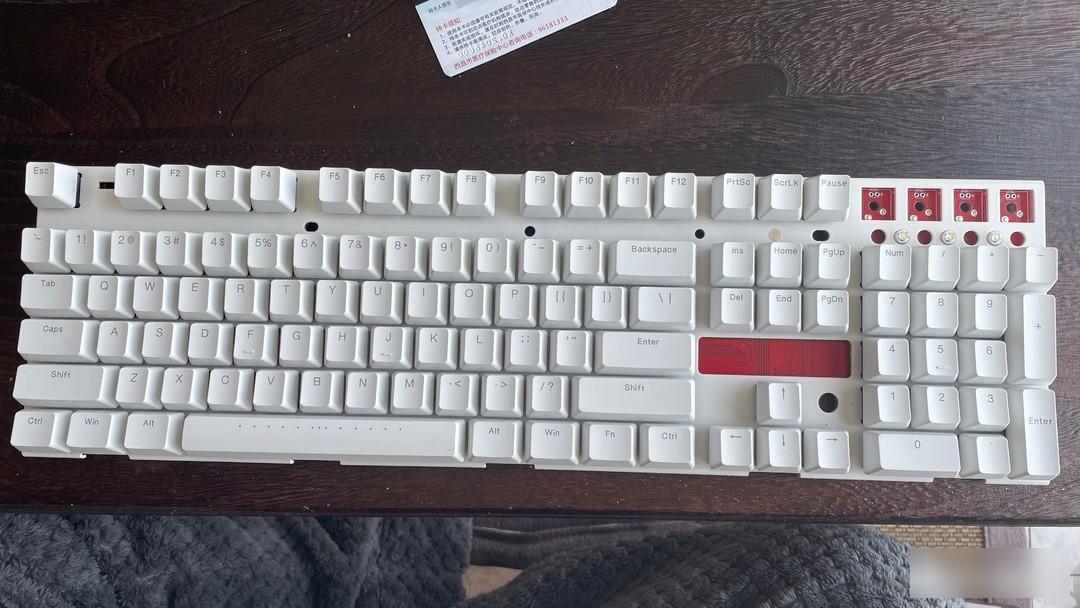
IKBC C104 + Logitech K375s ↷ (I have never used K375s keyboard with such a bad feel, tired hands and false touches, Shuangfeiyan completely exploded it
 )
)
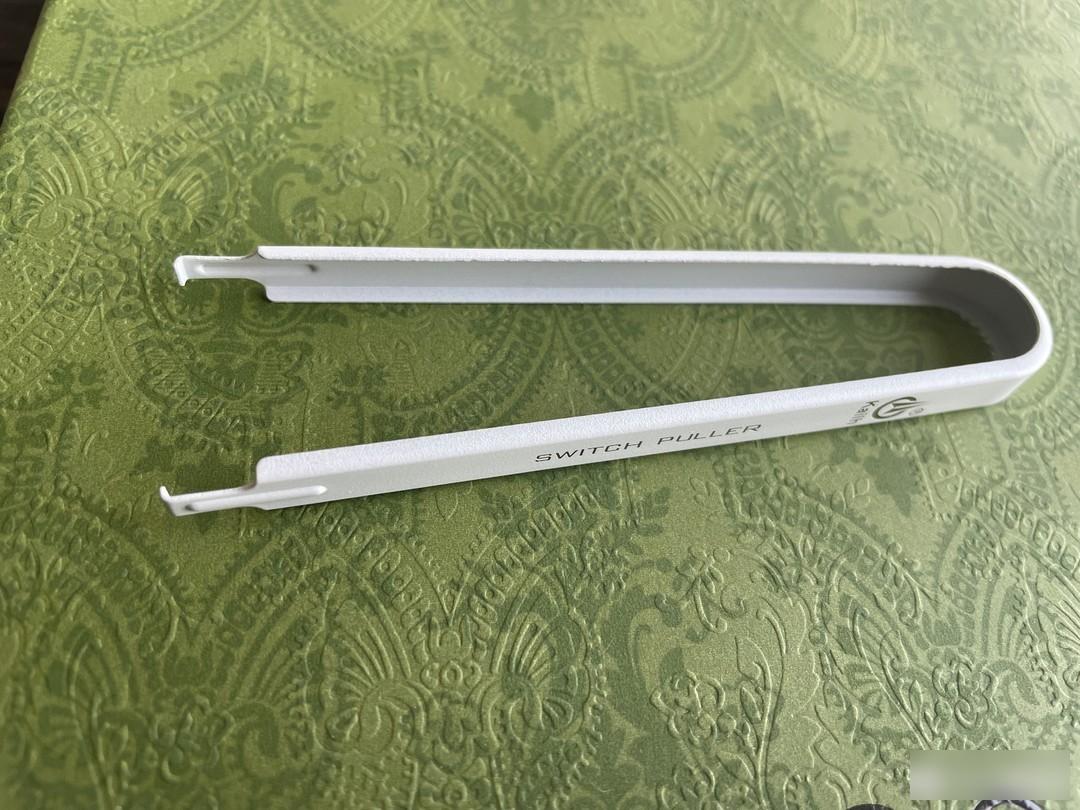
Kaihua Shaft Puller ↷ (Very easy to use, no deformation when violently pulling the shaft)
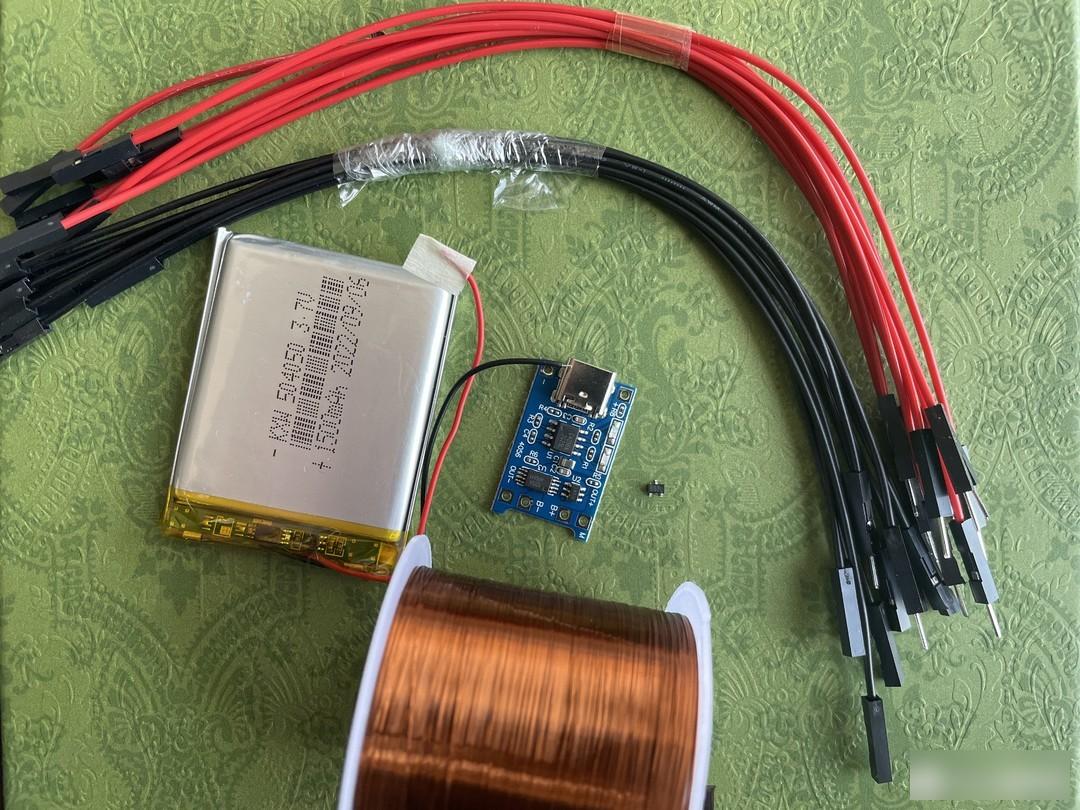
Enameled wire+lithium battery+charging board+DuPont wire ↷
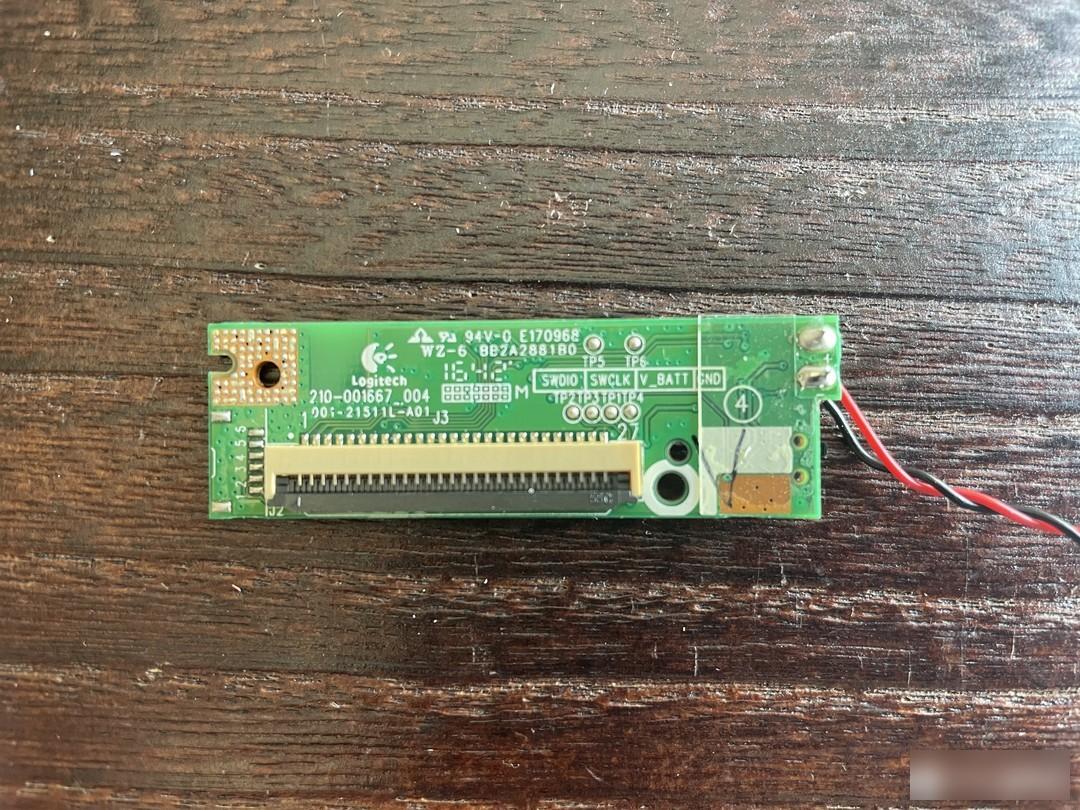
K375s main control ↷ (Plan to use a soft cable to transfer, afraid that the main control will be damaged by welding
 )
)
Remove the casing ↷
Remove the USB power cable ↷
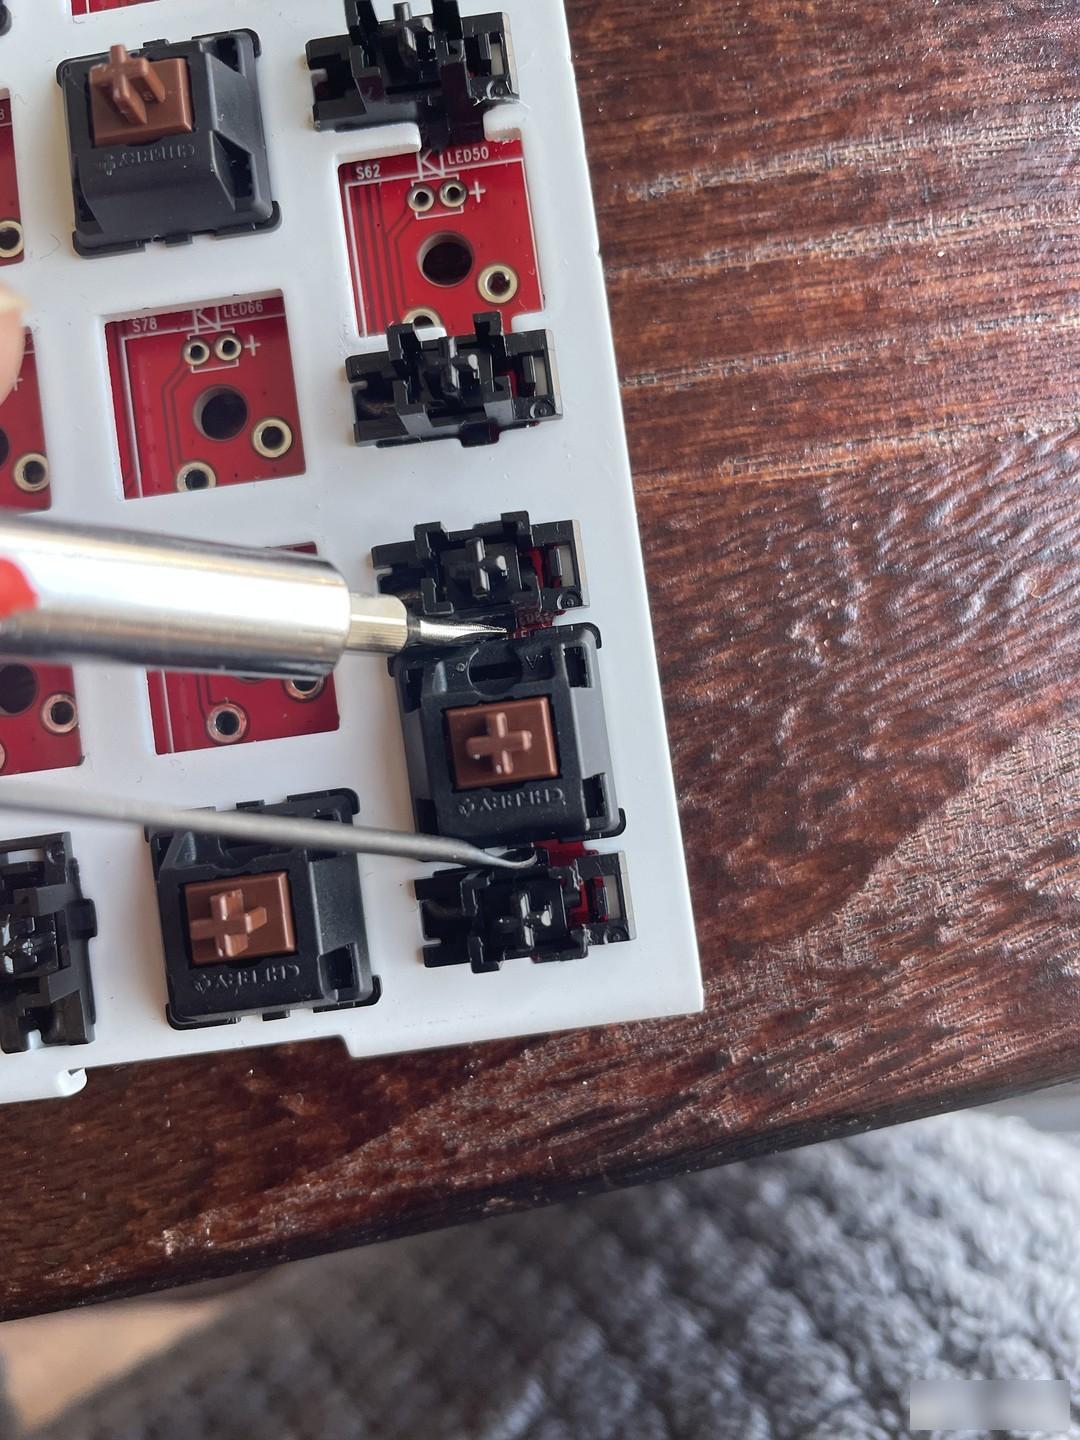
Shaft removal ↷ (C104 small keyboard + and enter key cannot use the shaft puller, suddenly found that I don’t seem to need to buy a shaft puller, and it’s a loss again
 )
)
The shaft removal process went smoothly ↷
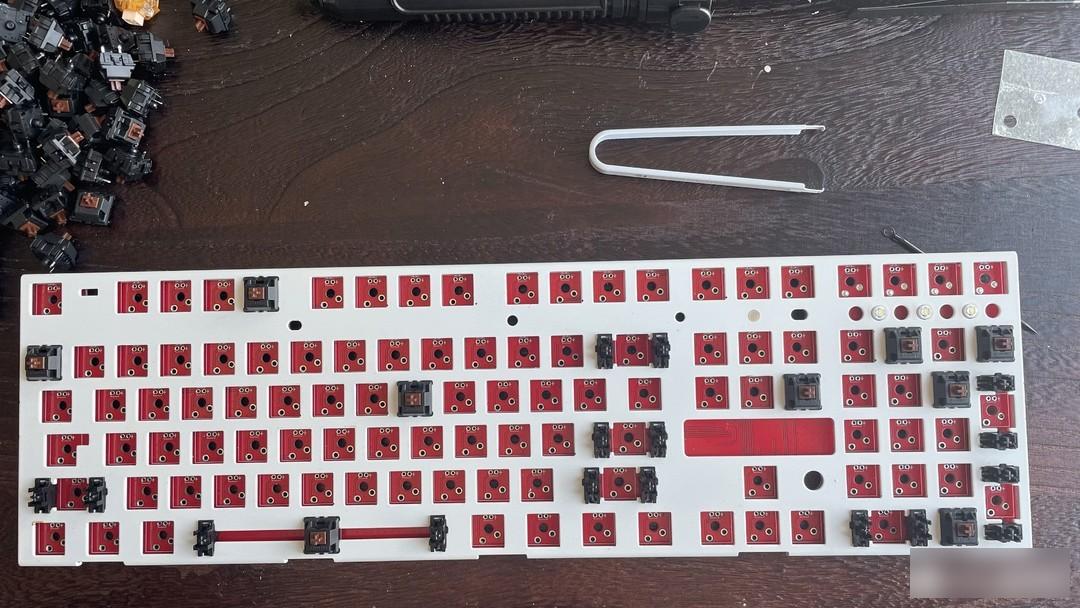
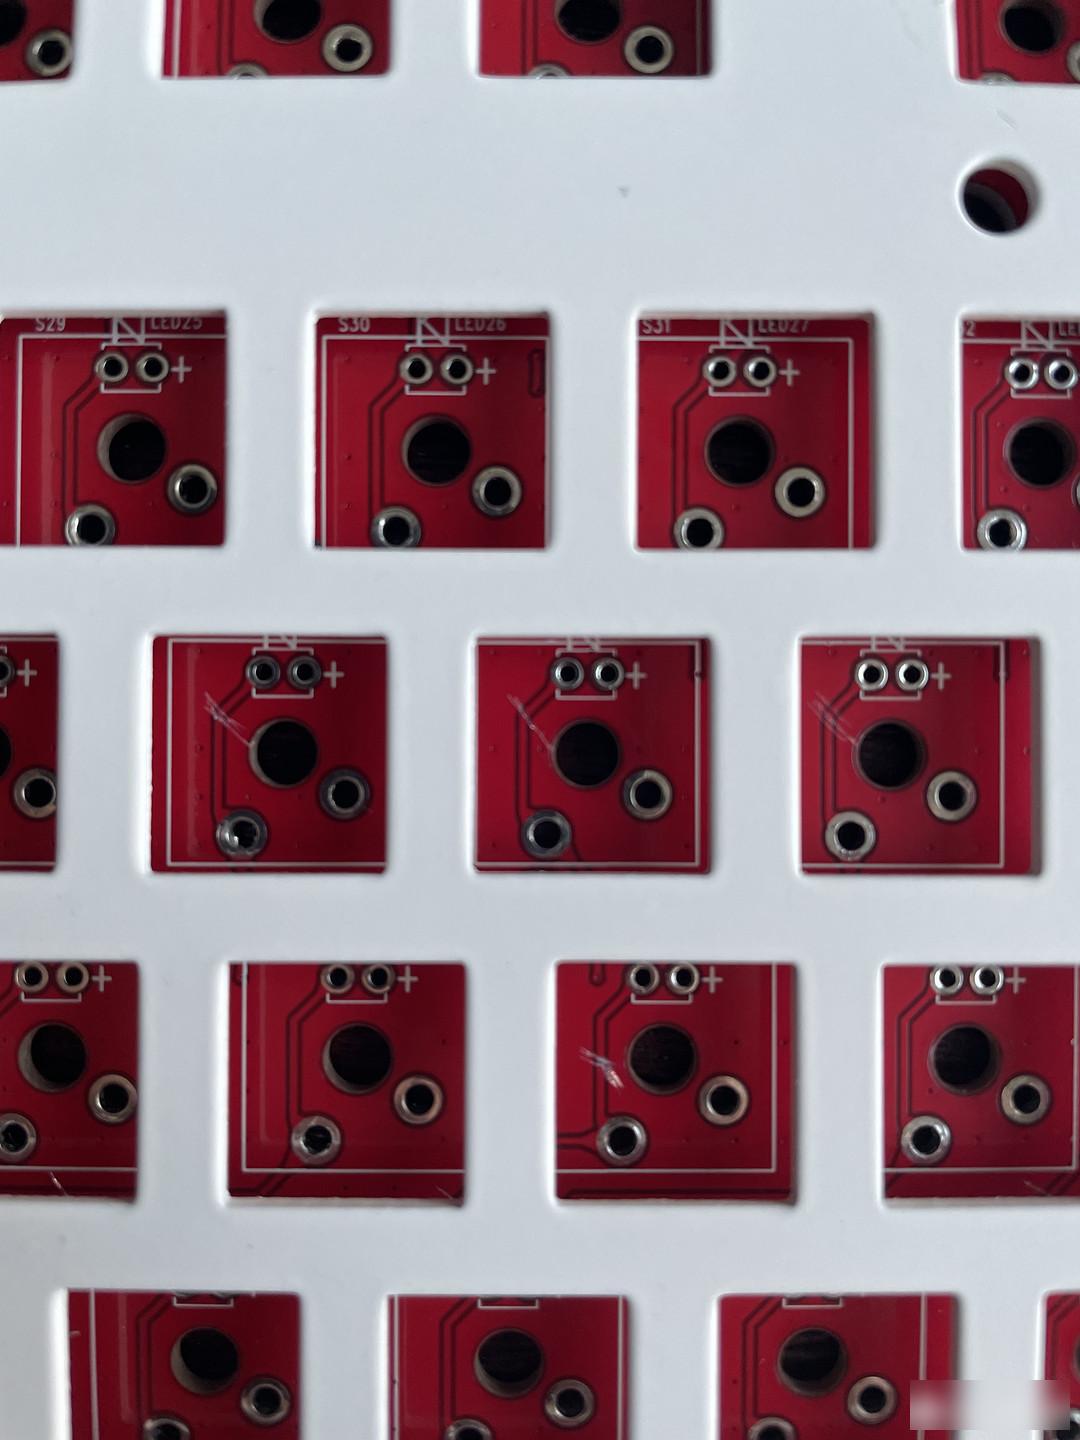
Cut off all the key wires ↷ (Actually, I didn’t cut them completely, the wiring of the small keyboard is much more winding than the main key, which directly caused me to dismantle all the wires after flying, and I borrowed a multimeter from the company to test them all again , it took nearly 2 hours
 )
)
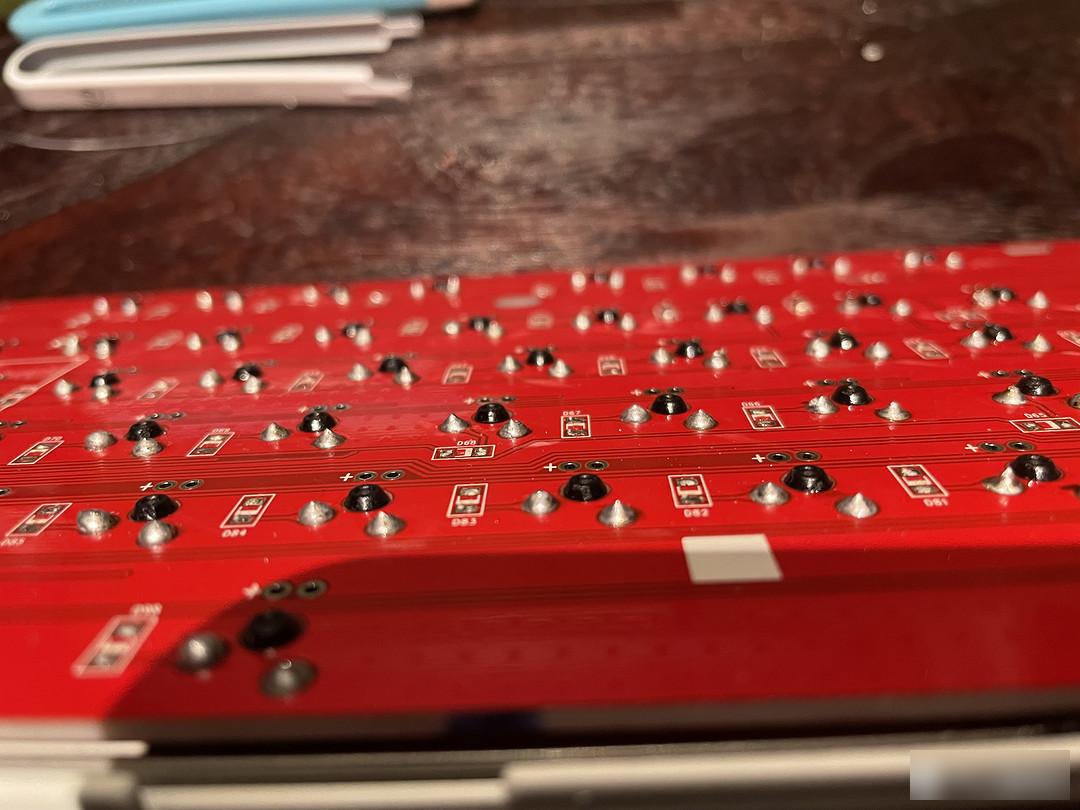
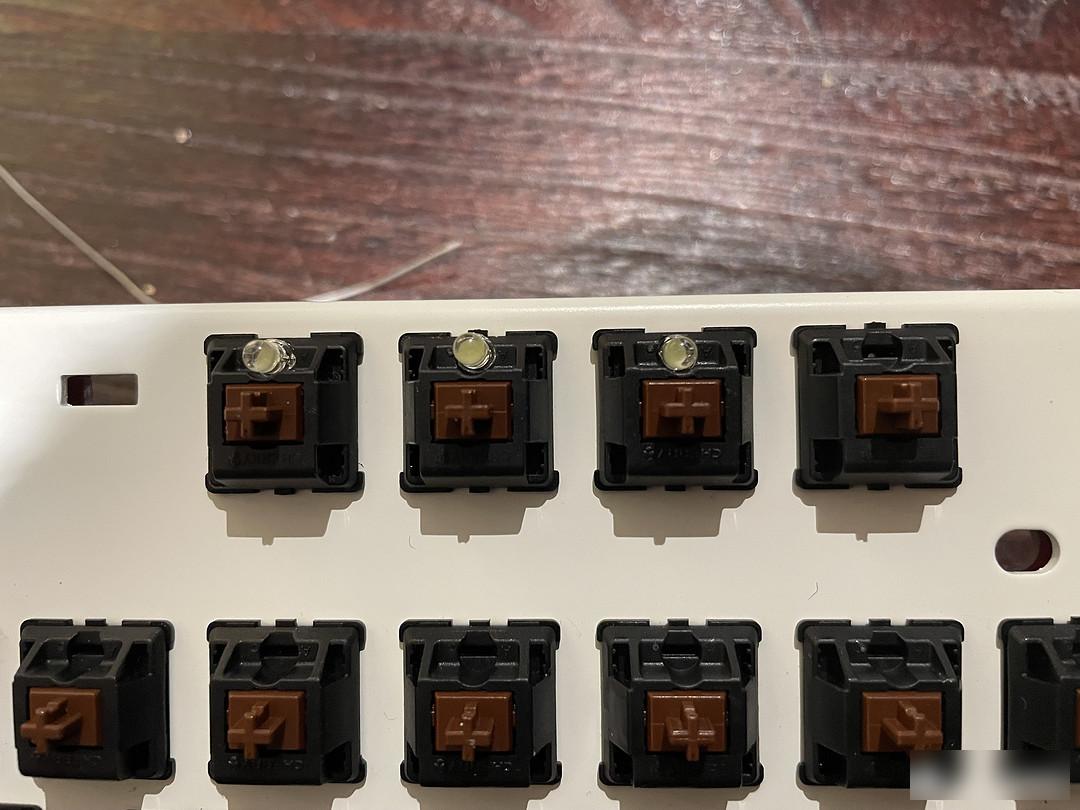
Re-weld the shaft body ↷ (Welding the shaft for the first time, it is really a bit ugly.)
Install the indicator light ↷ (Take out the remaining LED beads and weld them on the F1~F3 indicator positions)
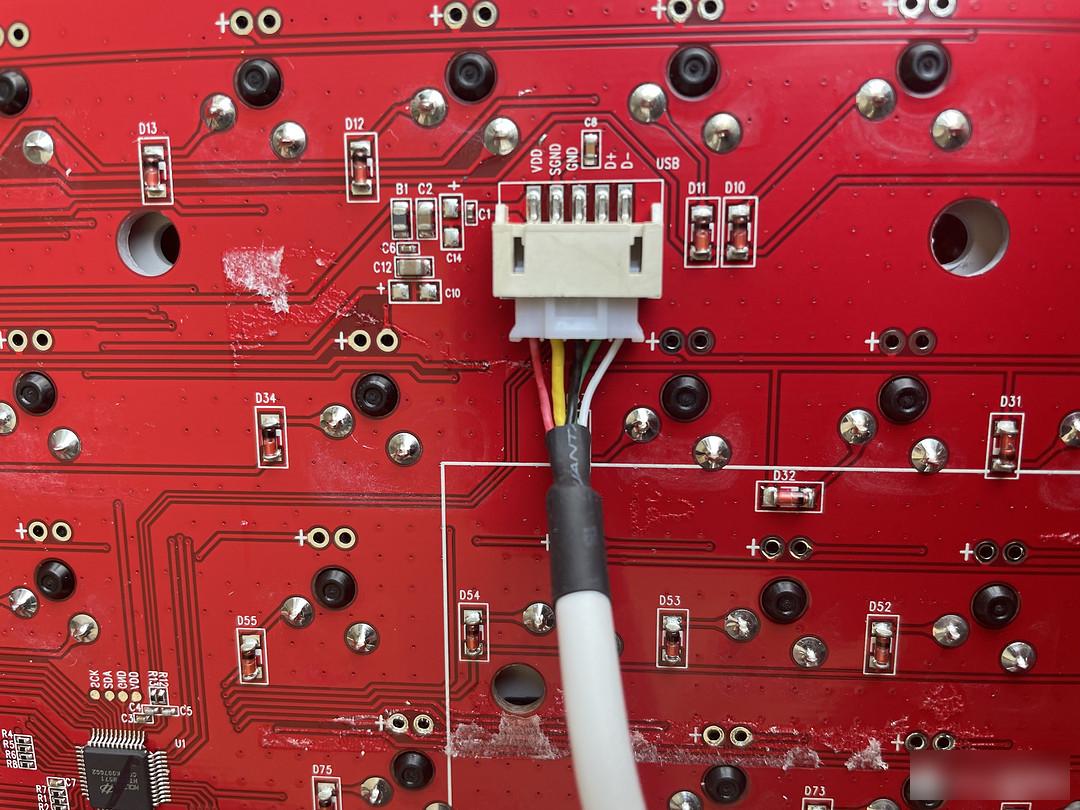
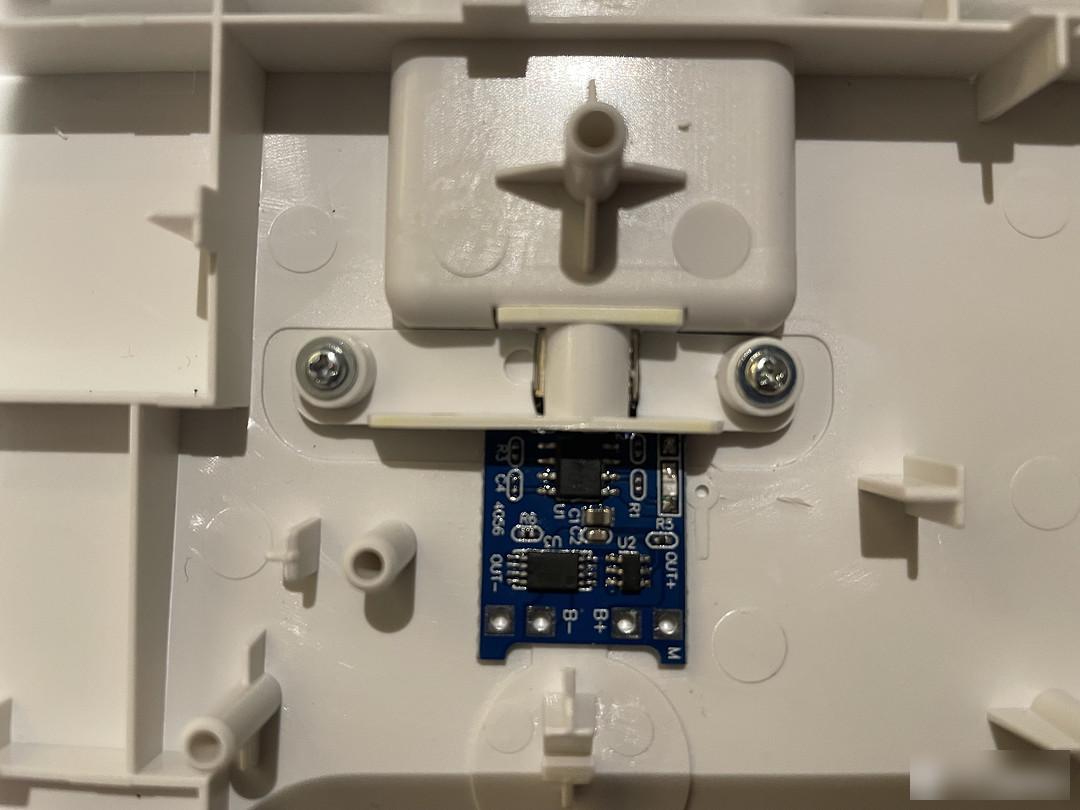
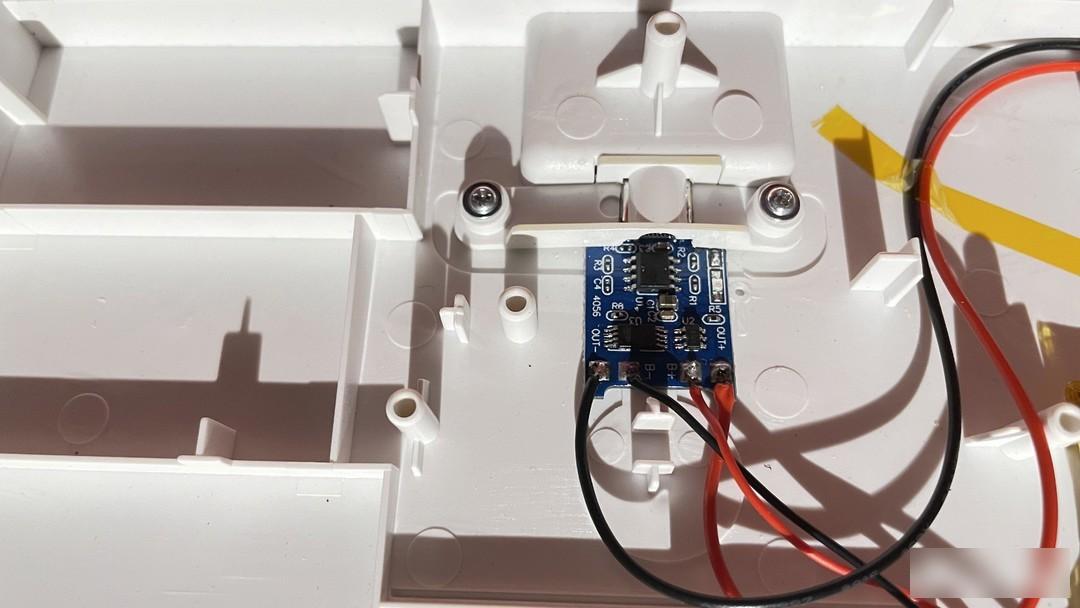
The first is the installation of the charging board ↷ (Use the original USB cable fixing buckle, cut and polish it, it is not impossible to use it as a solution to separate the key and wire.)
Charging port ↷ (more to come)
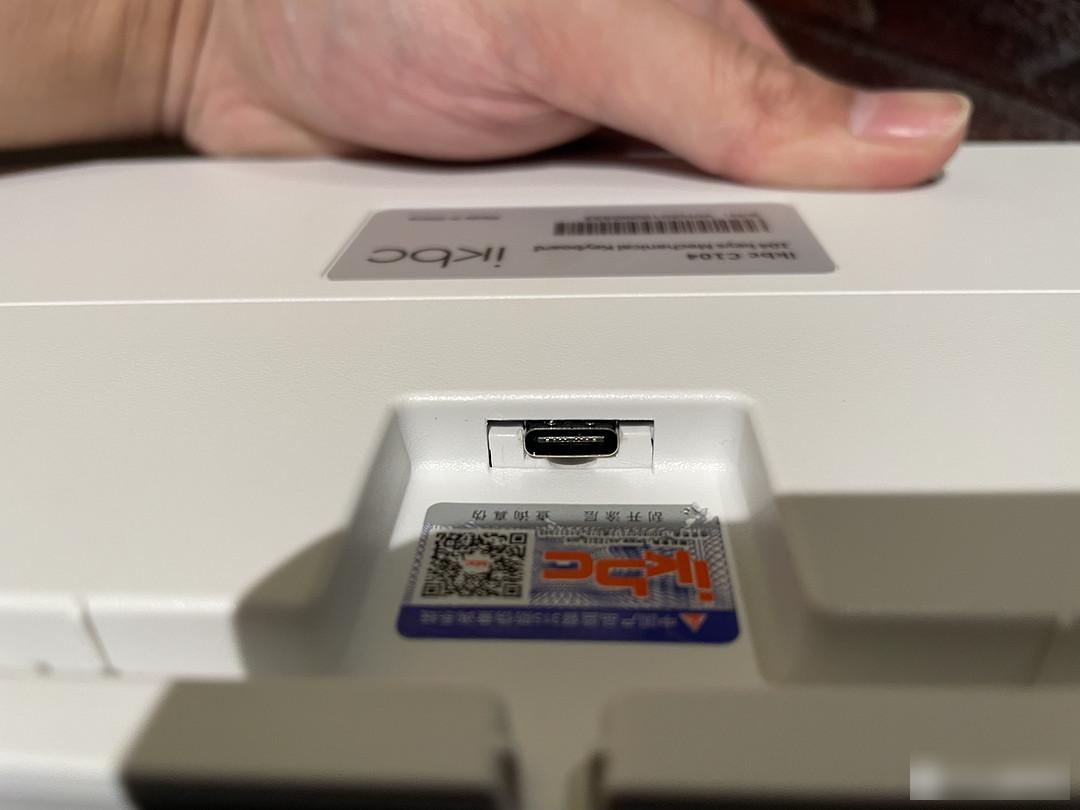
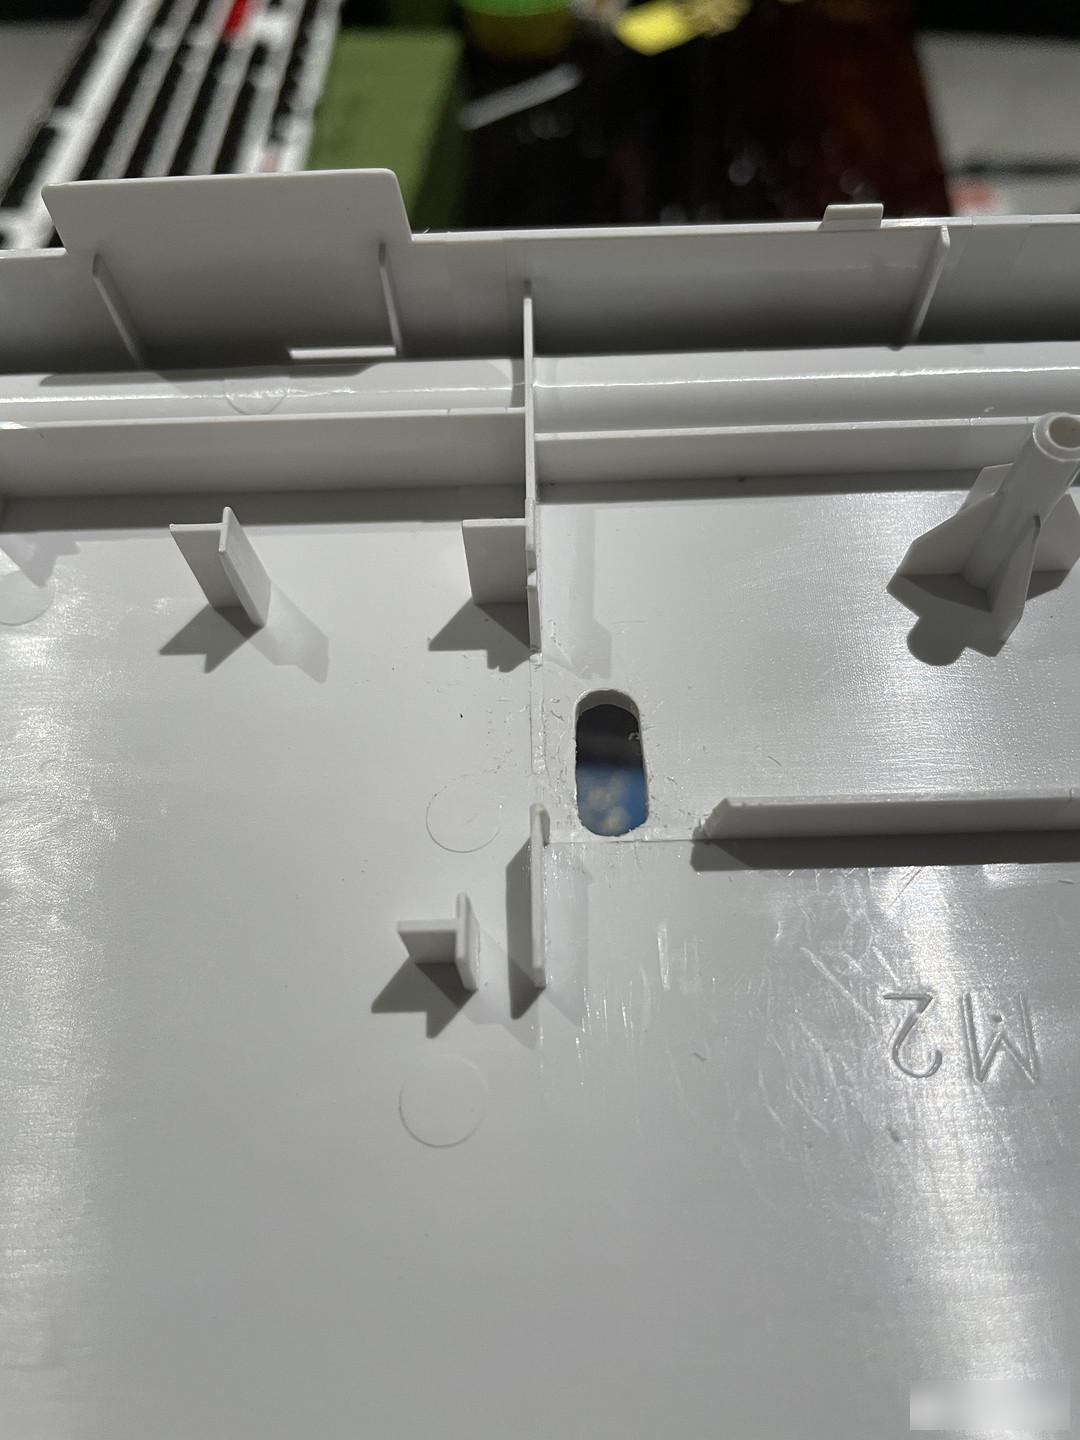
Because I chose the K375s switch, after various comparisons and confirmation of the position of the main control and battery, it is natural to destroy the bottom of the keyboard case. Although there is no turning back, fortunately, it did not fail too much.
Cutting + Sanding ↷ (a utility knife + file, looks ok)
Power supply drawings ↷ (Use CAD to sort out the ideas and draw the circuit drawings. There should be no problem with the circuit itself, but the XC6206 voltage regulator was not used in the end. It was also mentioned at the beginning of the article. The main control is completely powered by the lithium battery. Anyway, I will not admit that it is stable. Compressors are very difficult to solder
 )
)
Wiring of the charging board ↷ (There is no flying light cable, firstly, there is no need to worry too much about the battery running out, and secondly, the Logitech Options software will prompt the battery information, so I will be lazy)
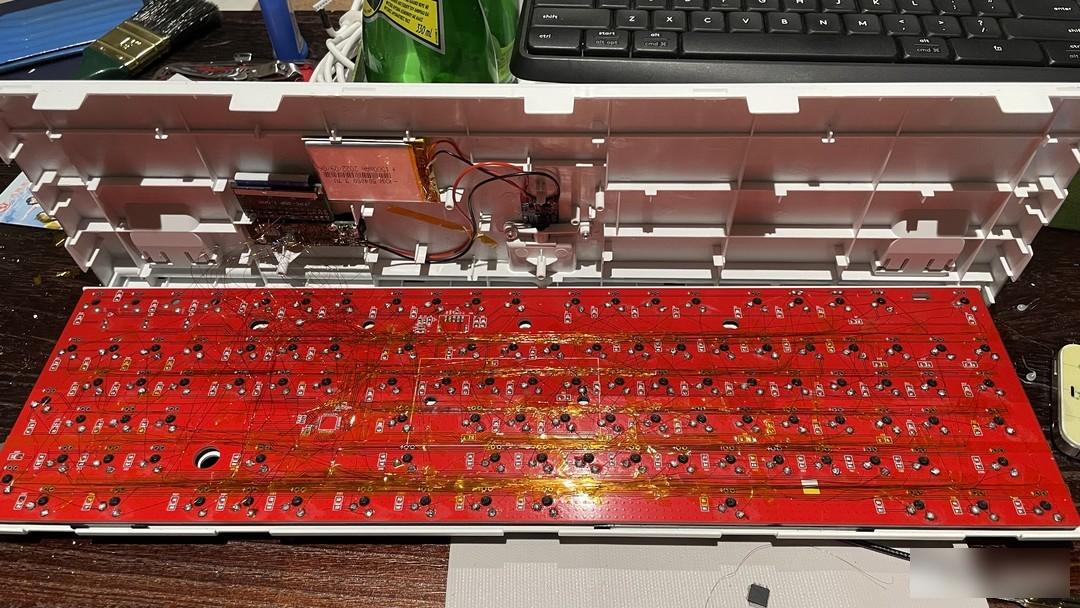
Display of the overall power supply system ↷ (Originally I wanted to fix the main control on the PCB board, and use Dupont wires to separate the bottom board from the PCB board when removing the keyboard, but I gave up this plan after fixing the main control on the bottom board. So I cut two pairs of Dupont wires and directly soldered the power supply.)

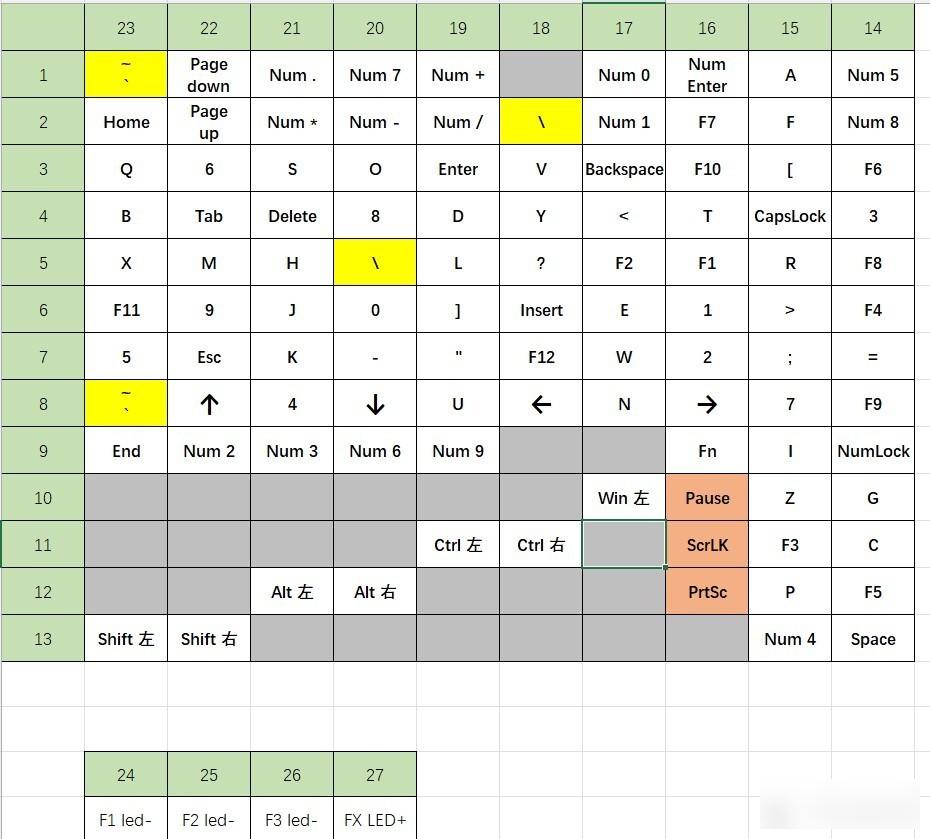
K375s main control key matrix ↷ (In order to ensure that it can be seen clearly during the welding process and avoid wrong wiring, so I finally made a matrix diagram by myself.)

Flying wire results ↷ (This is the second flying wire result, the first time it failed because the PCB key line was not completely disconnected, so I dismantled all the flying wires, and disassembled the shaft body again, but it was not disconnected The wires are all concentrated in the small keyboard area, and I was already thinking about making a finished PCB.
But the wool party will never spend money casually! ! ! ! I'm strong again
 , By the way, the original master control was dismantled, I was afraid. )
Since the computers are all antiques from 9 years ago, there is no Bluetooth function. In order to use the mouse, both computers have a Union receiver. The F1 channel and the F3 channel are respectively connected to the two computers, and successfully connected to Logitech Optiongs The software can check the power status normally.

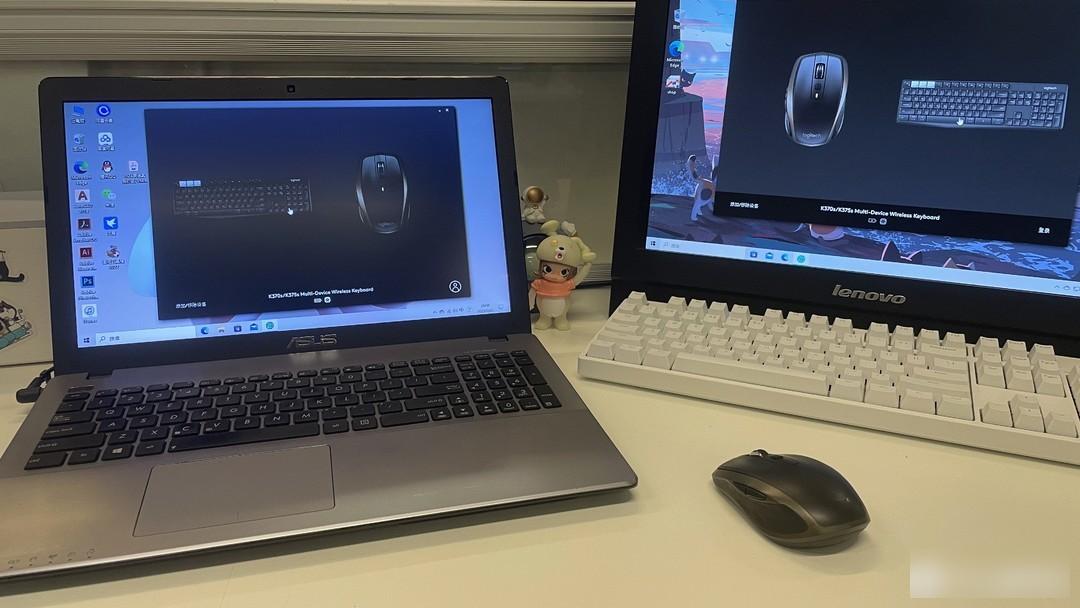
Everyone is happy to see it.

Before that, I didn't even know how to use a tin absorber. The first time I welded the shaft and the flying wire, it was very good to succeed. Although it was very cool when I pulled the wool, it was true when I finished the first round of flying the wire and failed. My mentality is broken, I should choose to spend money next time.

Factory Adress: No.11,FengpingRoad