Mechanical keyboard Part 3: Ducky one2 mechanical keyboard disassembly and maintenance
After work, I have always wanted to change a keyboard, and replaced the long-used Dujia cherry green switch, because it is really not friendly to use it in the office. After much deliberation, I finally chose Ducky.
The first time I came into contact with the Ducky brand was when I was in college. My roommate had a magic duck. Now the magic duck has evolved into the current Lucky Duck. As for the relationship between the two, please check it out yourself, so I won’t repeat it here. .
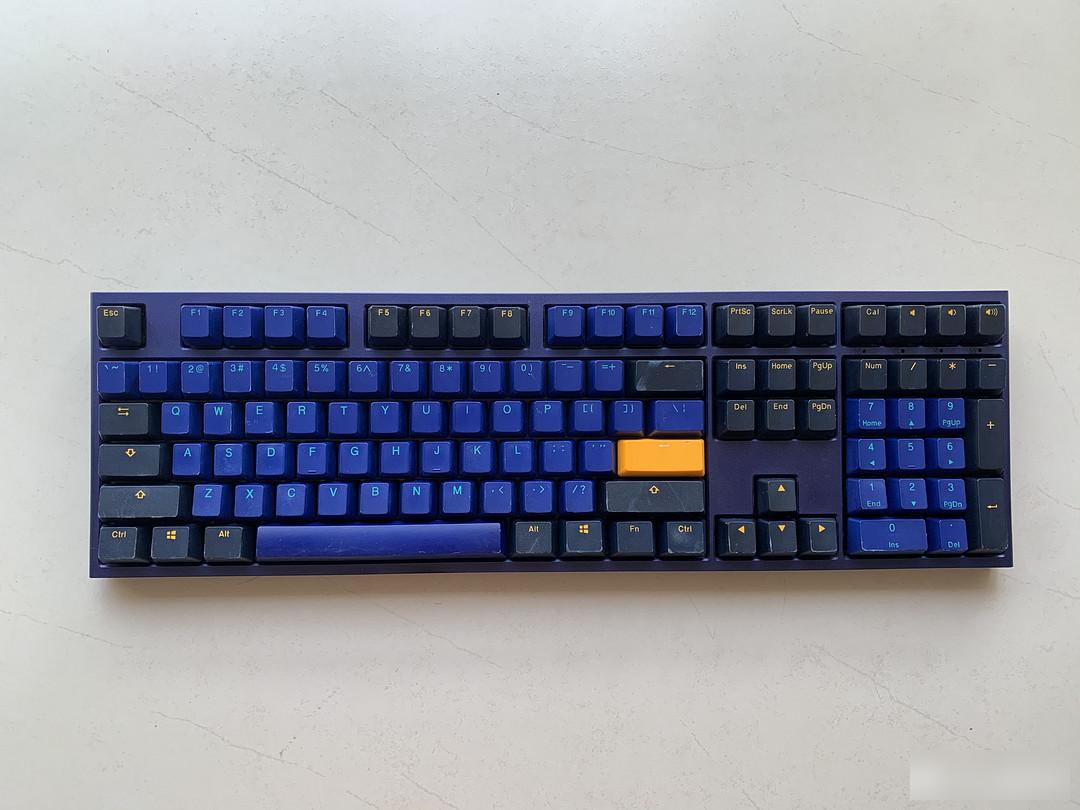 Ducky One2 horizon color matching
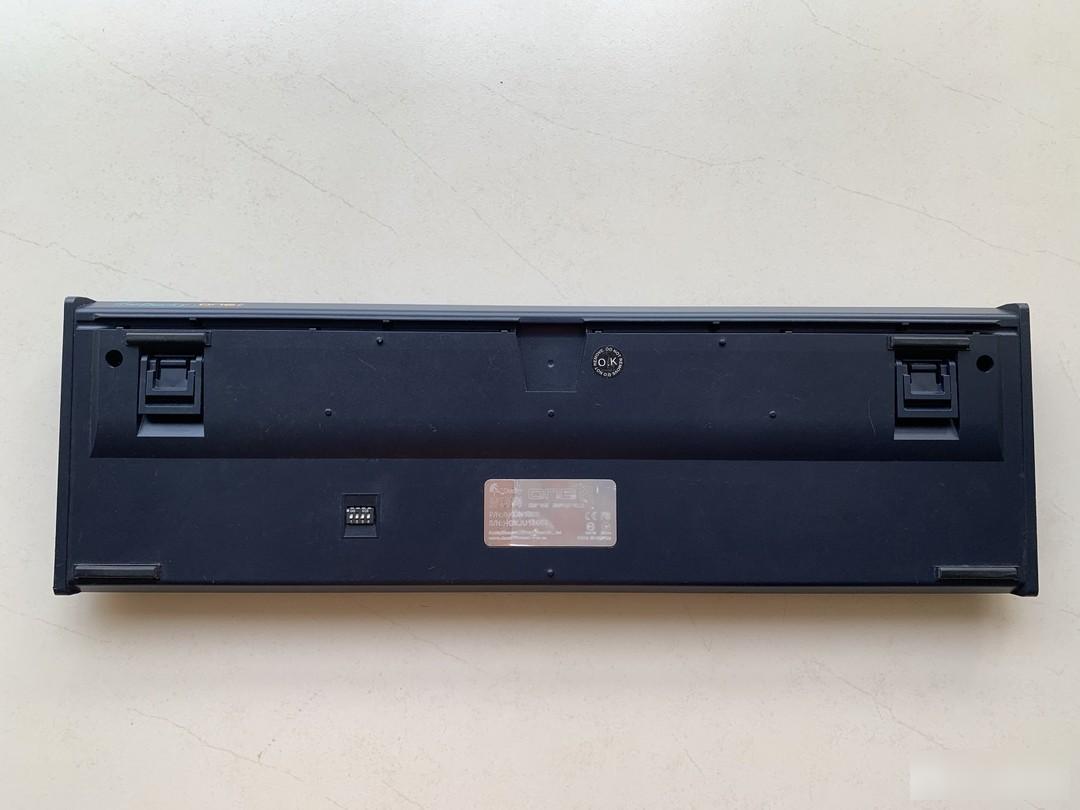 Metal nameplate on the back
 Ducky One2's logo
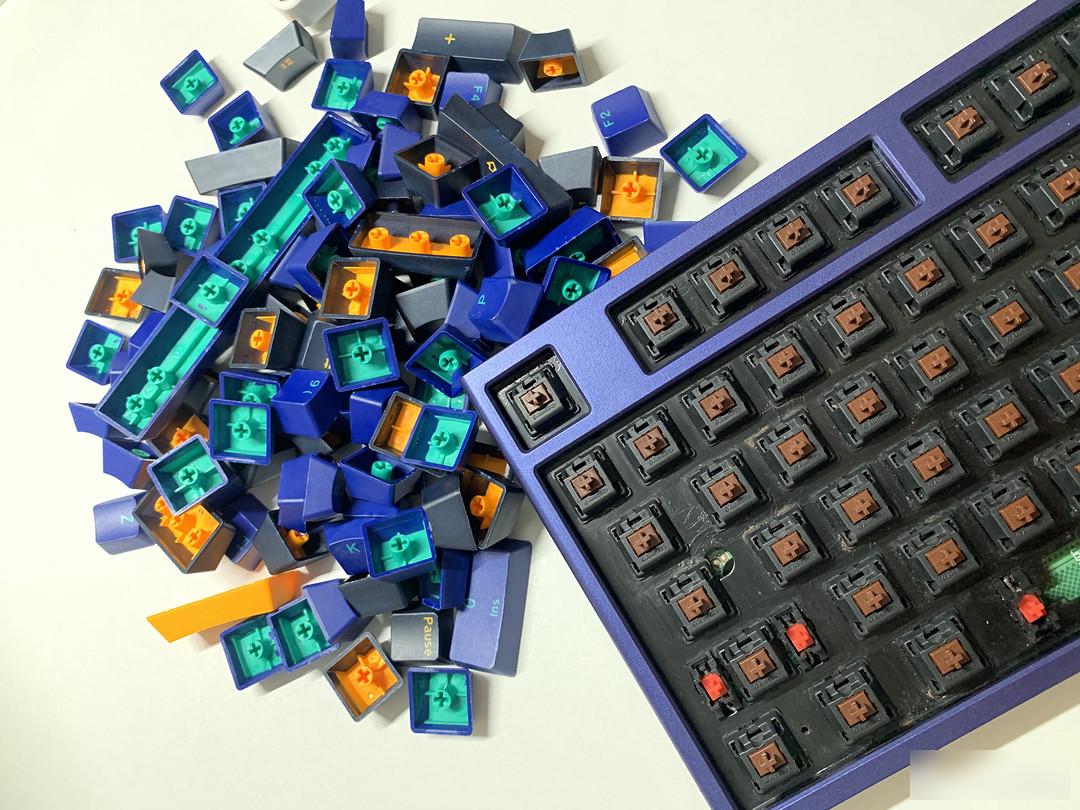 PBT two-color keycap
 two-stage foot support
Ducky one2 is generally of good quality, solid workmanship, and creative design. I chose the horizon color, cherry tea switch, TYPE-C interface, key line separation design, two-color PBT keycap, using The color-contrasting design matches the color of the keyboard itself. The feel of the large keys is not bad in satellite-axis keyboards. The current rookies in the keyboard circle are also doing very well, so looking at it now, it is no longer so prominent.
Closer to home, the reason for this disassembly and maintenance is that the uppercase and lowercase indicators of the keyboard are off. Although the functions are normal, they are basically invisible at ordinary times, but as a patient with obsessive-compulsive disorder, it is really unacceptable, so I decided to repair it . Judging from the symptoms of the problem, it should not be a big problem, so I decided to do it myself and have enough food and clothing.
The shell of this keyboard is quite different from the design of most mass-produced model keyboards on the market, and the difficulty of dismantling has increased a lot. There are also cases of dismantling and overturning on the Internet and various forums. The buckle will be broken. After searching on the Internet and seeing the cases of dismantling by others, I determined the general location of the buckle and started to work.
I have to say that if you want to disassemble this keyboard, a set of tools is really important. The international practice is to remove the keycap first, and then remove the shell. I started dismantling from the top of the keyboard. There are many buckles, so patience is required. One point, when you get to the two sides, the bayonet becomes tighter, you need to try it slowly, press it while warping, there are also multiple buckles on both sides, you need to disassemble them one by one, repeat the above operation until the upper and lower covers are separated, Unscrew the two screws on the main board, lift the keyboard main board, there is a connecting line between the main board and the TYPE-C interface inside, slowly take out the plug, and the disassembly is complete at this point.
 First remove the three screws on the north
 Remove the keycap and unscrew the two screws on the front
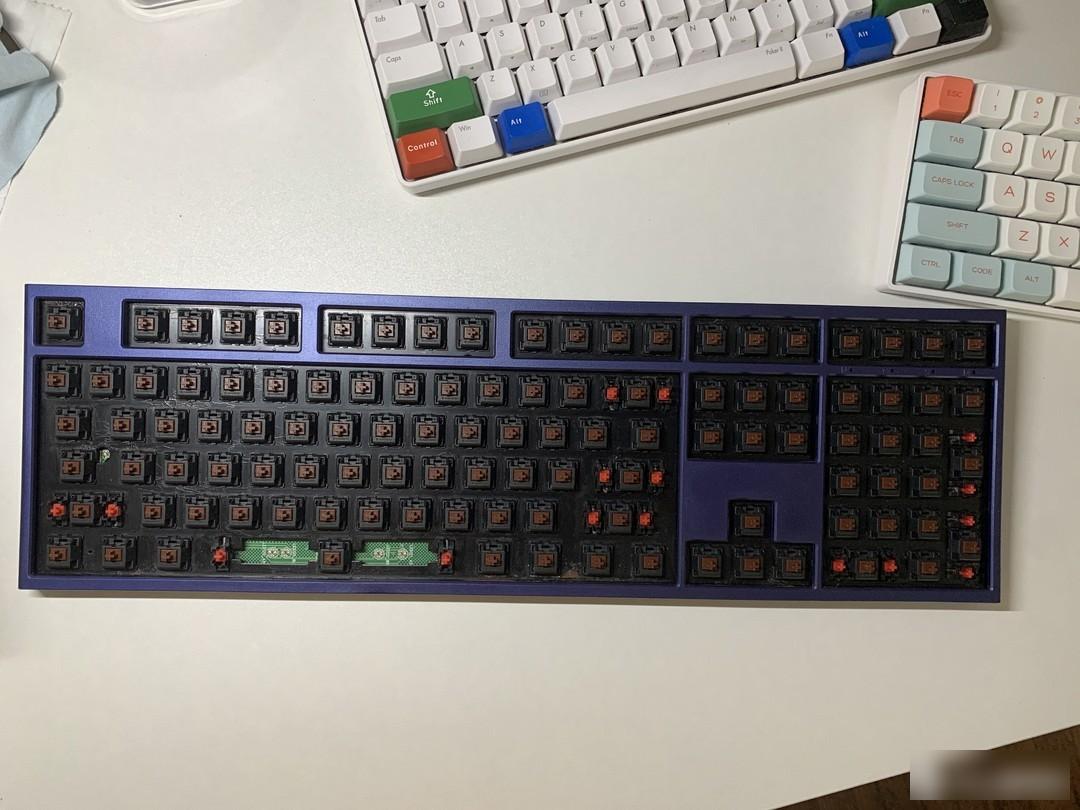
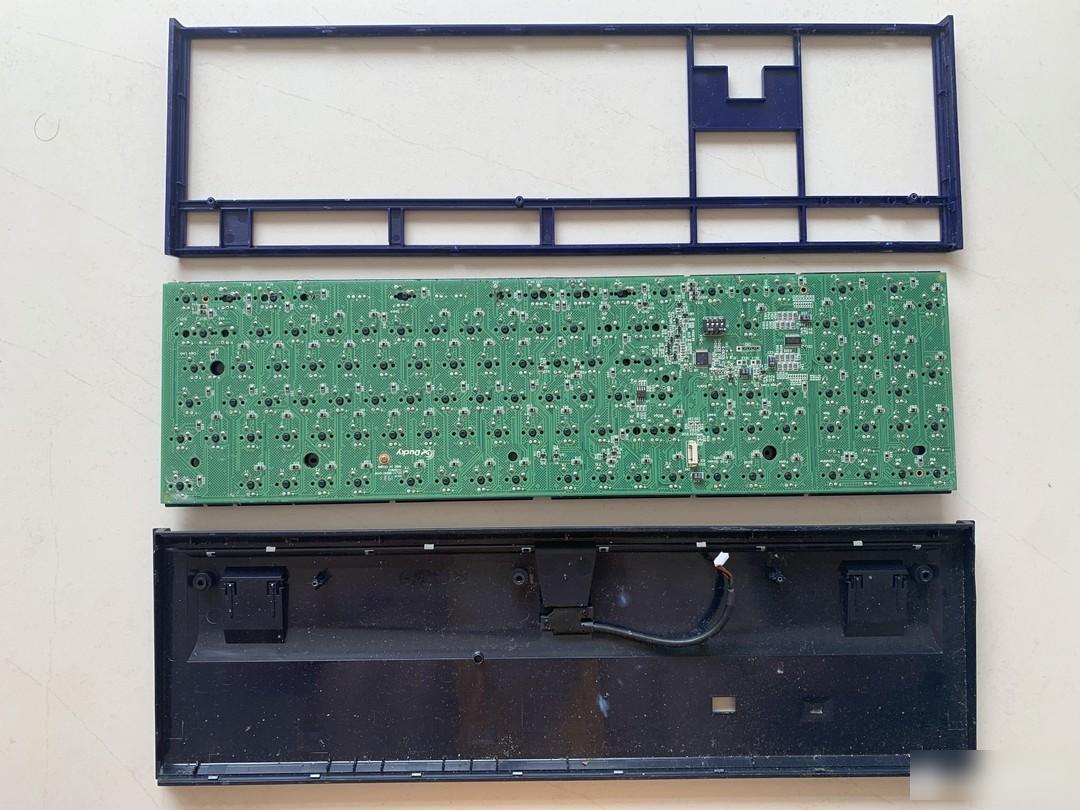 Remove the upper cover and take out the PCB board
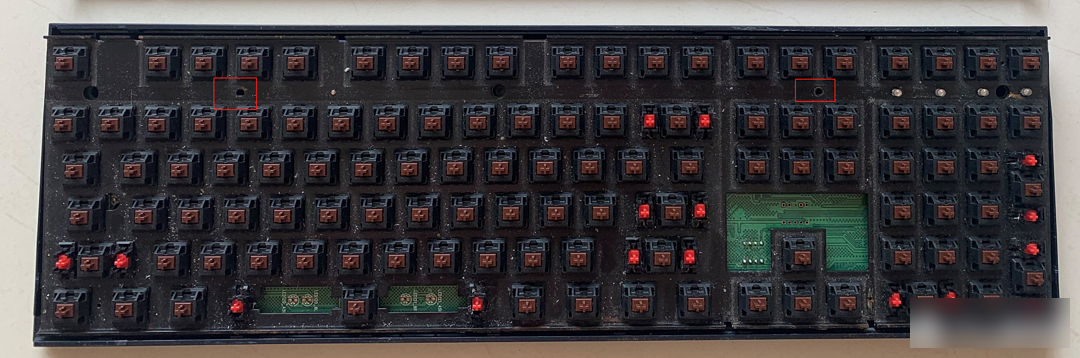
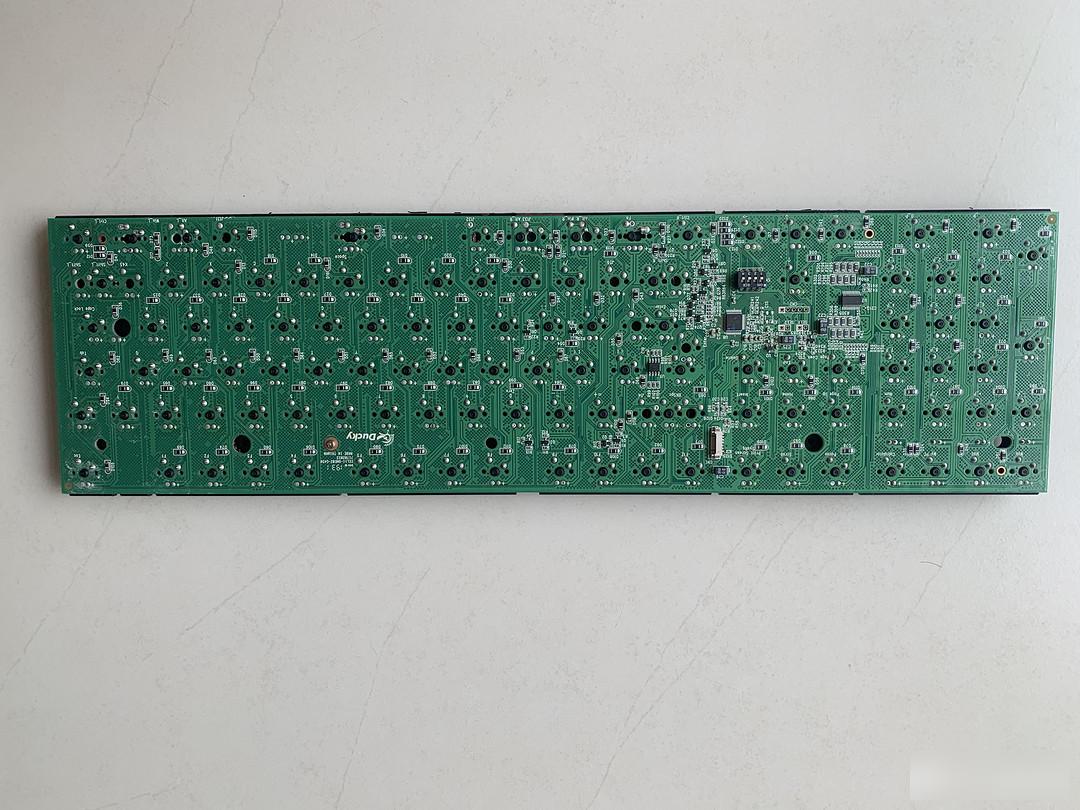 The PCB is beautiful
 "Rusty Duck" is still the same
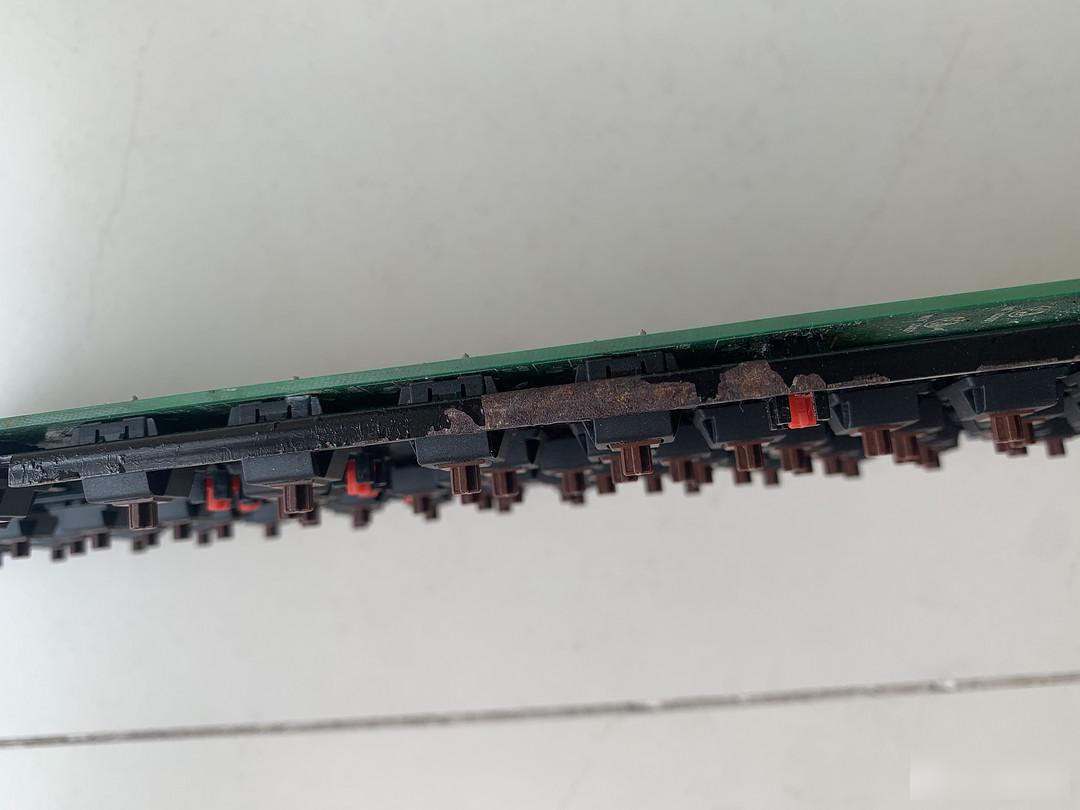 Rusty paint in many places
 You can refer to the line sequence
 TYPE-C interface design is exquisite
Let’s look at the problem again. After turning on the power, press the upper and lower case keys, but the indicator light does not light up. Before removing it, I suspect that it is a weak soldering or the lamp is broken. The initial plan is to add a soldering if it is a weak soldering. But look at the workmanship, directly The welding problem has been ruled out, so start Plan B, and remove the M indicator light on the far right, because it is basically not used. After thinking about it, if this light is not on, I always feel that something is missing, so I found out my own family background. I used to play The small LED light beads left when the keyboard is used. At first I wanted to replace it with an ice blue mist LED, but the color and brightness were too poor. Later, I found that there were LED lamp beads that were disassembled before. I tested it and it happened to be blue. Although it was misty, the brightness was slightly poor. One point, generally acceptable, that's it.
 The brightness of the lamp bead is very low
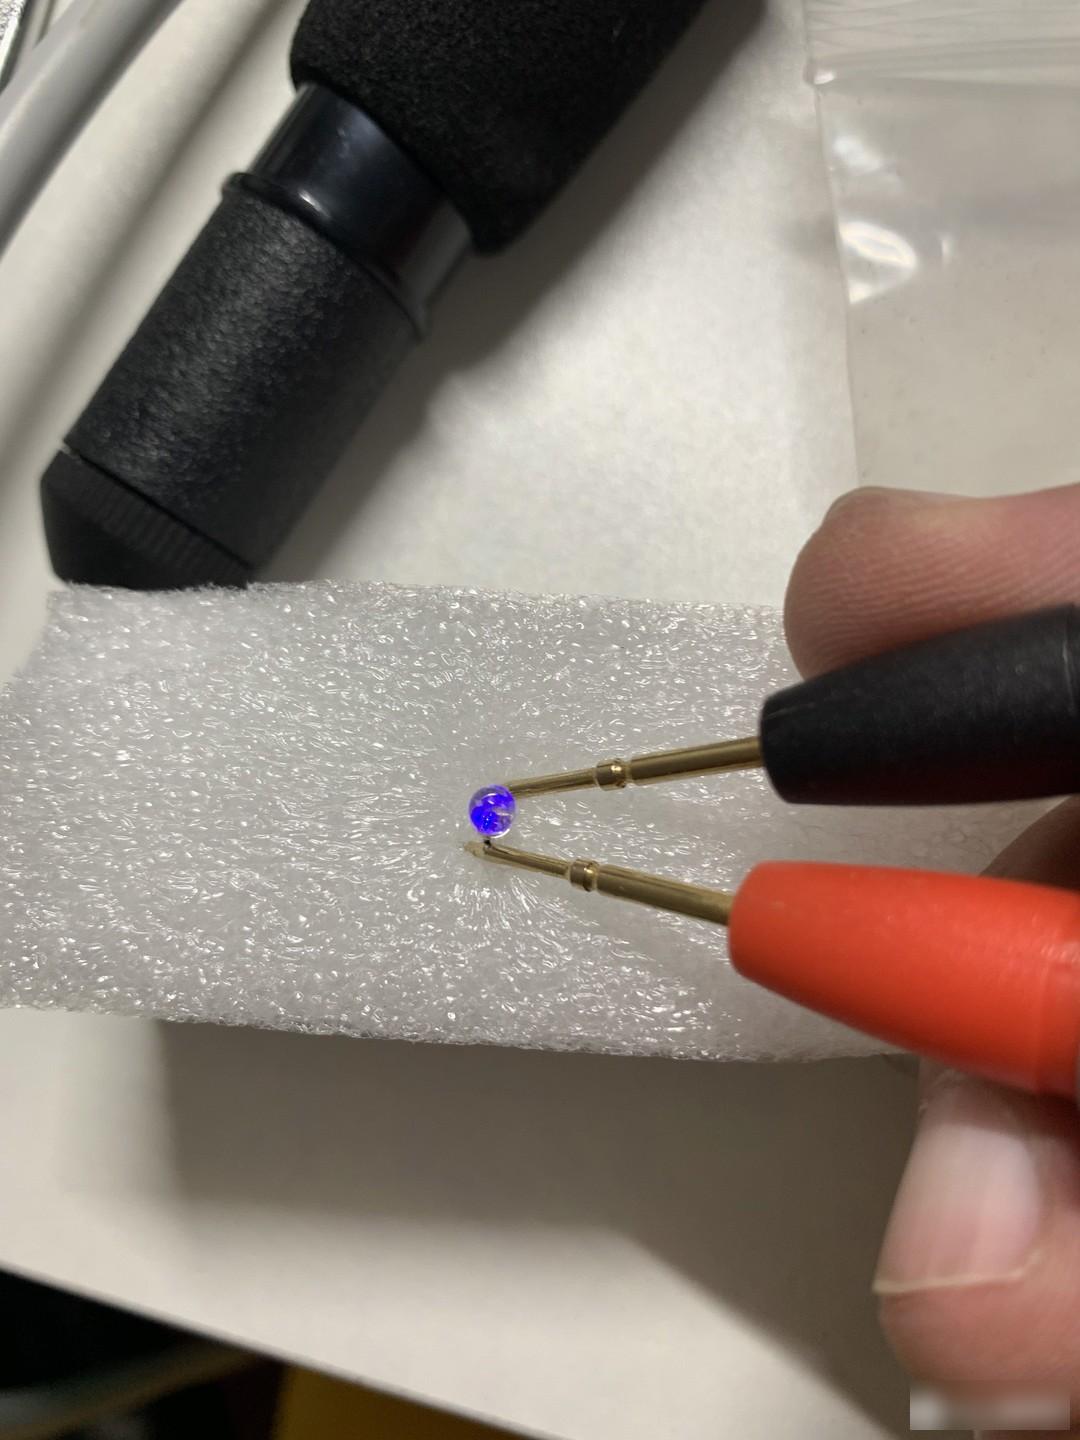
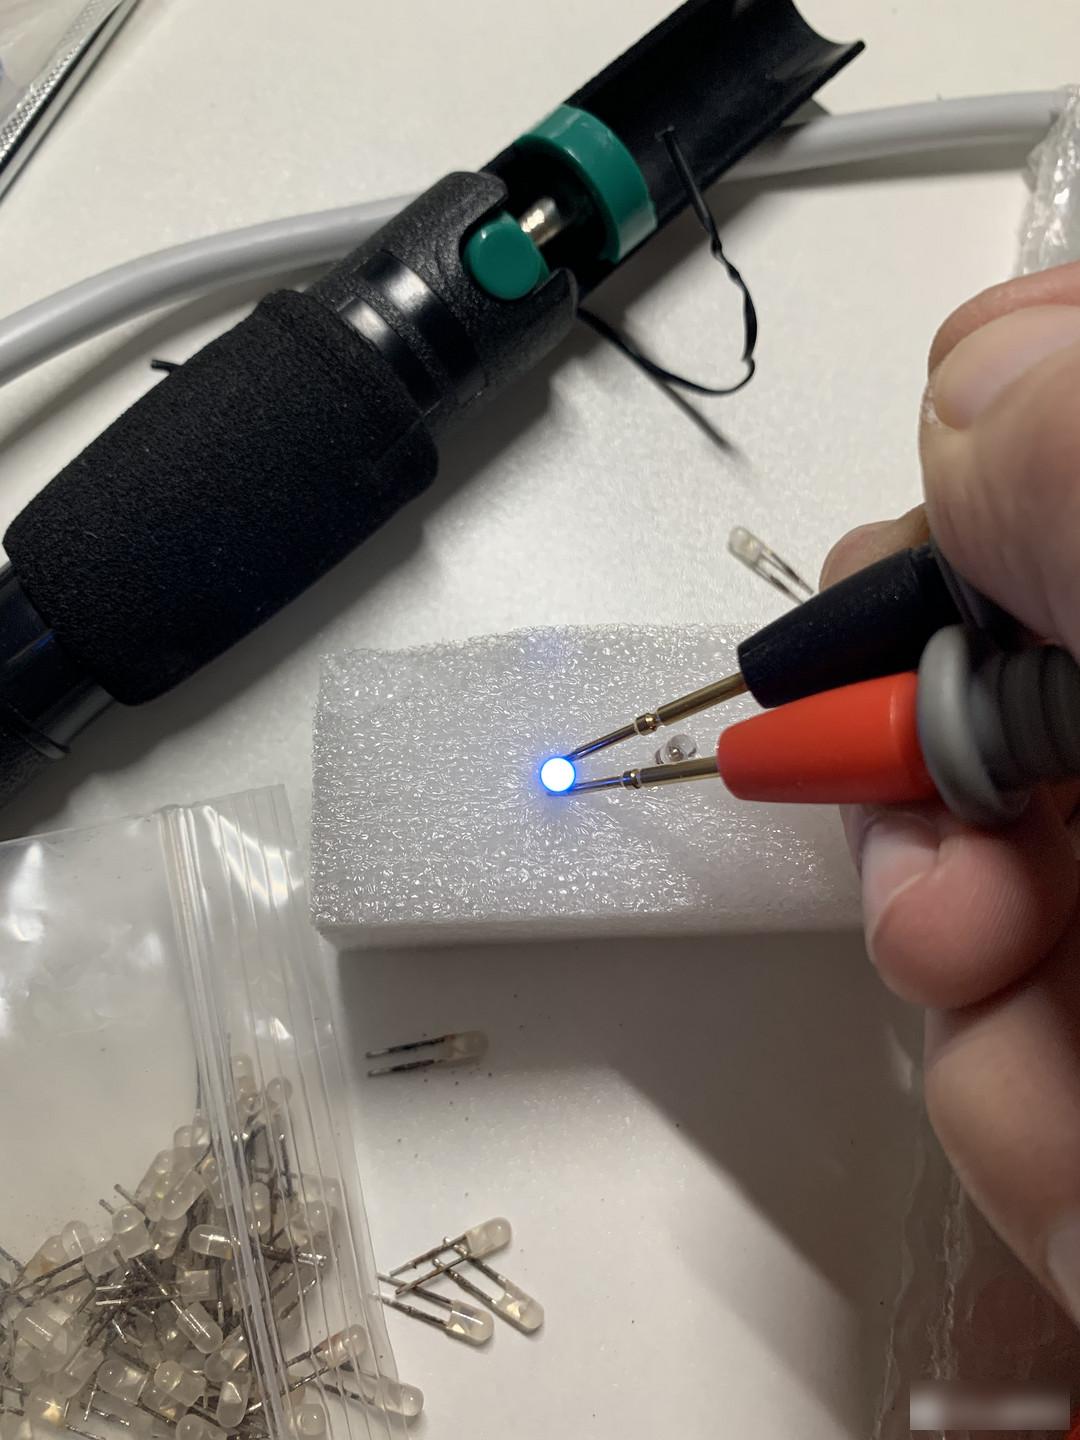 Replacement lamp beads
The replacement parts are ready, and the next step is to replace the lamp beads, because the upper and lower case button indicators are used more frequently, and finally decided to change the M indicator to the upper and lower case position, and put the replacement LED in the M position. The replacement method is also very simple, first add some solder to the original solder joint, and then use a soldering iron and a solder suction device to suck it off, or use a knife-tip soldering iron to melt the two pins of the lamp bead at the same time, and then insert the solder from the other side. Pull out the lamp bead, and then solder the new LED on. After the soldering is completed, power on the test, all the buttons are triggered, all the indicators are normally on, the color difference is acceptable, and the maintenance is complete.
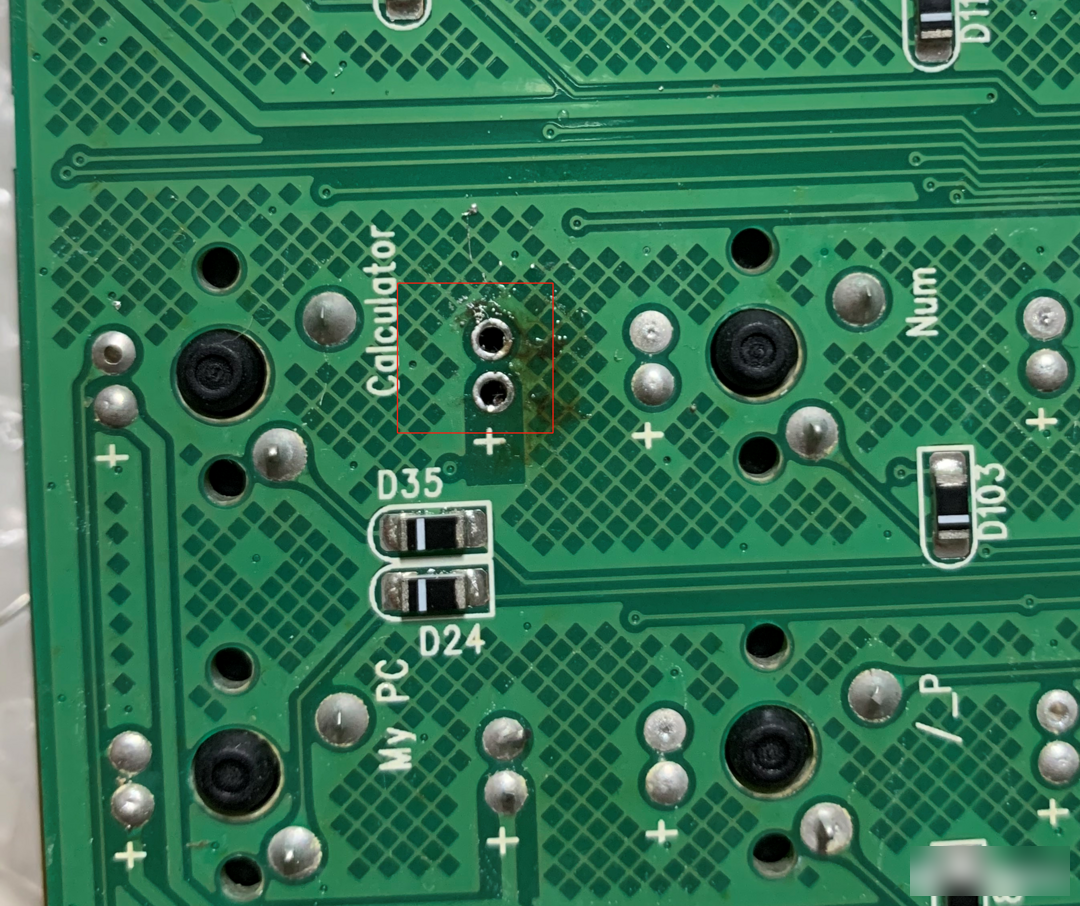 remove solder
 Remove the lamp bead
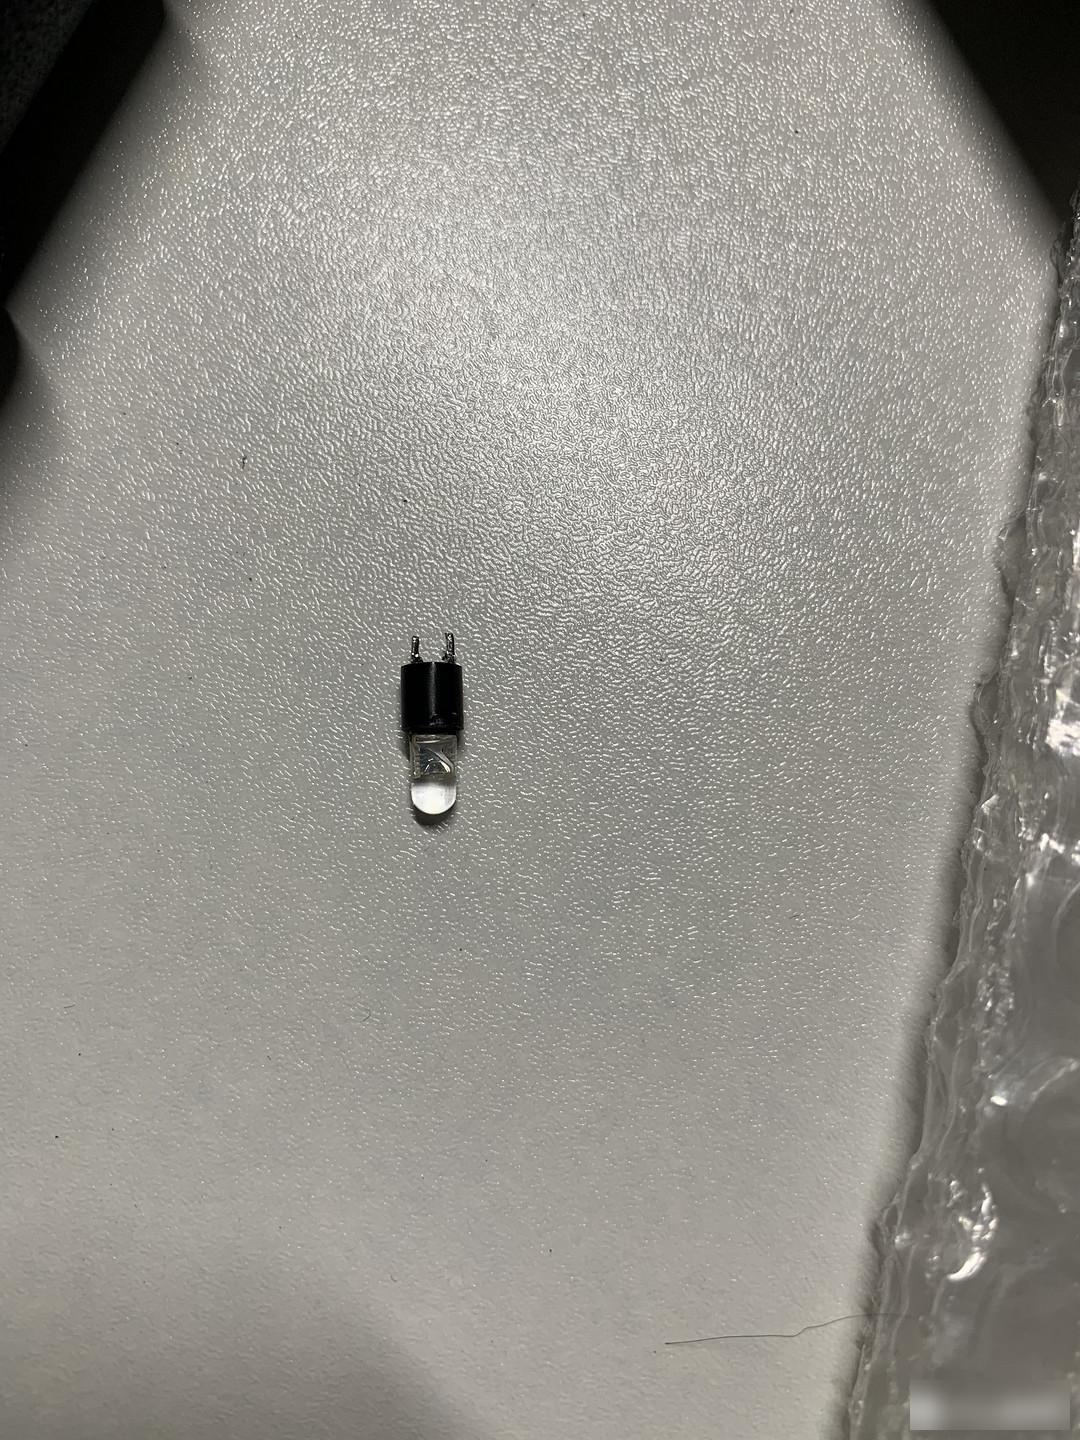 Put the new lamp beads back, pay attention to the positive and negative poles
 Soldering and soldering
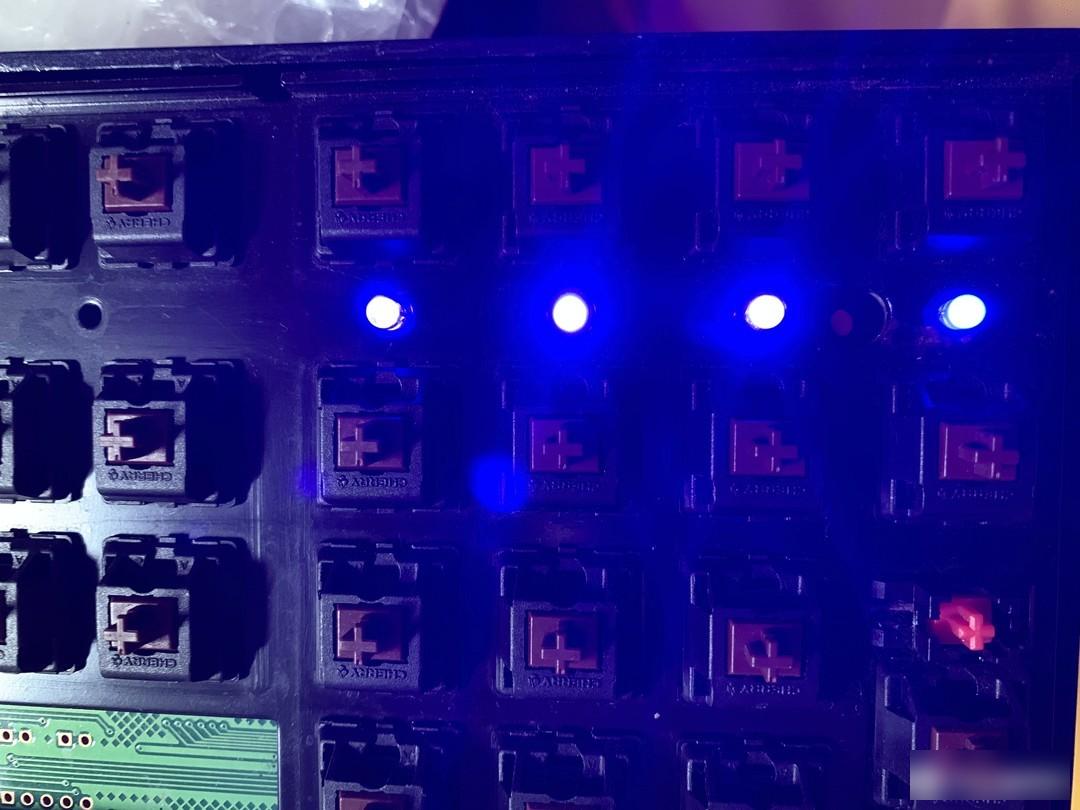 all lights up
 Clean up the booty a bit and put the case back on
 Tighten the two screws and replace the keycap
At this point, the maintenance is complete. Although the color of the light is slightly different, it is not obvious if you don’t force a comparison. That’s it. In addition, the title of “Rusty Duck” is really well-deserved. Many parts of the keyboard steel plate have rusted and exploded. Paint, if you have time, you can remove all the shafts, polish off the old paint and rust, and re-spray the paint. I am busy with work recently, so I will do this first, and it will not affect the use. Finally, I will attach the tools used for this maintenance. If you have any questions, welcome Thank you for watching.
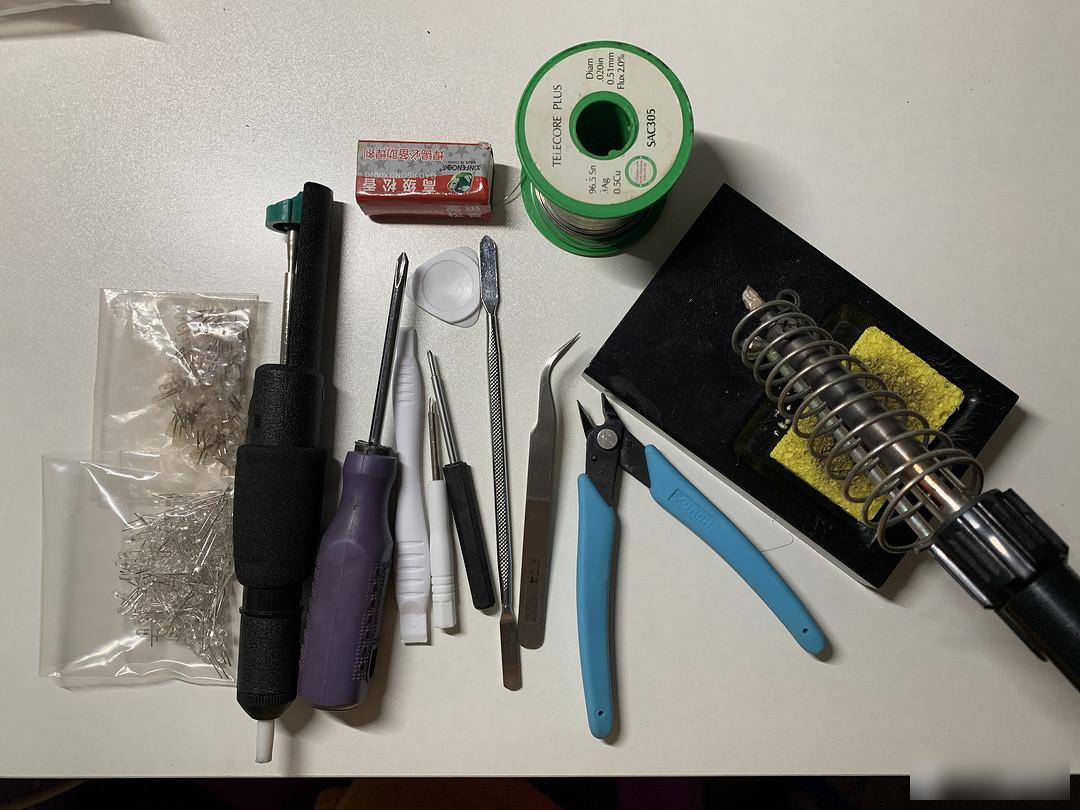 All tools used in this repair
Factory Adress: No.11,FengpingRoad