MELGEEK PIXEL Mechanical Keyboard Compatible with Lego Bricks Review
Today’s review is a bit off topic, but as long as you are a fan of Lego blocks or domestic building blocks, it’s hard not to like it according to your interests, because this is an interesting collision of two hobbies. We've also posted about this keyboard before.
Overseas Lego blogger Jaysbrickblog had the opportunity to get a MelGeek Pixel Lego keyboard, which is a brand new mechanical keyboard with Lego particles on the shell and keycaps, and it is compatible with Lego bricks.
*This article is translated from jaysbrickblog's article
jaysbrickblog received this package from the team at MelGeek and was really excited to see what it's all about because they've done a really neat job with the Pixel and it's a really unique product that fits both legos and mechanical keyboards .
The MelGeek Pixel is currently in crowdfunding on Kickstarter, with prices starting at $199. The keyboard is scheduled to ship (worldwide) from January 2023.
Note that this is not an official LEGO product and is actually made by a third party. I've asked some of my mechanical keyboard enthusiast friends and they're convinced that MelGeek is a pretty good brand in this space, despite the pricier price tag and their solid reputation for custom keyboards.
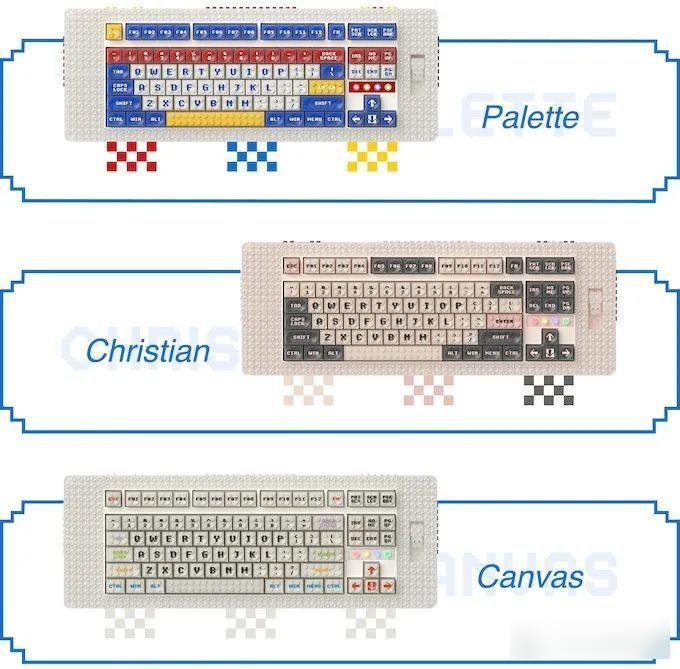
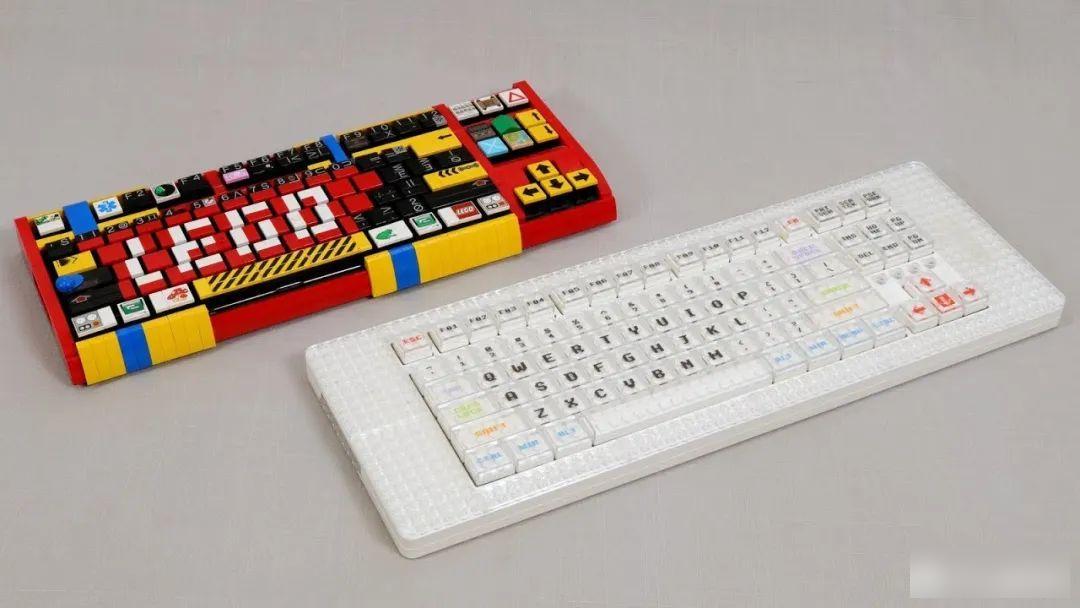
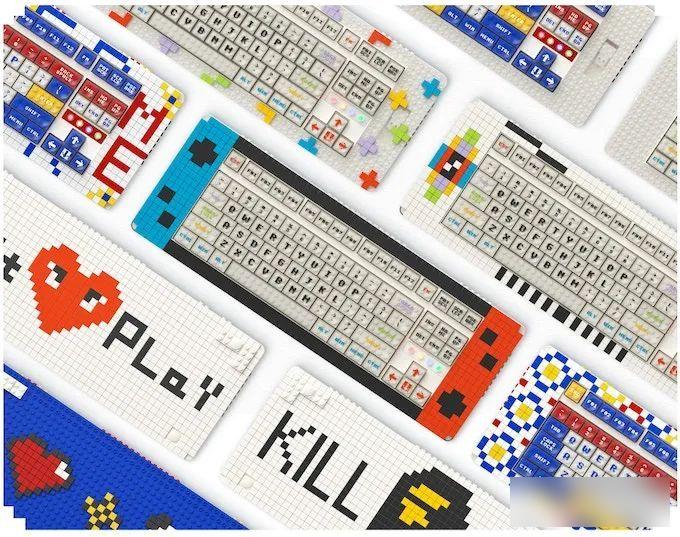
The keyboard is available in 3 color design options – Palette, Christian and Canvas, which also offer very different experiences, with Palette being a louder, toy-like design with red, blue and yellow key profiles. Christian has a softer, retro monochrome look, while Canvas, as the name suggests, is a blank canvas for decoration and is slightly more colorful and whimsical.
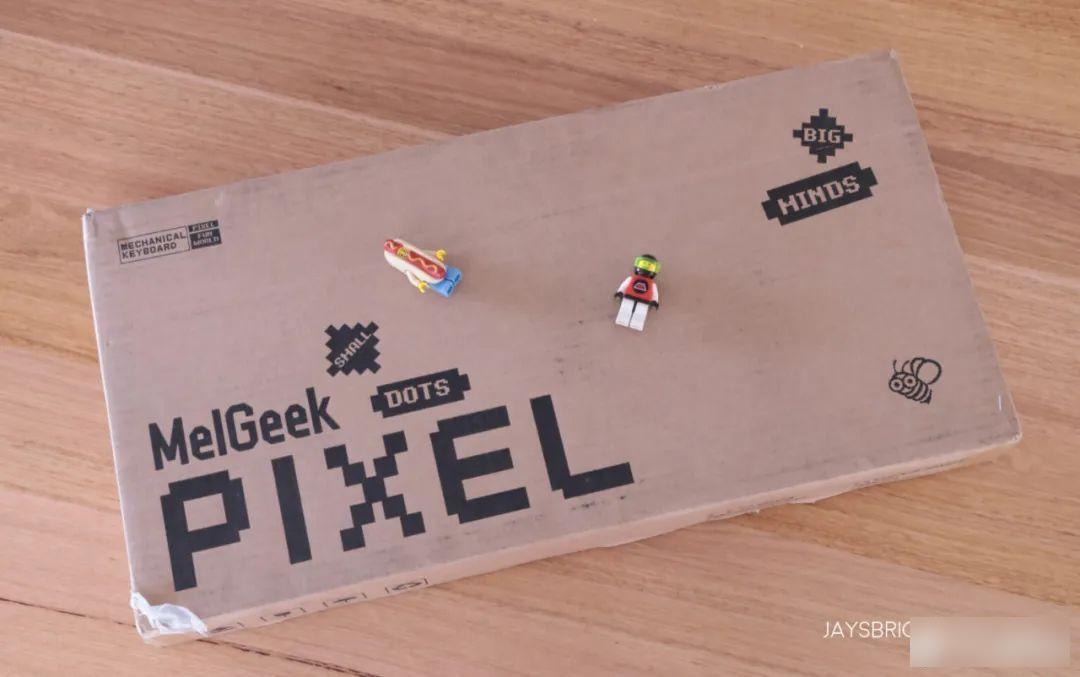
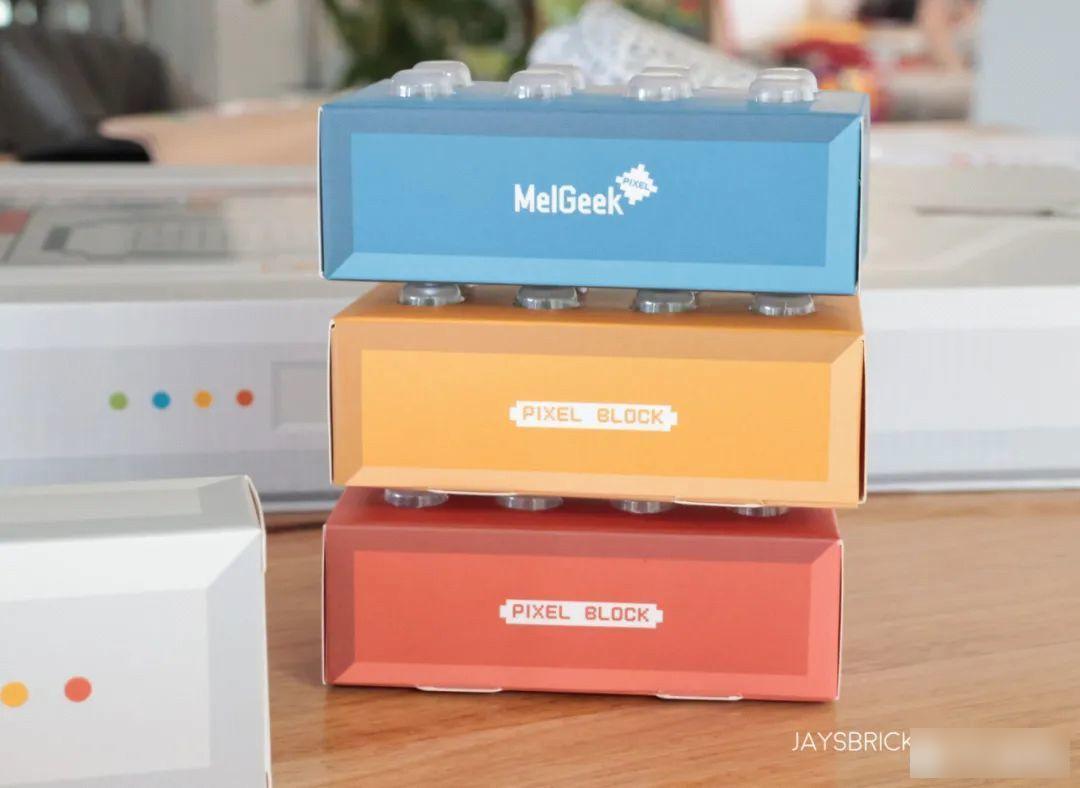
jaysbrickblog got the version of Christian that will be featured in this review. This is a box in cardboard. The first impression of the packaging box is very good, the quality and overall presentation make people have a good sense of expectation for the contents inside.

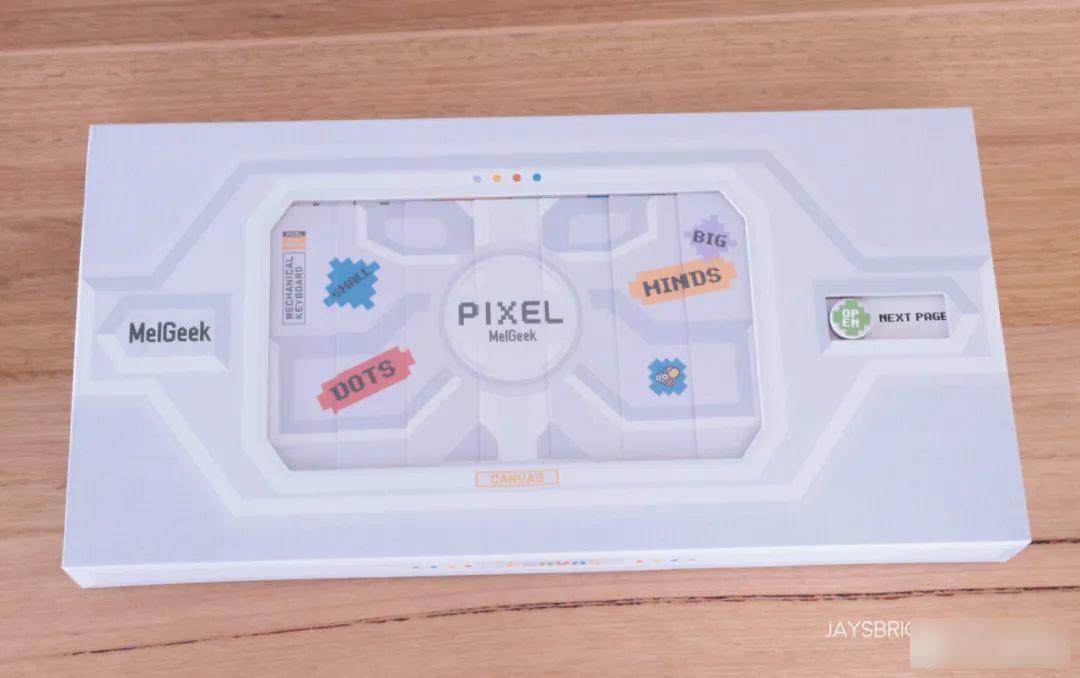
Oh, and on the cover, there's a little button that slides... through this sliding mechanism to toggle the graphics in the middle of the box. It reveals some fun pixel art-inspired designs that can be used as inspiration for your own creative designs to customize your Pixel.
It's a really fun little interactive experience, and while it doesn't feel entirely necessary, a lot of people do appreciate small rewards like this.

This is the back of the box. The box is a clamshell box with some magnets holding the lid down. Open it to reveal the paper, which also doubles as an instruction booklet.

There is also a Chinese description on the paper, so there is a high probability that it is produced in China? The instructions are fairly straightforward and include steps on how to sync the keyboard connection to the computer, what the LED lights mean, and how to toggle the RGB lighting mode.
Below is what greets you when you take that paper away. The keyboard is inside the plastic sleeve and there are these smaller colored boxes in their own recessed parts at the bottom of the box.

There's an accessory box, as well as these colorful "pixel block" boxes.

In the accessory box is this USB-C cable with bricks on each end of its connector. The pellets work a bit, but they snap a little too tight - to place parts on them, you have to use a fair amount of force (tight), which doesn't work very well for minifigures.
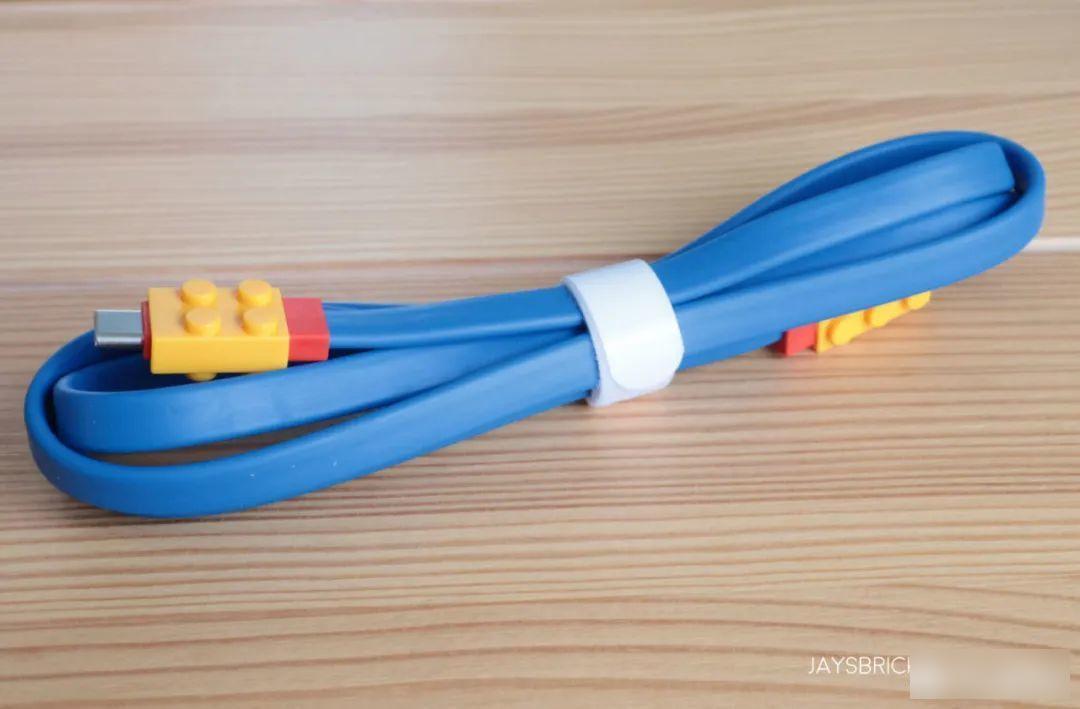
Still, this data cable is very convenient, I like the color and design of this cable, and can consider this cable for my own personal use. Probably my favorite thing in the whole package!
The following picture shows other accessories in the colorful box, some building block parts, and rubber feet for the keyboard, keycap puller and USB dongle.
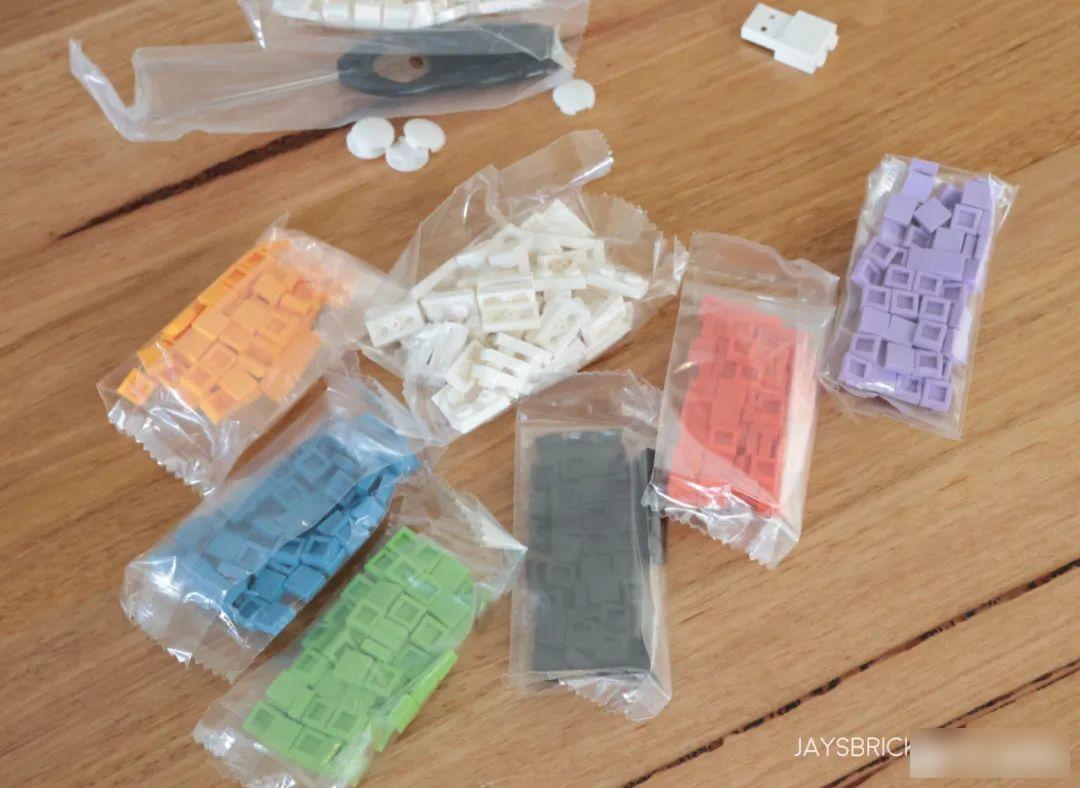
The parts are these colorful 1×1 glossy parts bricks and 2×1 plastic bags for the glossy parts. These are not LEGO parts and I don't use any non-LEGO parts so I just put them aside.

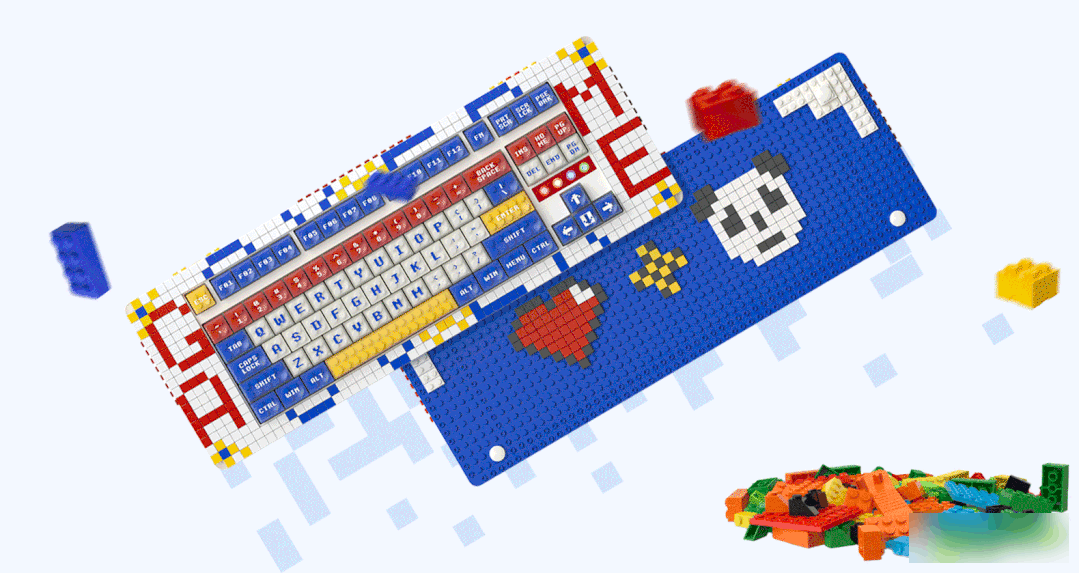
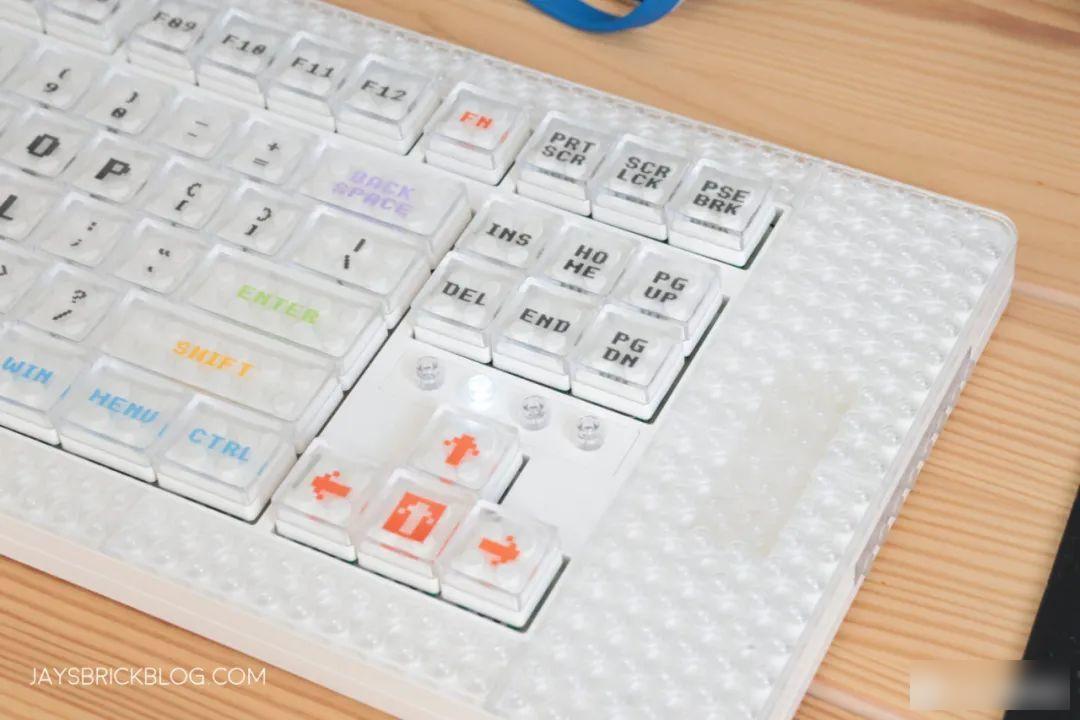
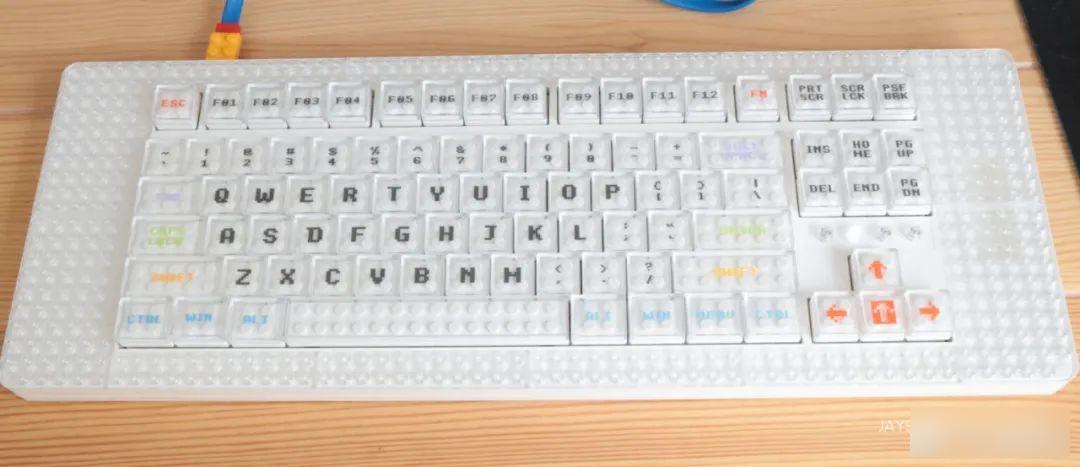
Check out the MelGeek Pixel! It's a fairly large keyboard, measuring around 45cm, with plenty of extra room around the edges for LEGO parts. It's an incomplete keyboard without a number pad, which may not be to some people's liking.

Connecting the Pixel to my computer is relatively straightforward, and you can use a USB dongle, Bluetooth, or a wired connection. Since this is the Canvas version, it looks very minimalistic and simple, but you can customize it to your liking, which we'll cover later.
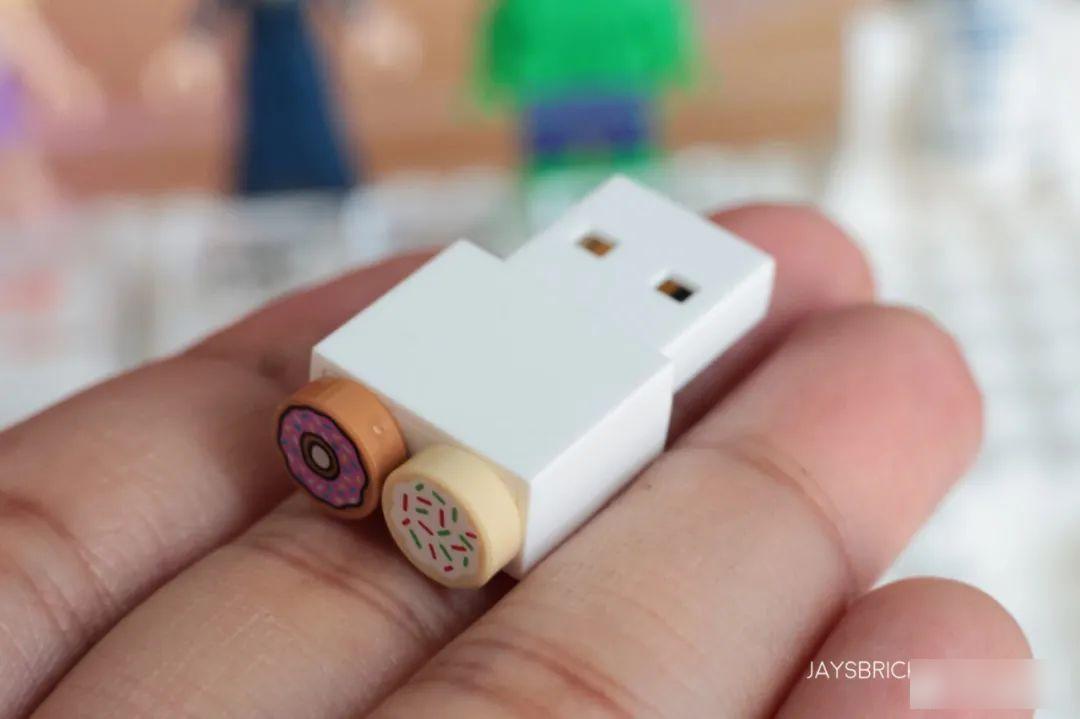
By the way, look at this USB dongle, it also has 2 LEGO brick positions on the end that can be decorated!
There's also a cute little recess on the right side of the keyboard where you can safely store the dongle for safekeeping.

Since the keyboard is not an official product of the LEGO Group, but only produced by a third party, there is no word "LEGO" on the protruding particles.
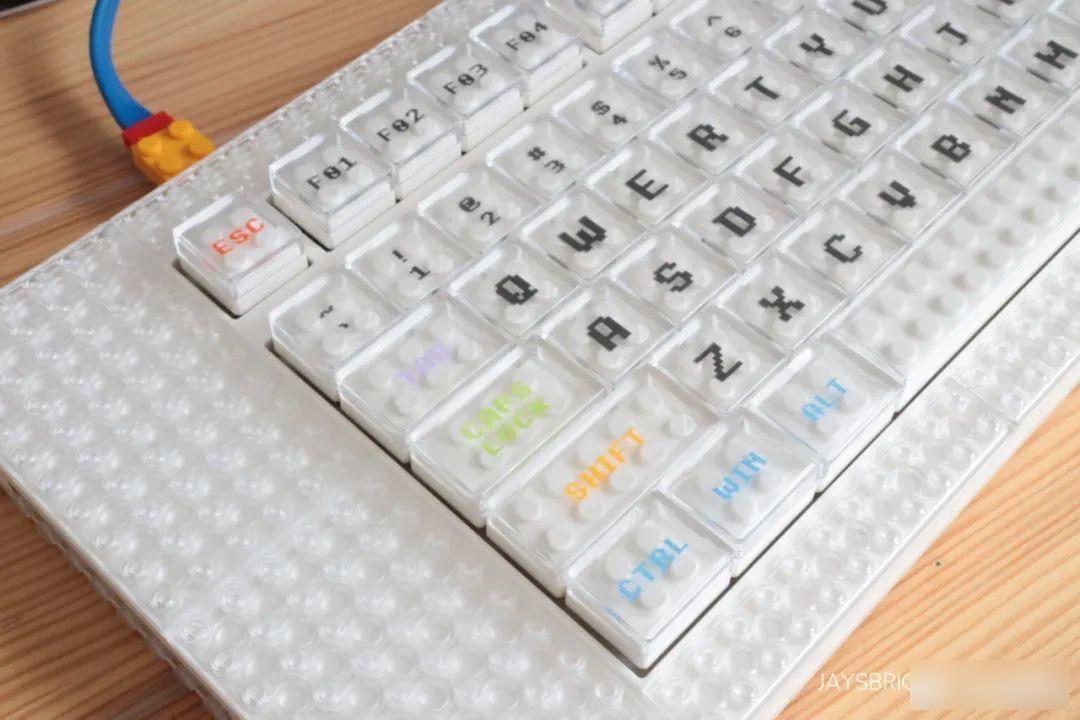
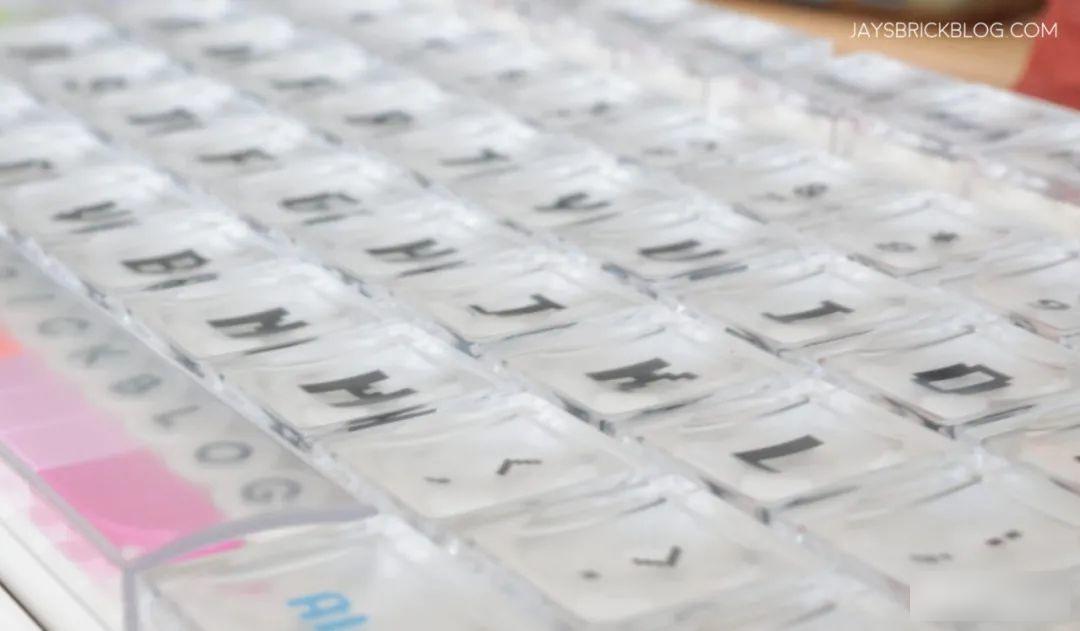
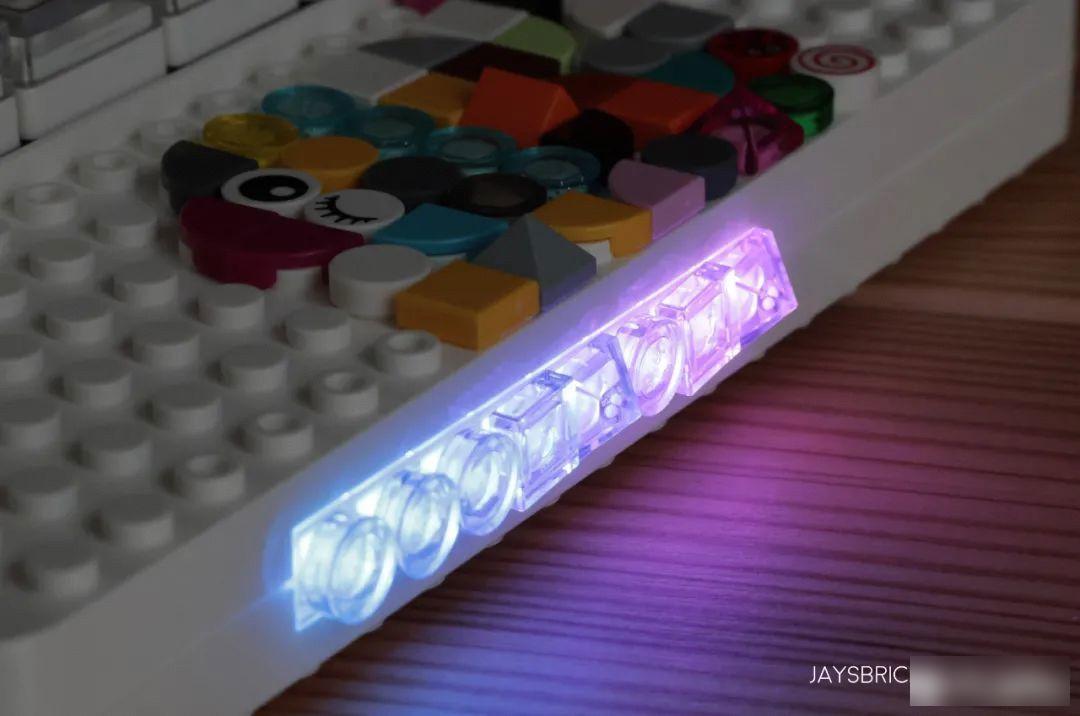
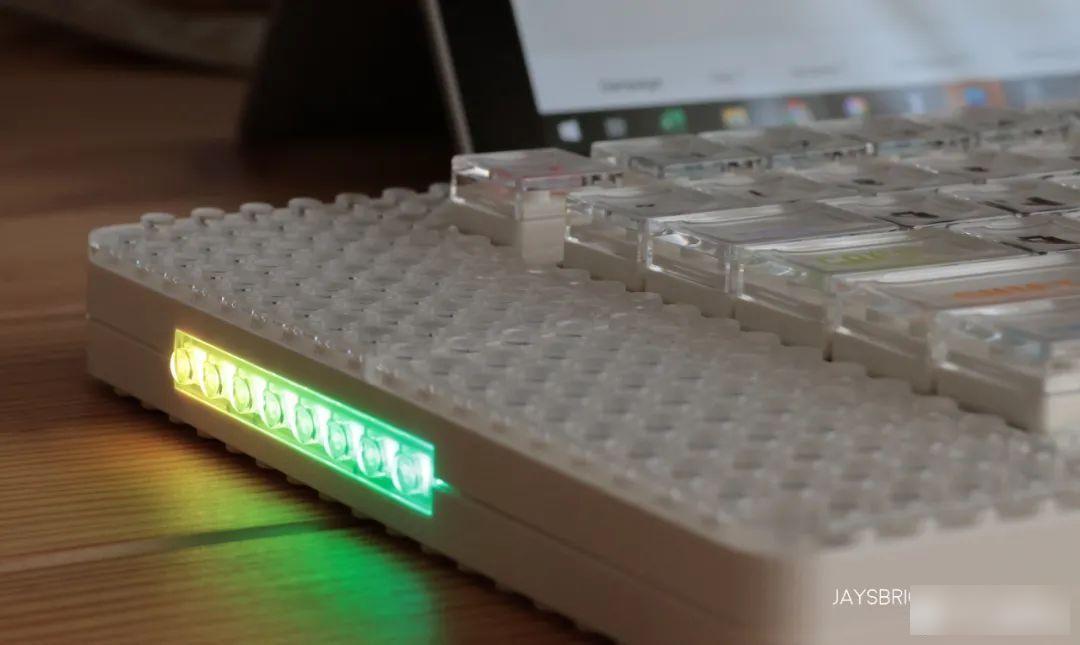
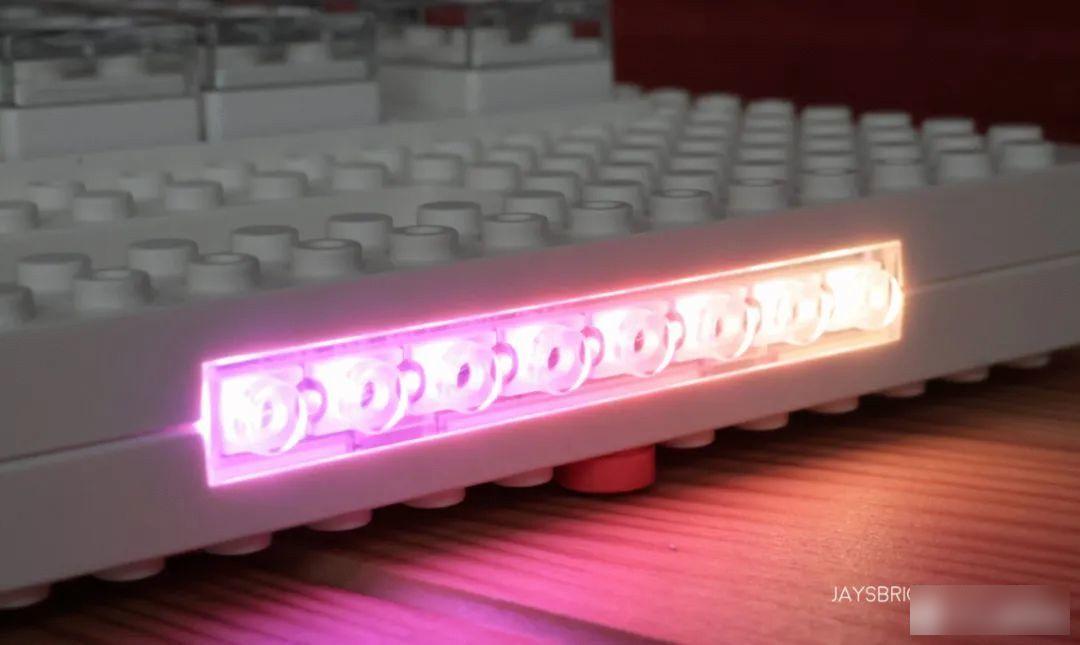
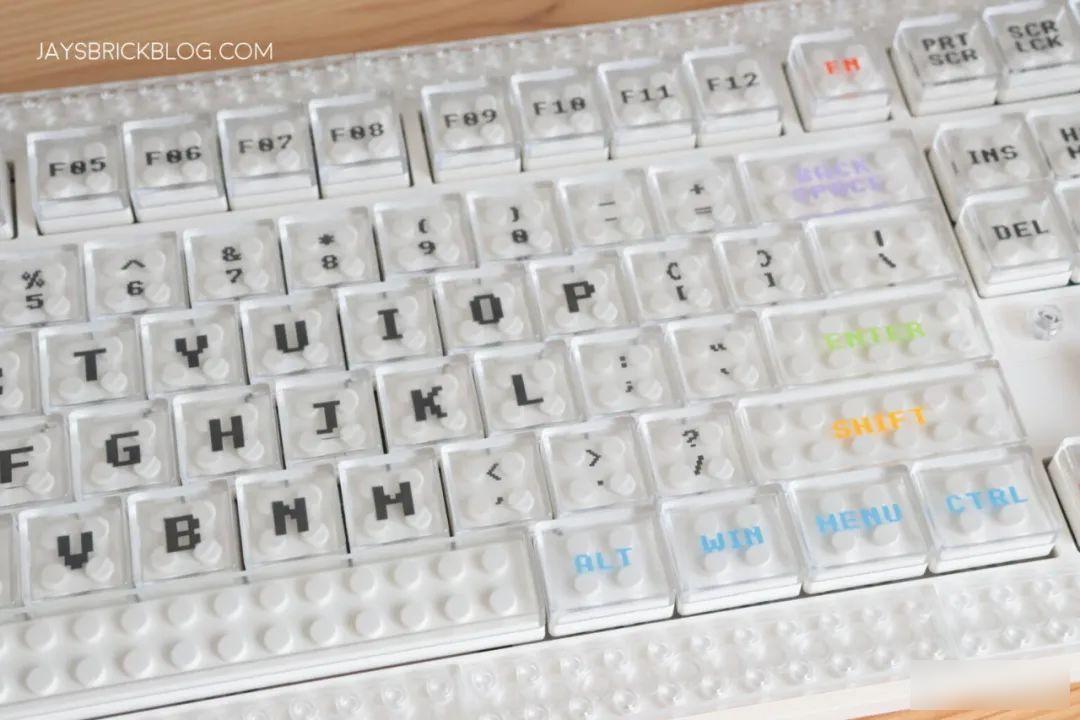
Below are the details of the keyboard and some keys. There is a transparent plate around the edge of the keyboard, and if you look at the keys, you will also notice that the keycaps are transparent, and they also have LEGO particles under them, decorating almost every part with the LEGO keyboard.
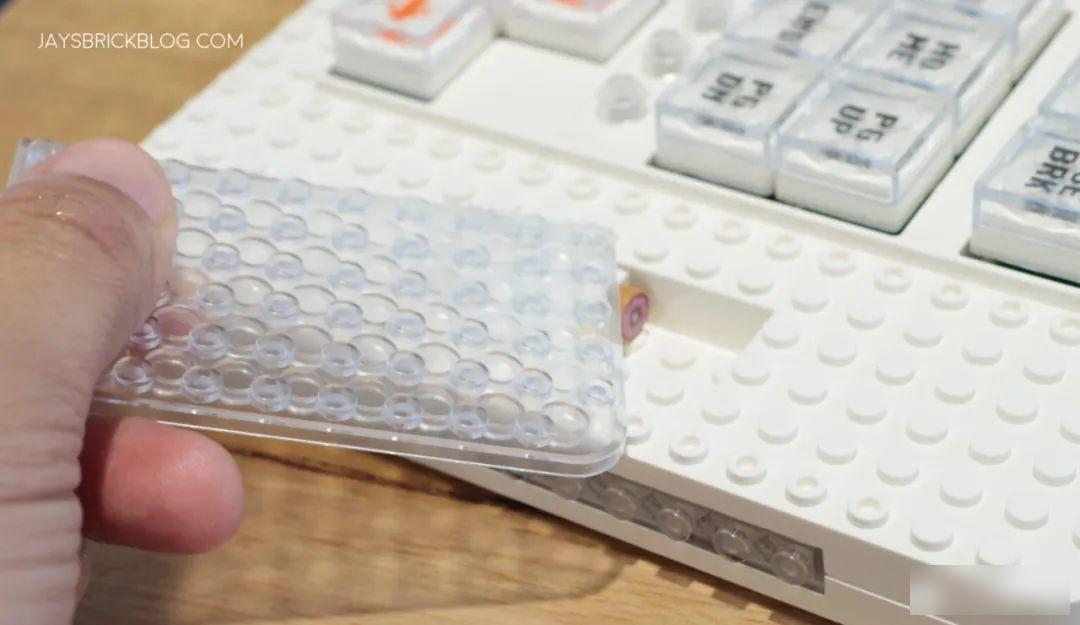
Below is a clear plate that can be easily removed. You can build on white base or clear board.

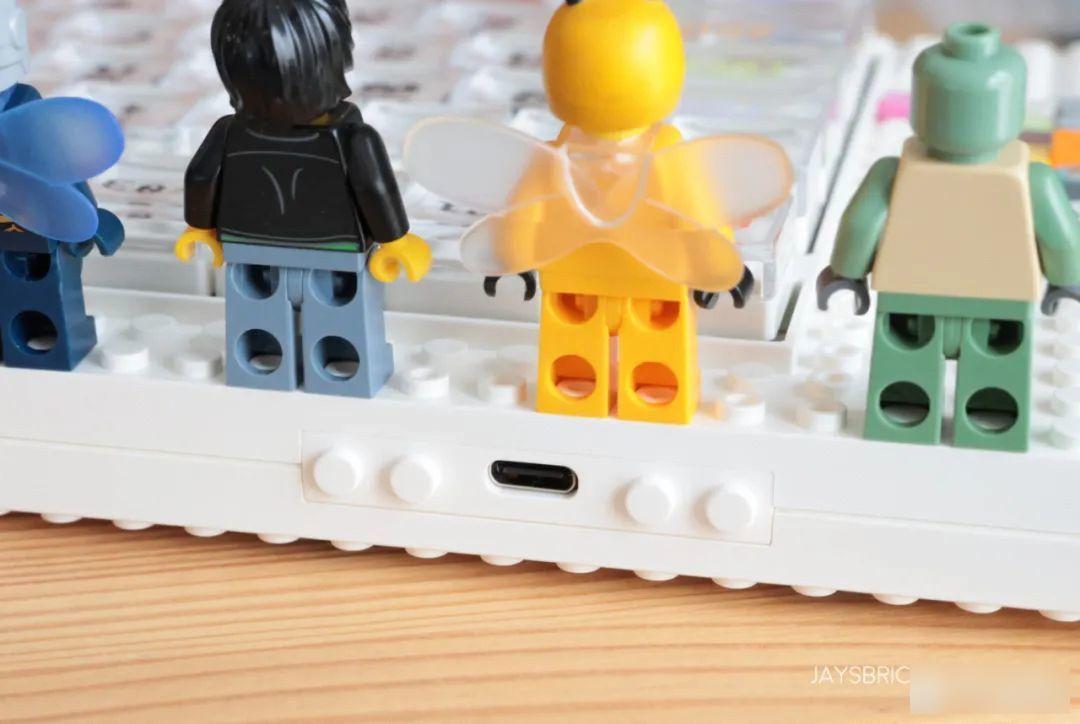
This is the back of the keyboard where you can better see and understand the USB-C port, as well as the switch to toggle between the different modes. I appreciate that there are LEGO bricks, you can of course attach LEGO bricks to it.
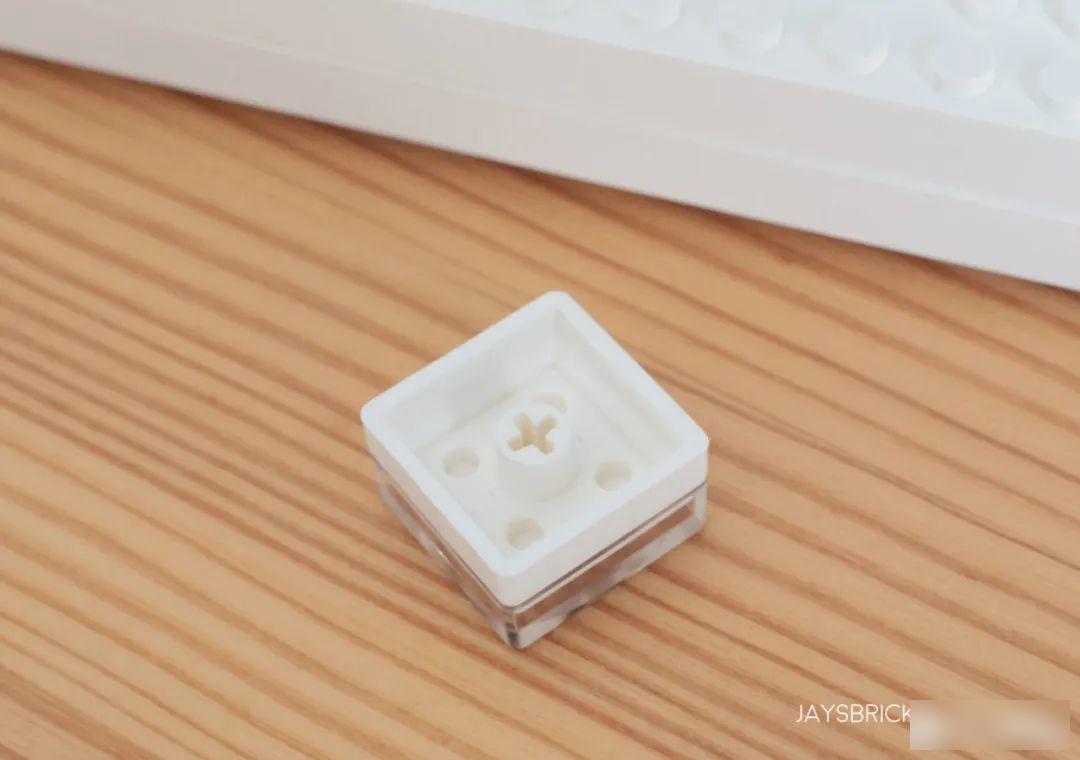
The keycaps are really interesting because apart from the ones with the 2×2 sized LEGO pieces, they have a clear case on them, and on the white keycaps you can decorate with LEGO parts. You can use them like crazy, but if you don't want to, you can also cover them with a clear case, and they will protect your fingertips.
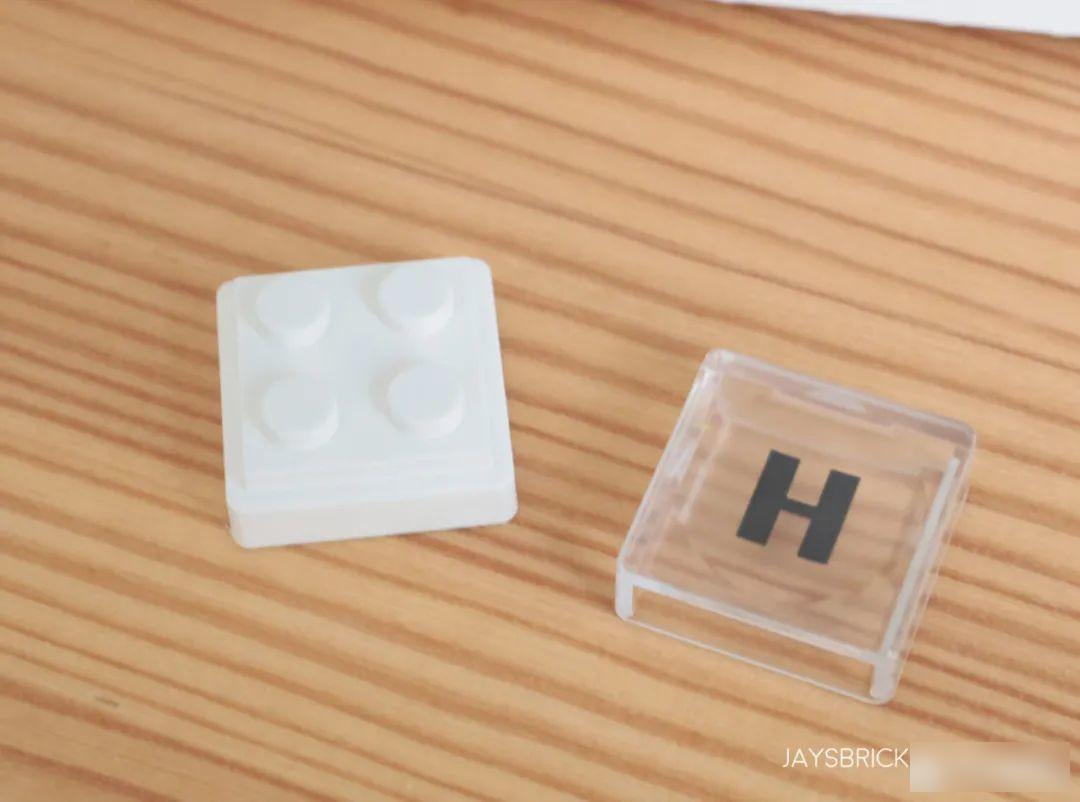
This is the bottom of the key, the classic cross-axis keycap, which means we can replace other keycaps as well.
This is the key switch on the keyboard, is this a blue switch?

So, I'm not one to use mechanical keyboards a lot, this is actually my first (I considered dabbling in...but LEGO is my main hobby and I'm not allowed to burn any more money Hobbies) I'm excited to try. The Kaihl keyswitches used by the MelGeek Pixel, these switches have a maximum travel distance of 3.9mm and are designed to provide a tactile feel and a soft sound.
Yep, in case you're wondering, I only type with my index finger. That's how I learned to type, and I'm really good at it. Since this is a Canvas keyboard, the goal here is to decorate and personalize it as much as possible.

Being able to decorate all the slots with tiles or studs is really fascinating and kind of cool, we didn't manage to fit LEGO pieces in all the slots, but you really can.

The keyboard can also be used as-is without the clear cap, and you can really make it look like a Lego keyboard without the case. If you do, hopefully you've committed the keyboard layout to muscle memory, but that's just one of the ways you can customize and really make this keyboard your own.
I figured if I had enough light panels it would look great with multi-color light panels on all the keys.
The picture above is a close look at the keycaps. Oh, and did I mention you can customize the RGB too, and decorate with clear LEGO bricks?
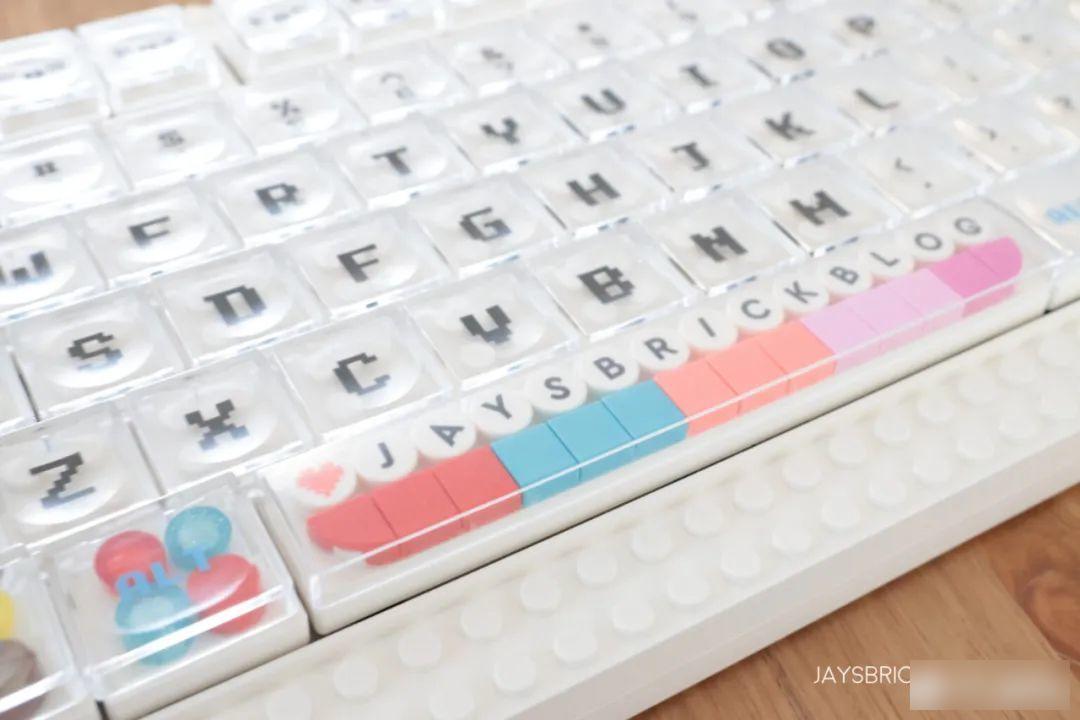
For me, the large canvas sits at the bottom of the keyboard, a huge void that can be used for decoration. This is my handiwork! The font is adapted from Mark Anderson, who submitted and designed the LEGO DNA font for New Elementary's Alphabet Competition.
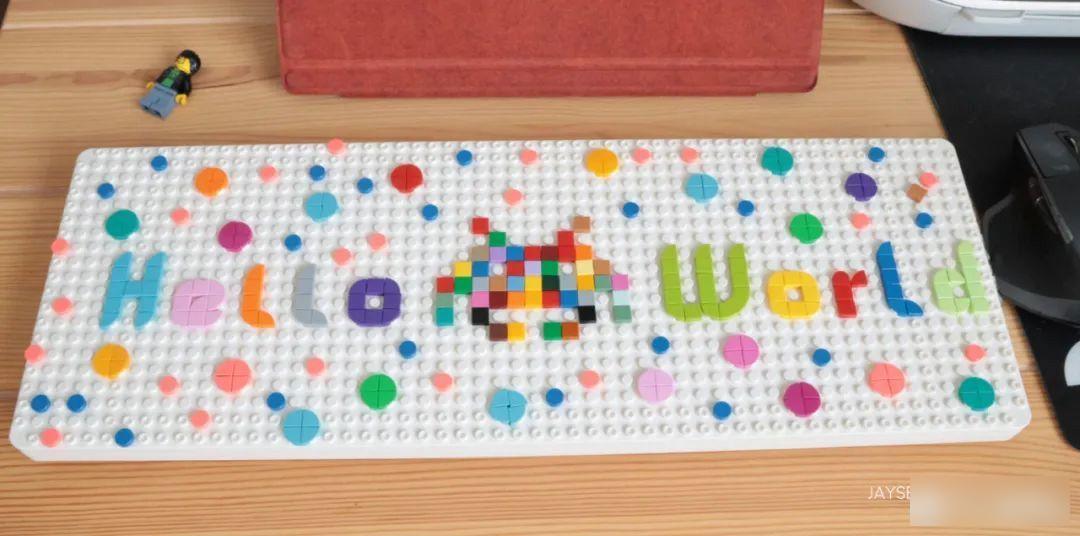
It's actually quite interesting, I don't consider myself an artist, but I'm very happy with my work. This is probably the most intensive MOC I've done all year (don't laugh).
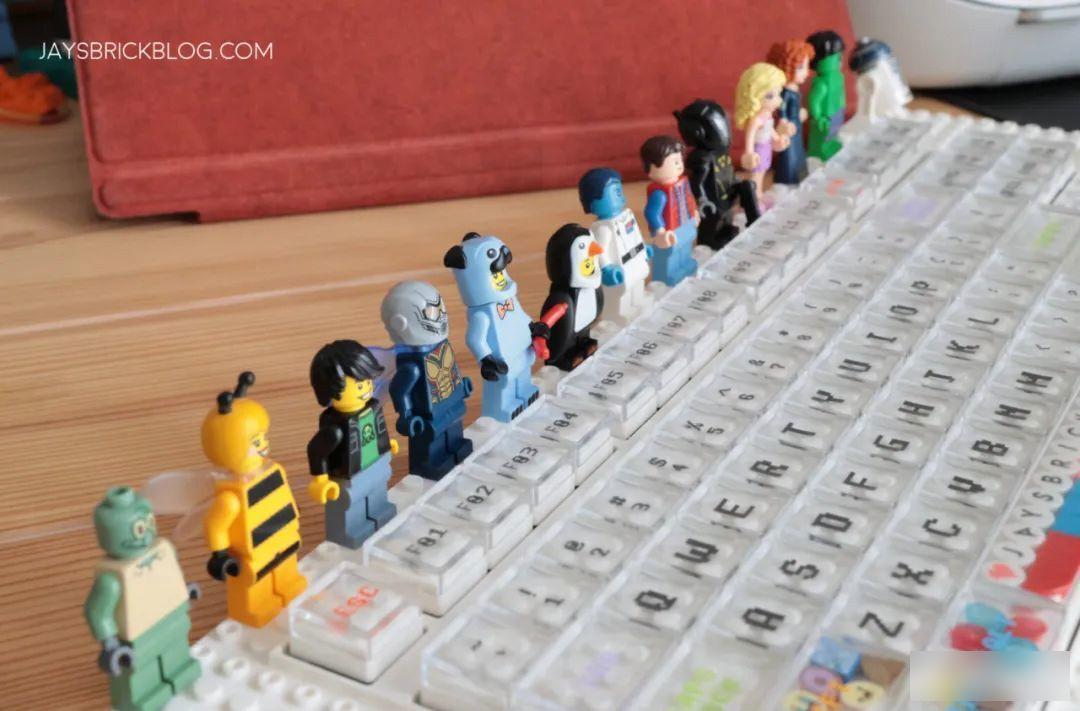
On a more practical level, I think my favorite thing about the MelGeek Pixel is the ability to display minifigures on it. Putting them above the function keys is the sweet spot because they're out of the way and you can't accidentally knock them over, plus they look good. The pellets on which the minifigure rests on the keyboard have a decent bite, they're a little loose in some cases, but overall they're pretty solid.
I really like the MelGeek Pixel, even though it's not an official LEGO product, I think it's pretty good quality and most importantly doesn't feel cheap. They took the LEGO essence of creativity and DIY-ness to heart, and built that into the overall design of the Pixel Mechanical Keyboard in a way that I think LEGO would appreciate.

For Canvas models, this is really a good fit if you enjoy designing and customizing with LEGO Dots, because as long as you have enough tiles and elements to realize your vision, there is plenty of room to make your own.
Unfortunately, this was my first experience with mechanical keyboards, and the experience proved they weren't for me and my typing style. I prefer chiclet-style keys, so it didn't quite work for me.
如果你习惯了Macbook/Mac/较浅的按键,可以先出去尝试在机械键盘上打字,看看你是否能适应它。

You can obviously swap out the switches and keycaps to get closer to regular chocolate keys, but mechanical keyboards are another hobby and it took me some time to work out what I needed to make it something I use to type on.
That said, if you like mechanical keyboards and Lego bricks (how can you afford both hobbies in the first place??), this might be something worth checking out, especially if you have a design you like, or are curious about how Customize your own MelGeek Pixel.
As Christmas approaches, or if you know someone who loves mechanical keyboards, this could be a really fun gift for them, as it blends the two interests nicely.
I do have some ergonomic issues, especially if you're the kind of person who likes to rest your palms on the keyboard because it's tall and the hard abs plastic with the studs isn't for your palms to rest on The most comfortable thing, but again, this will depend on your typing style - mine floats in the air so it's none of my business.

Depending on the package type and options you choose on the MelGeek Pixel Kickstarter, the cost can add up quickly, especially if you choose multiple switches, keycaps, and cables. Another thing that's unfortunately missing is that the keyboard isn't backlit, which again is entirely a matter of personal preference, but RGB lighting customization is a nice consolation.
Overall, I really like what MelGeek has done with the Pixel, and fans of mechanical keyboards will also be happy to incorporate their LEGO hobby into their main hobby. If you're a LEGO fan and want a cool novelty keyboard, it's definitely unique, and if you're used to mechanical keyboards, you'll have a lot of fun customizing its look with LEGO sets.
*Data reference: jaysbrickblog
Factory Adress: No.11,FengpingRoad