Unboxing an old plastic bowl keyboard
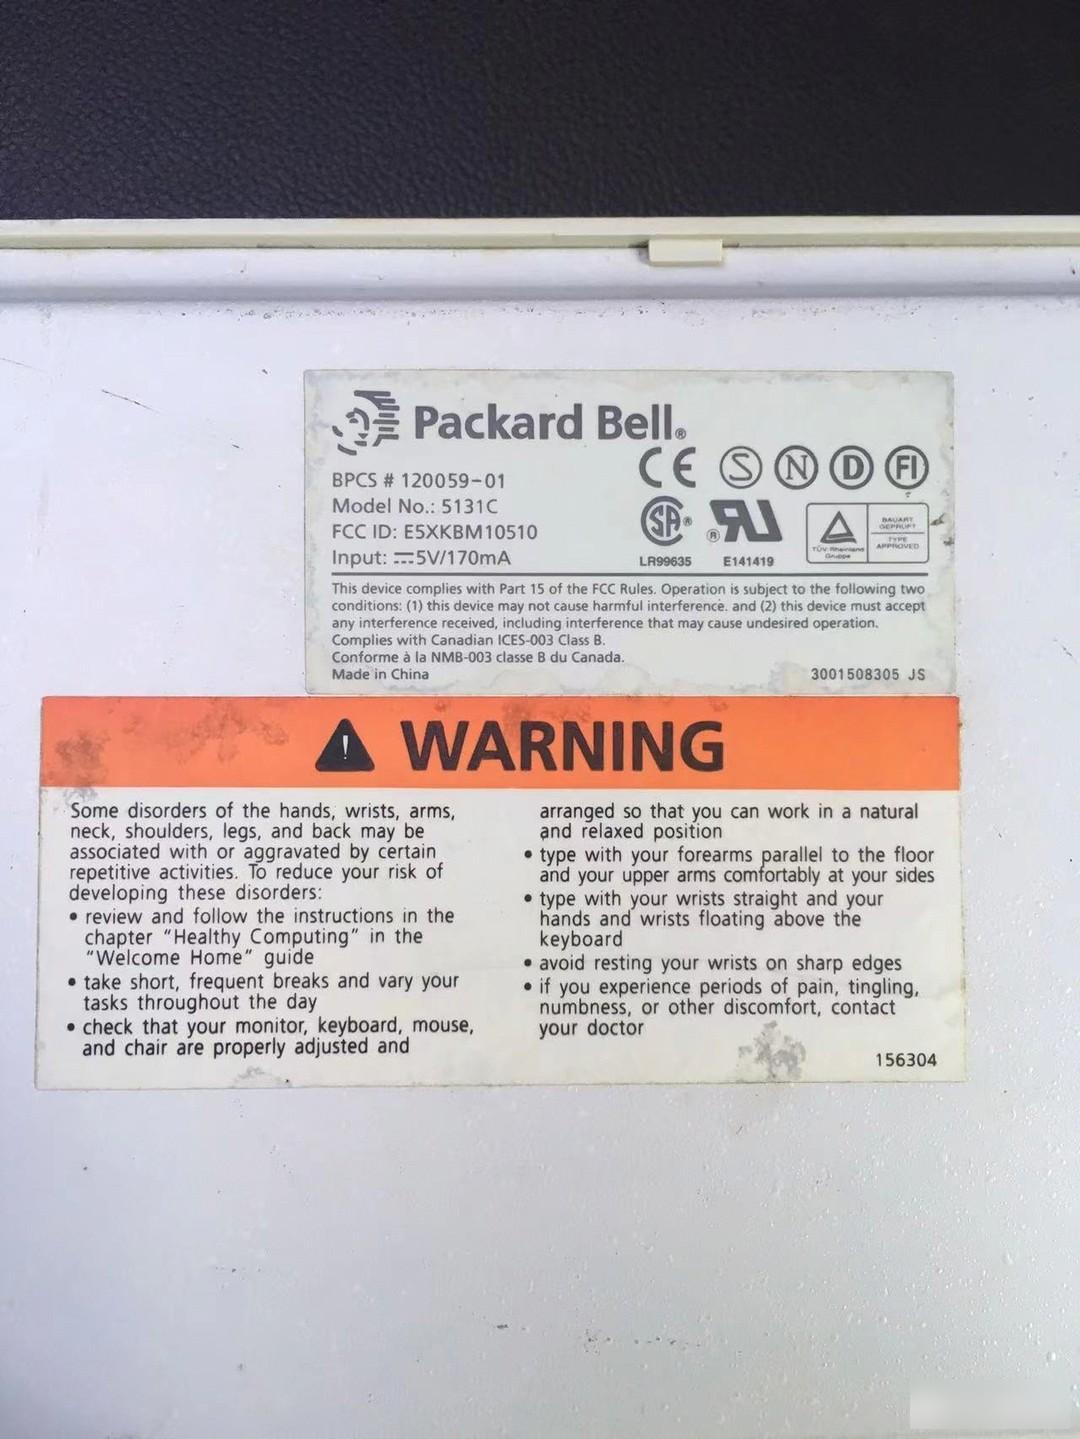
One day, while wandering in the seafood market, I found a seller hanging out an old Packard Bell keyboard, model 5131C. After checking, this keyboard belongs to the BTC 51 series, and it is a BTC dome with slider (BTC plastic bowl with a slider) structure. Foreigners have very good evaluations of its feel. Since the price is not expensive, and the quality of the seller's real photos is not bad, I took a photo and used it as a toy.
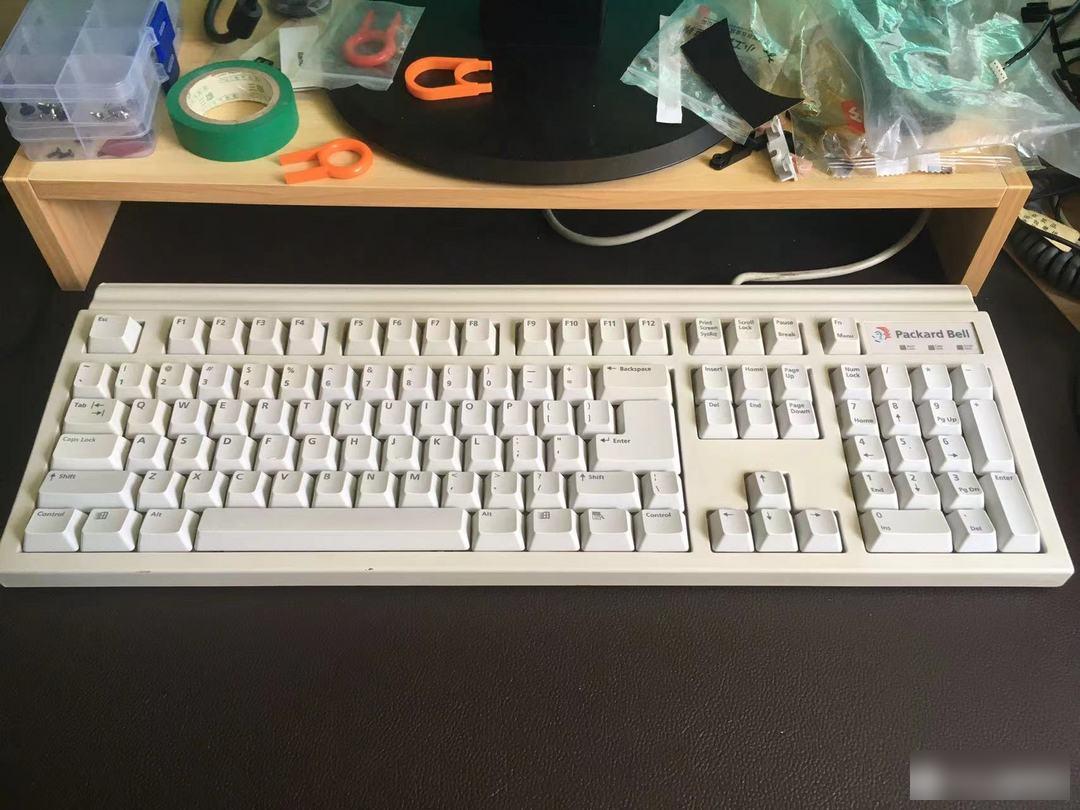
It took 2 days for the courier to arrive. It's dirty, but overall it's in good condition. The cable is a PS2 socket, and most of the current computers can still be connected. The keyboard is a European-style layout with 104+1 large carriage returns. Except that the backslash is weird to the right of the right shift, the other layouts are similar to modern keyboards.

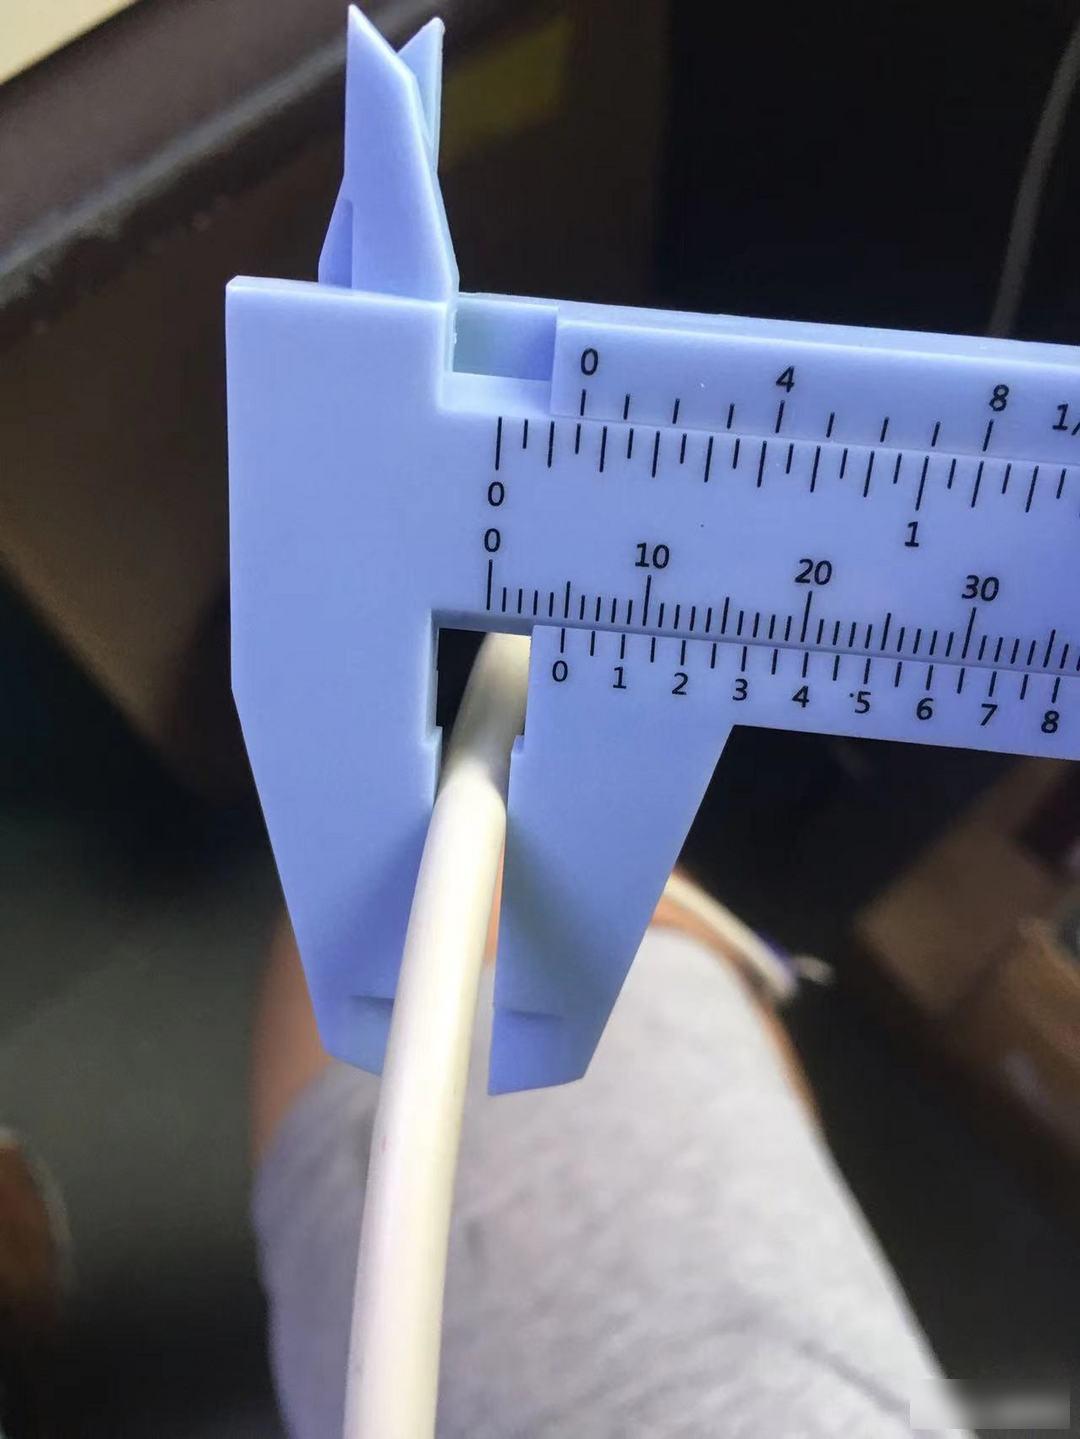
Wanted to test first to see if this keyboard would work. Simply wipe off the dust on the surface with a damp cloth, and you are ready to test on the machine. The cable of this keyboard is really nice, thick and long. Just as an old keyboard, it is a pity that it is not made into a spring wire. I measured it with a caliper, and the wire diameter is 5mm. This thickness can kill many modern keyboards in seconds. The length is not detailed, but it is longer than my arms when straightened, it is estimated to be about 2.1 meters

The bad point of the PS2 interface is that it cannot be hot-swapped. You have to turn off the computer, plug in the keyboard, and turn it on again. There is also a special reminder where the keyboard cable is close to the ps2 interface. The keyboard can only be installed after turning off the computer.
The test process went smoothly, and the Num light can be seen to be on as soon as it is turned on. Then use the keyboard keys on the webpage to test the software, and it is also fully triggered without any problems. Since there is nothing wrong with it, let's do a deep cleaning of it and explore the internal structure of this old antique by the way.
The bottom of the keyboard is a steel plate, and the upper part of the steel plate has two feet that can be opened to adjust the height of the keyboard. There are also two rubber pads on the lower part of the steel plate to protect the keyboard from being bumped during placement.

Marked as Made in China.
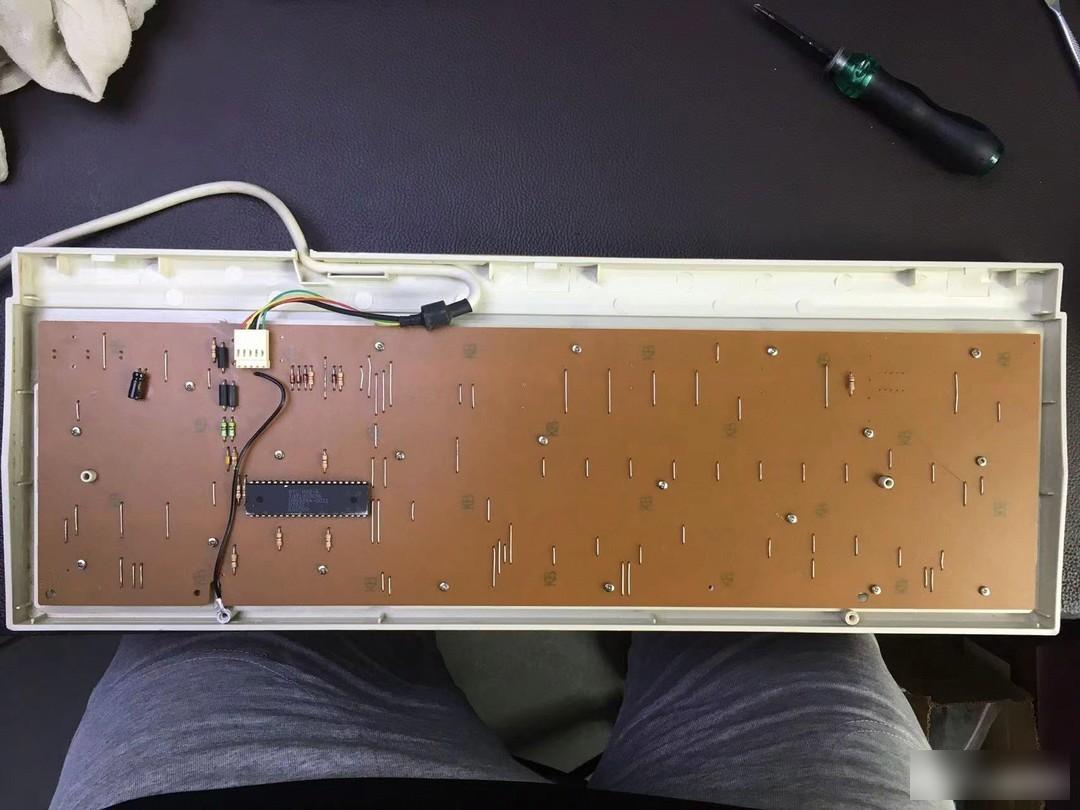
It is also very simple to disassemble the keyboard, just remove the two screws at the bottom of the steel plate, and the whole steel plate can be removed. Remove the steel plate and you can see the back of the PCB. The back of this pcb is very simple. There is a 5P socket for connecting the ps2 data cable, a main control chip, a few in-line components such as resistors and diodes, and a few metal wires. The whole pcb is fixed with the upper shell of the keyboard by more than a dozen screws.
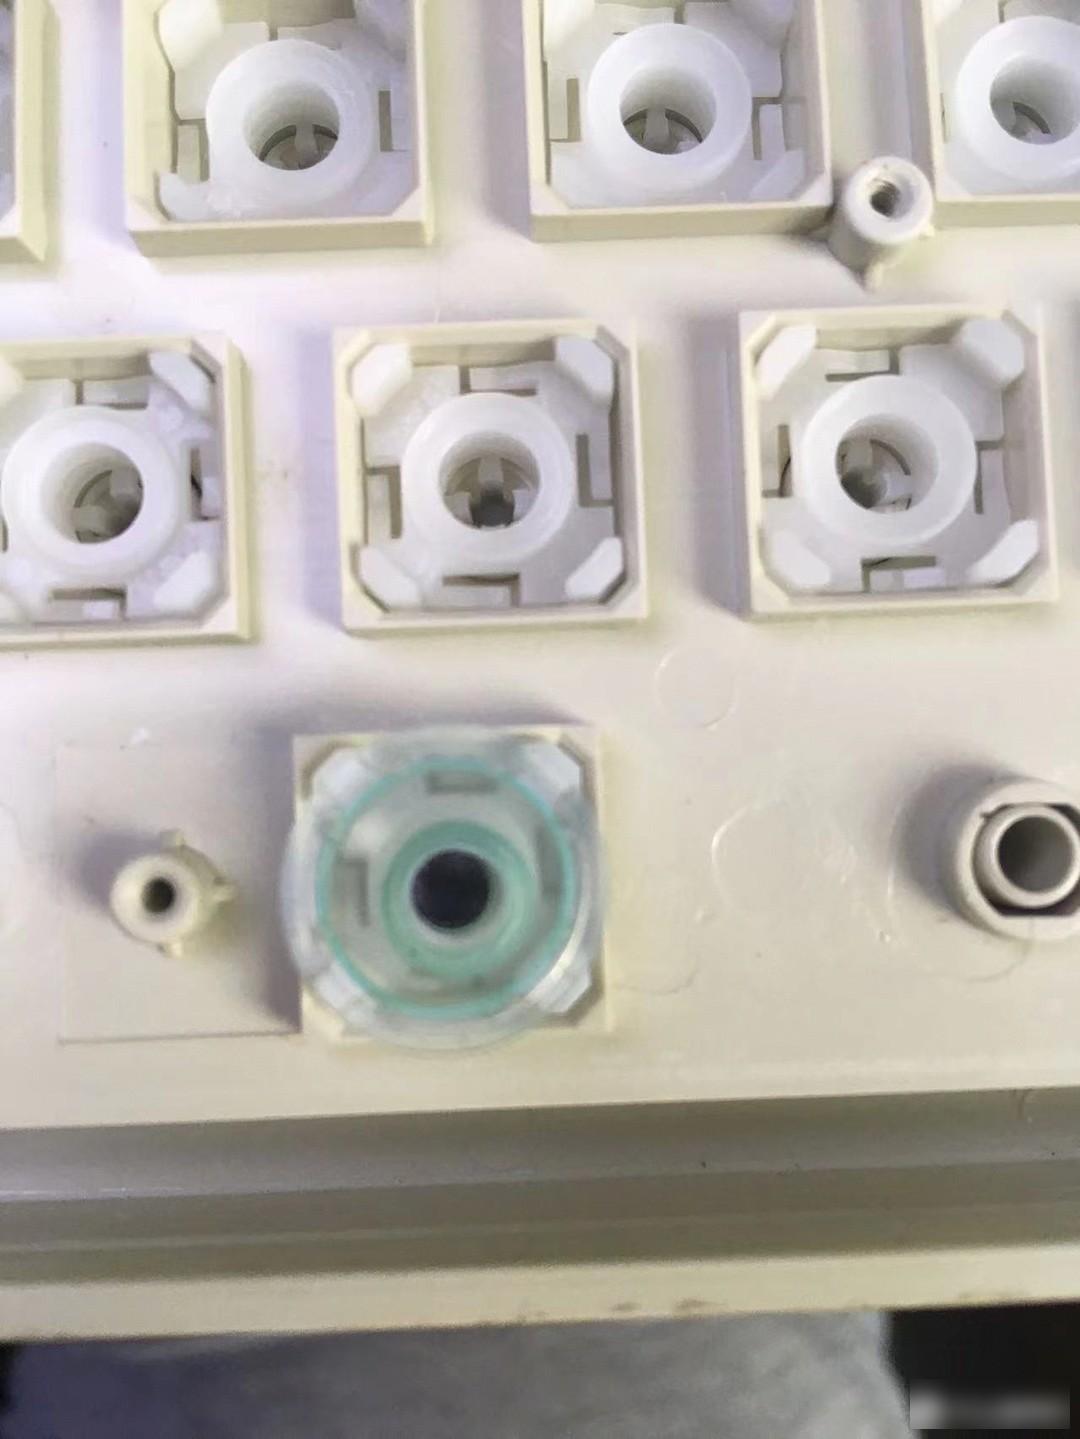
Continue to remove more than a dozen screws on the pcb to separate the pcb from other parts. It can be seen that there are many small plastic bowls on the top of the PCB. The small numeric keypad area, editing key area, Fn area and the main key area except the bottom row are all made of plastic bowls, and the bottom row of the main key area is a piece of plastic for each key. Separate glue bowl.
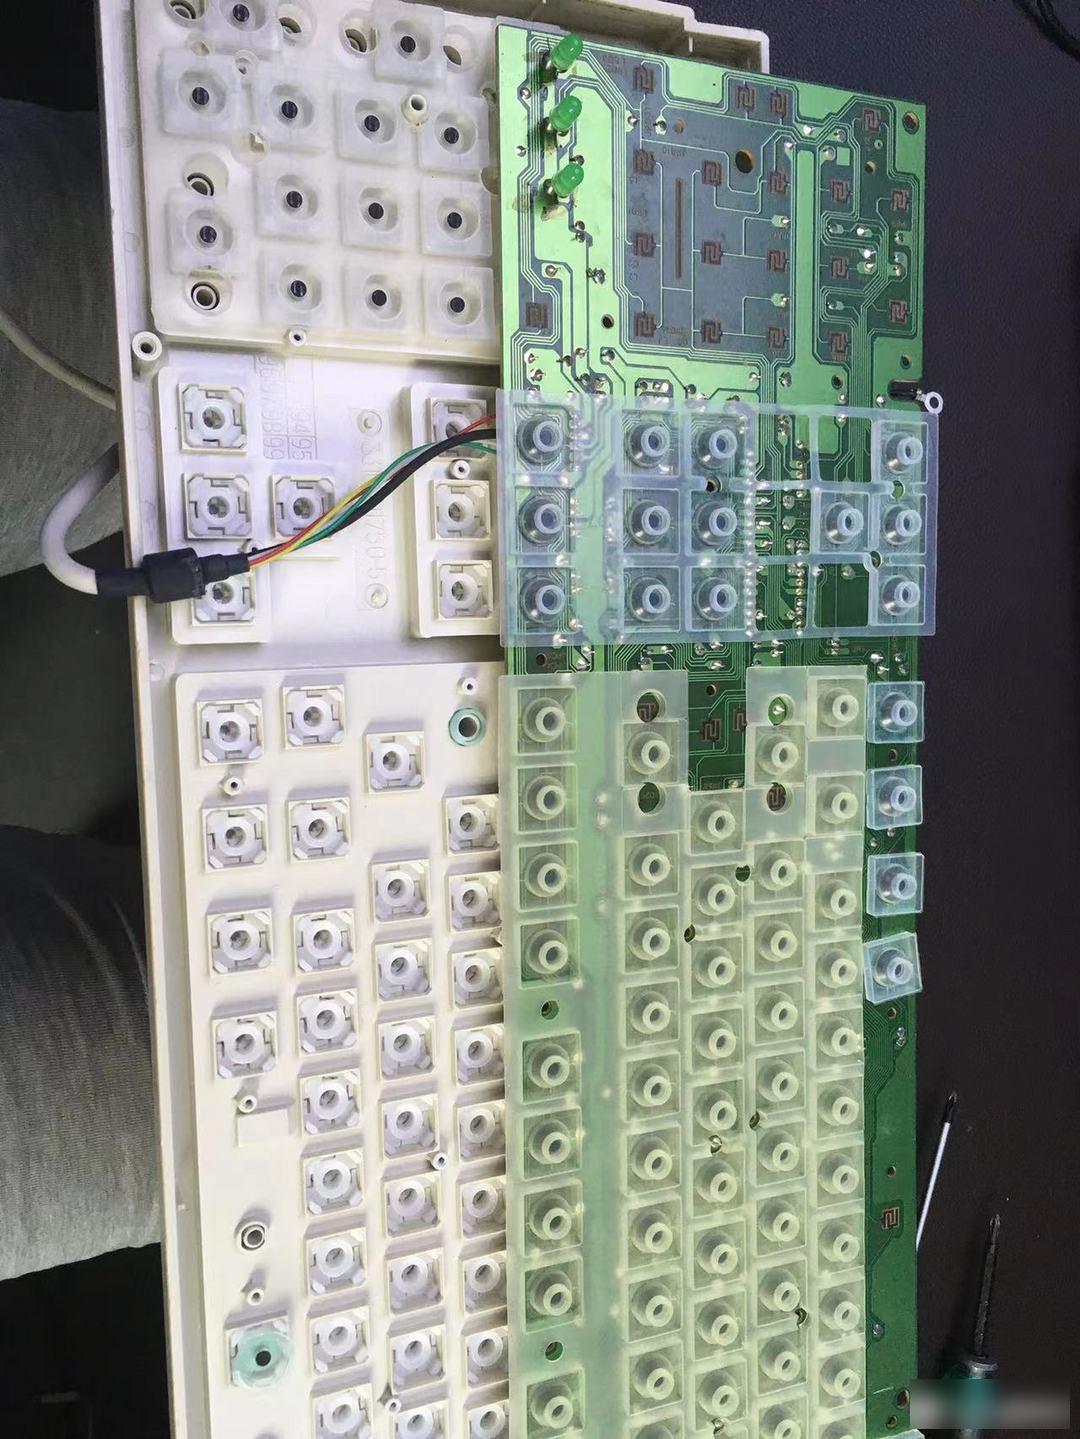
Interestingly, these plastic bowls are also divided into three colors. The main button area is milky white except for the bottom row. The rest of the keys are transparent except for the space. Spaces are transparent green. Maybe different colors of plastic bowls represent different rebounding forces?
Take a look at the pcb. There is a silk screen 9735 on it, does it mean that it was produced in the 35th week of 1997? I feel that it should be a product that was released in about this year. First of all, this keyboard has a win button, which must be a product that came out after win95 came out. Moreover, the keyboard does not have a usb interface, which became popular after 2000. Moreover, after 2000, membrane keyboards occupied the absolute king position, and other types of keyboards basically disappeared.
This is a single-layer pcb. If there are such complicated wiring as the keyboard on the single layer, once two sets of lines cross, only one set can be connected through "flying lines". This is why we saw some metal wires soldered on the back of the pcb earlier. Modern pcbs already have multi-layer printing technology to solve the problem of wiring conflicts, so the current keyboards rarely solder metal wires directly on pcbs.

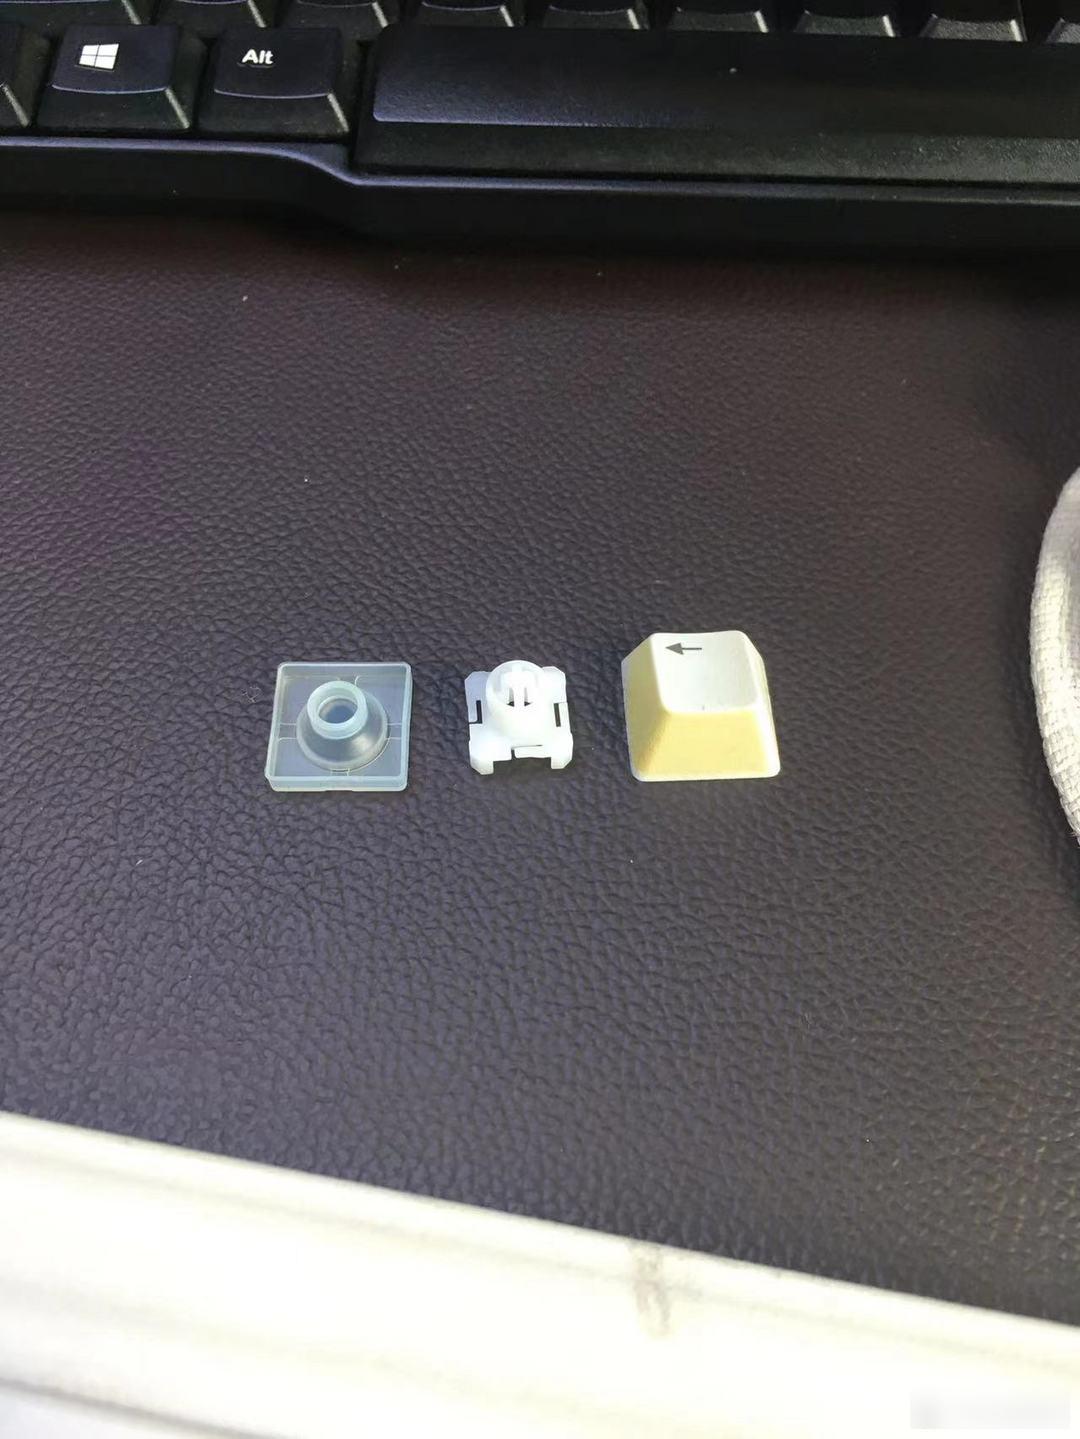
After observing the keycaps, sliders, plastic cups, pcb, etc., it is easy to understand the triggering principle of the keys. After pressing the button, press the rubber bowl through the slide bar, so that the black conductive rubber at the bottom of the rubber bowl contacts the pcb, and the row and column signal lines on the pcb are short-circuited to complete the trigger. This key trigger structure has been widely used in remote controllers so far, but it has not been used in computer keyboards for a long time.
The pcb and rubber bowl of the keyboard are very clean, and there is basically no dust, and some corners and corners can be wiped with a damp cloth. The keycaps and upper cover on the upper part of the keyboard are very dirty and need deep cleaning. Most keycaps can be removed with a mechanical keyboard cap puller. However, the combination between the keycap and the slider is too tight, and it takes a lot of force to pull it out. After pulling out the entire keyboard, my fingers were almost broken by the hat puller!
According to the information, the keycaps are laser-engraved ABS keycaps. The surface of the keycap has obvious rough and grainy feeling, which has a certain anti-slip effect. The font on the surface has basically not worn out after decades. However, the thickness of the inner wall of the keycap is average. The keycaps are the same as the keycaps of the current mx axis. They are all cross-shaped caps and can be installed on the mx axis.

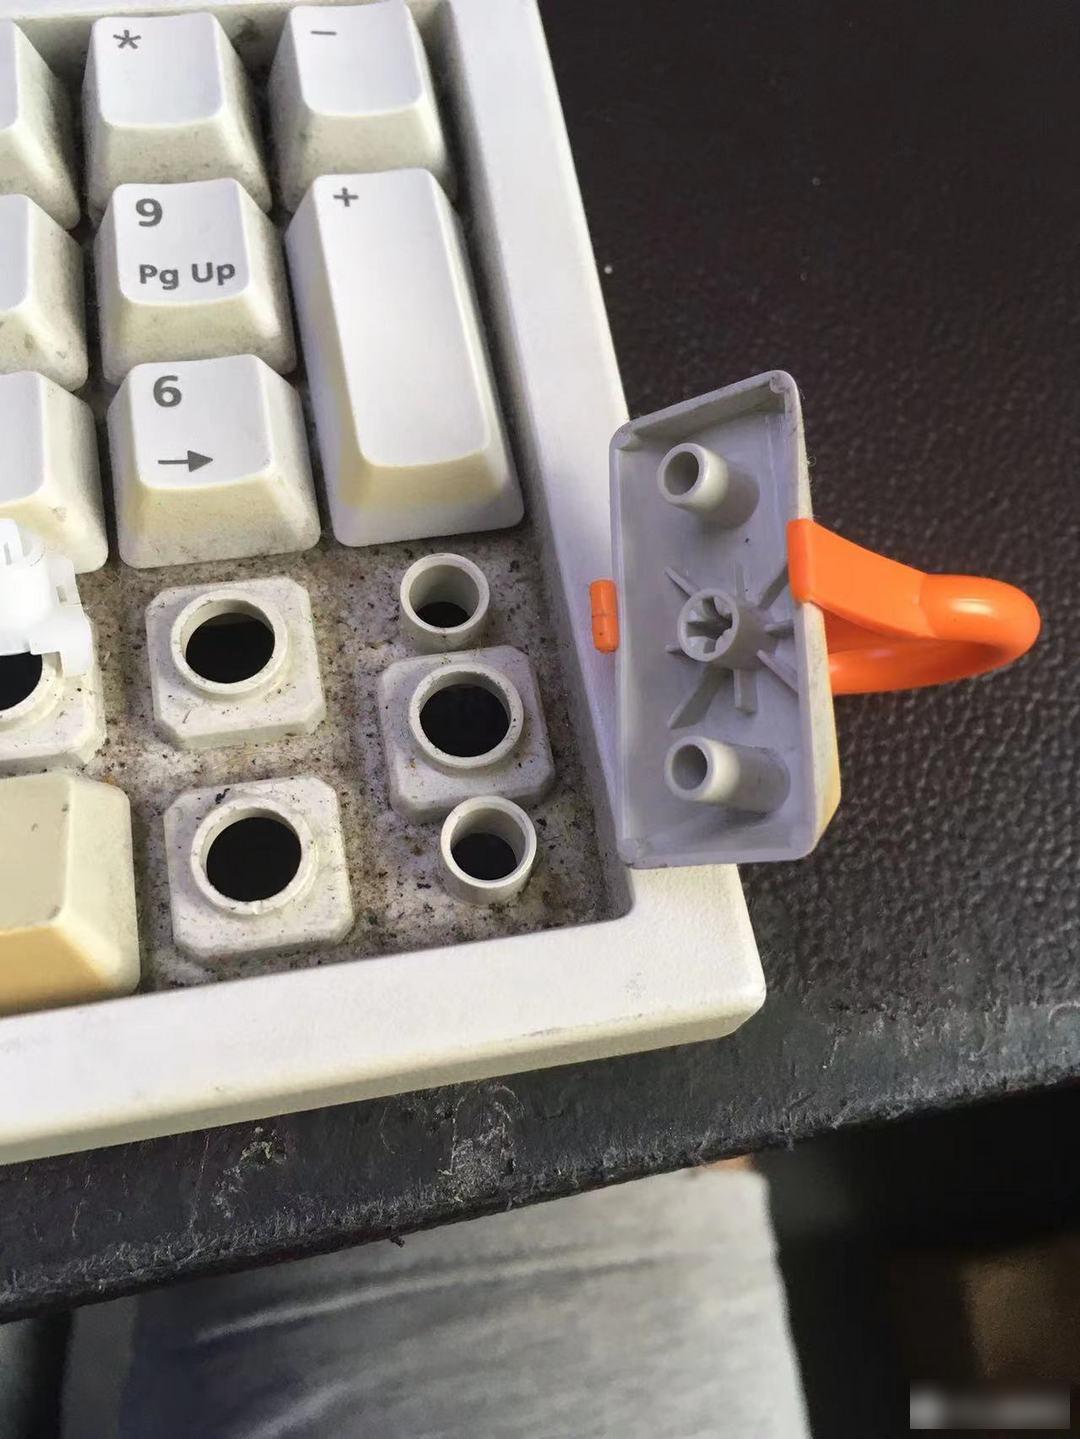
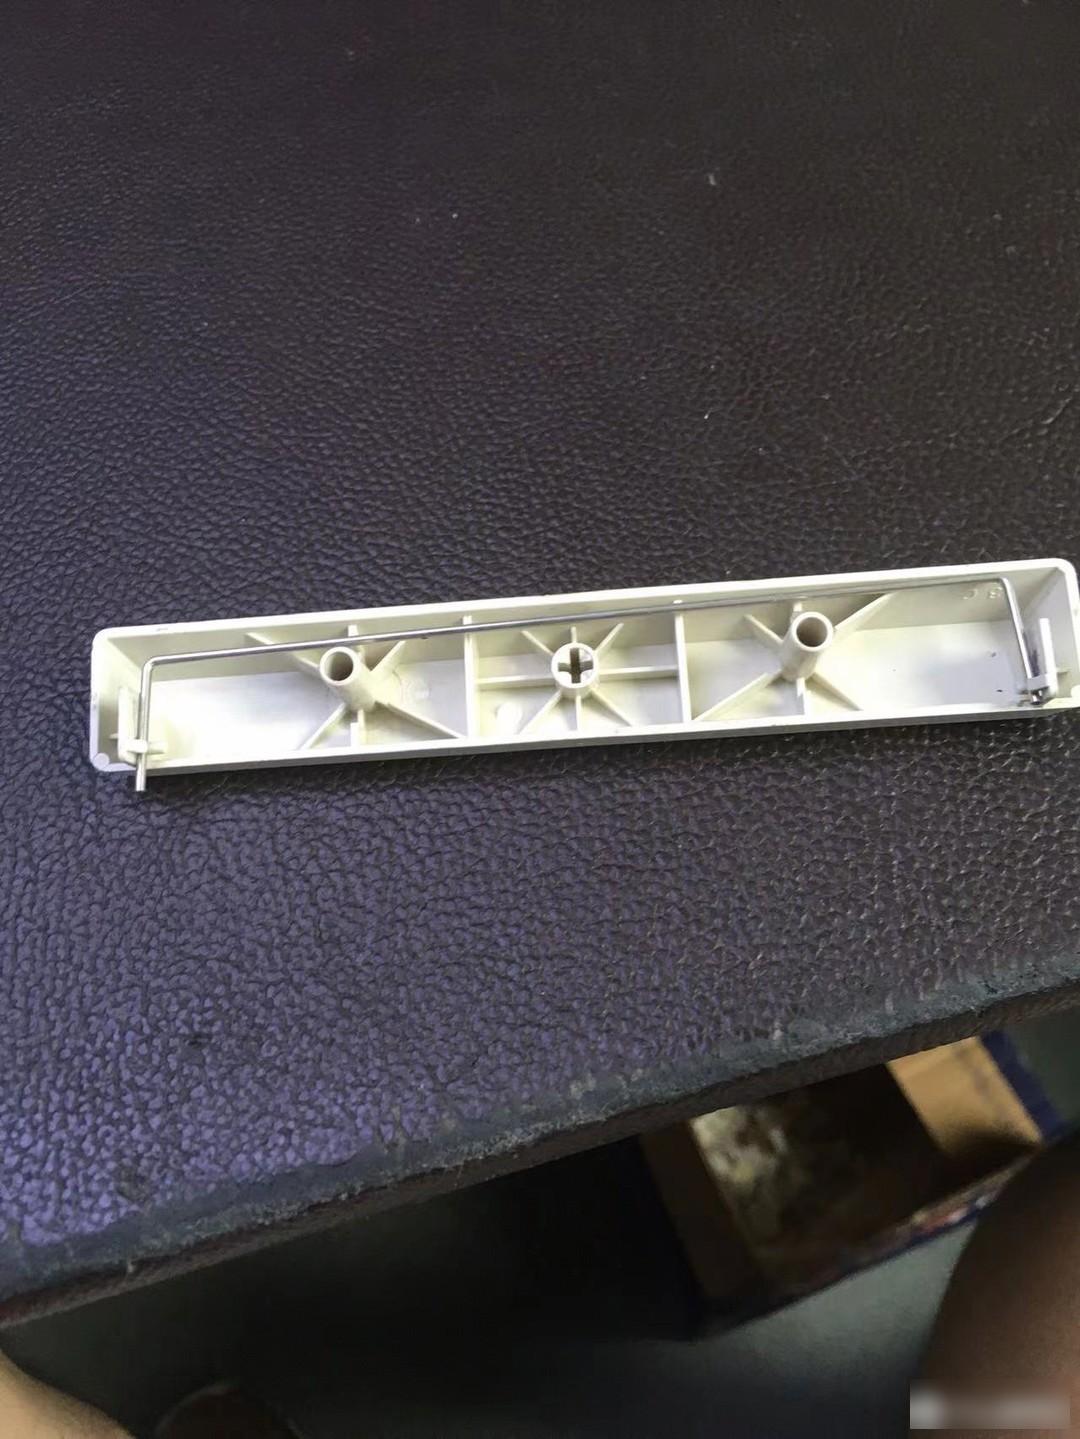
However, the installation method of the large keys is not the same as that of modern keyboards. It is neither a balance bar nor a satellite axis. Most of the keys are stabilized by two additional sliders that slot into the wells of the keyboard. The space bar, in addition to the slider balance, also uses a simple balance bar.
The keyboard achieves the ergonomics of the entire keyboard through different keycap heights. The height of the keycap is close to the height of the original factory.

In order to thoroughly clean the keycaps, an ultrasonic cleaner was dispatched. Since the dirt on the keycap is mainly dust, it can be cleaned with an ultrasonic wave and then wiped with a damp cloth.

The top cover of the keyboard can be easily cleaned by taking it under the faucet and washing it with a brush at the same time. Only some black scratches need to be wiped off carefully with toothpaste and nano sponge.
The one remaining niggle is that most of the keycaps are yellowed. And what's interesting is that the yellowed keycaps are generally yellowed on two sides, the left side and the down side, and the front side is basically not yellowed. After reading some articles and videos on the Internet, others generally use hydrogen peroxide + UV light to bleach. However, I didn't have either, so I tried to use 84 disinfectant instead of hydrogen peroxide for bleaching. But I don't know if it's because my 84 has been stored for a long time, or 84 is not good for bleaching plastic itself, and it has no effect after soaking for almost a week. The price of hydrogen peroxide is too expensive. Buying a bottle to soak the keycaps can cost as much as this keyboard. Later, I looked at station B and learned that there is a kind of hydrogen peroxide milk for hair dyeing, which can replace hydrogen peroxide for plastic bleaching. The price of this kind of hydrogen peroxide milk is relatively cheap. You can buy 120ml of it for 5 yuan by mail, and the concentration is still 12%. The bleaching effect is far better than that of 3% concentration of hydrogen peroxide, so I decisively placed an order and bought a bottle.
The bleaching method is also very simple. Apply hydrogen peroxide evenly on the yellow side of the keycap, then seal it in a sealed bag and expose it to the sun. The effect is still very obvious! However, it may be because some keycaps are too yellow, and there are too many bleached keycaps, the sun is not very uniform, and the effect of some keycaps is still not very obvious in one bleaching. Later, I repeatedly applied hydrogen peroxide milk and continued to expose to the sun, and it took more than a week to bleach all the keycaps.
This Packard Bell 5131C is still a pretty good keyboard. The rubber bowl is very elastic, and the keys rebound quickly. When the button touches the bottom, it will have a rubber buffer similar to some mute switches, so that it has a certain noise reduction effect when pressed, but it will not make people feel very fleshy. This keyboard has modern 104 keys, and it will not cause discomfort due to the lack of win keys like other ancient keyboards with 101 keys. And with mx-compatible keycaps, small keys are easy to find replaceable keycaps.
Of course, this keyboard also has some drawbacks. First of all, its backslash is located on the right side of the right shift. This kind of layout is rather weird, which often causes mistakes when you want to press the right shift. Moreover, the large keys other than the space are only stabilized by the auxiliary slider, which is not as stable as the balance bar or the satellite axis. Another point is that the keycaps are too difficult to remove, making it more difficult to clean them.
Factory Adress: No.11,FengpingRoad