Keyboard and Mouse Combo Manufacters Buying Guide
Keyceo Tech Co., LTD, one of the most professional manufacturers of Keyboard and mouse combo manufacters, always sticks to the principle of quality first to win higher customer satisfaction. The product is manufactured under the quality supervision system and is required to pass the strict quality tests before shipment. Its quality is completely guaranteed. Its design is appealing, showing the brilliant and creative ideas of our designers.
We seek to establish long-term business relationships with clients and partners, as evidenced by the repeat business from existing clients. We work collaboratively and transparently with them, which allows us to resolve issues more effectively and to deliver exactly what they want, and further to build a large customer base for our Keyceo brand.
Customers can count on our expertise as well as the service we rendered through Keyceo as our team of experts stays with current industry trends and regulatory requirements. They are all well-trained under the principle of lean production. Thus they are qualified to provide the best services for customers.
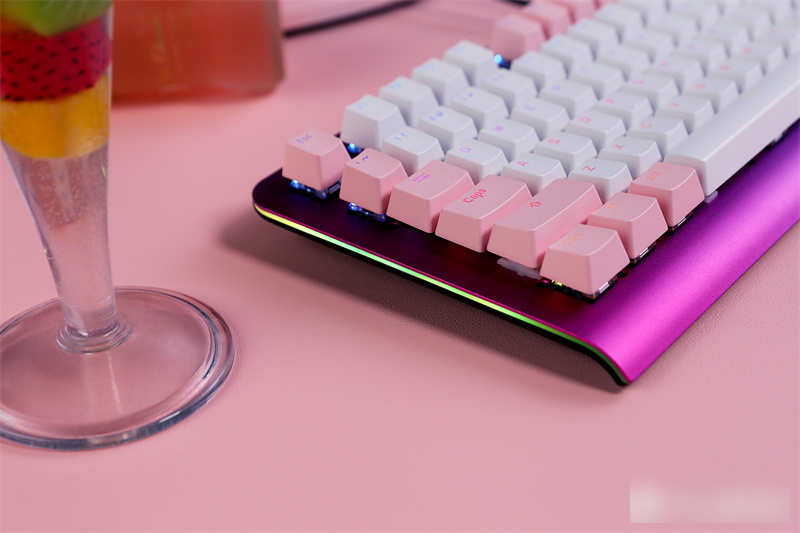
Dimo F31 Falcon Eagle Aurora Edition e-sports gaming mechanical keyboard brings the mysterious dream of Aurora onto the keyboard. Under the charming body, it also has a good performance core, which can easily cope with complicated operations. The combination of mechanical beauty and super power will conquer the hearts of players!
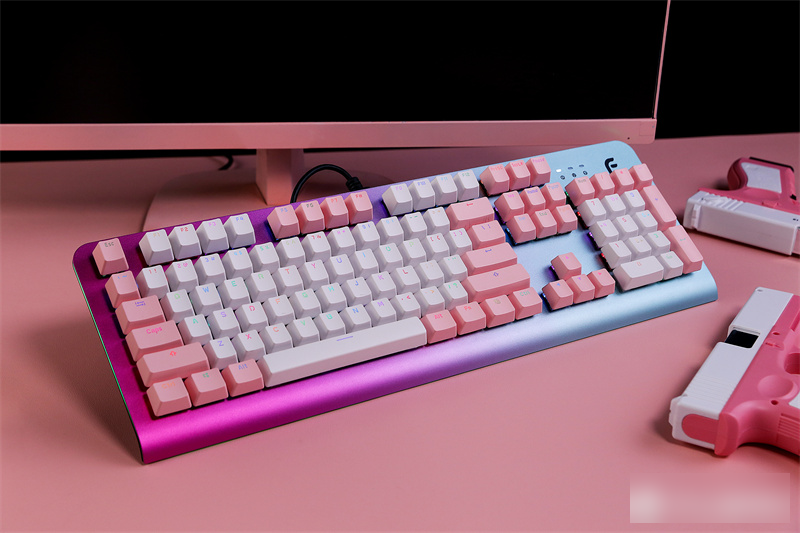

Dimo F31 Falcon Eagle Aurora Edition e-sports game mechanical keyboard adopts Aurora’s purple-cyan gradient design, mysterious and dreamy purple, elegant cyan, and the aluminum alloy panel after electroplating process, which outlines a dreamlike dazzling Fascinated. Against the background of the high-end and exquisite shell panel, the embellishment of the pink and white keycaps of the Dimo F35 Aurora Edition not only deepens the overall sense of hierarchy, but the visual presentation is sweet in the dream, and the Aurora panel is more gorgeous.
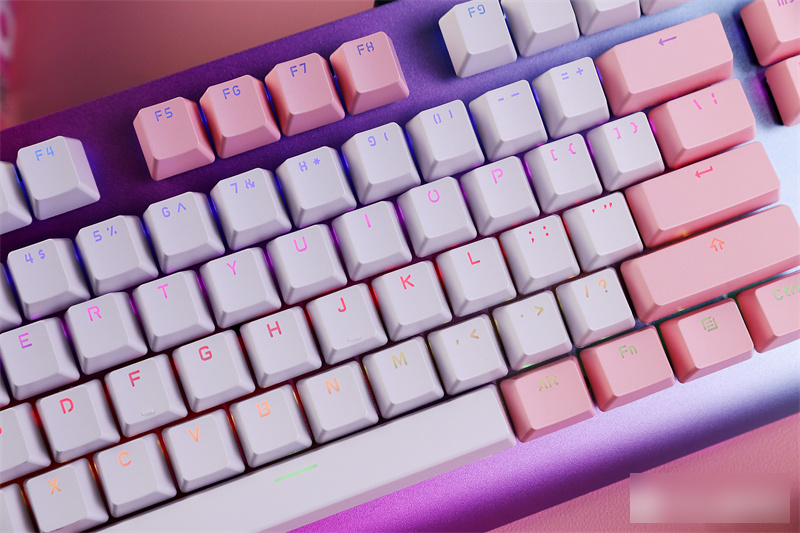
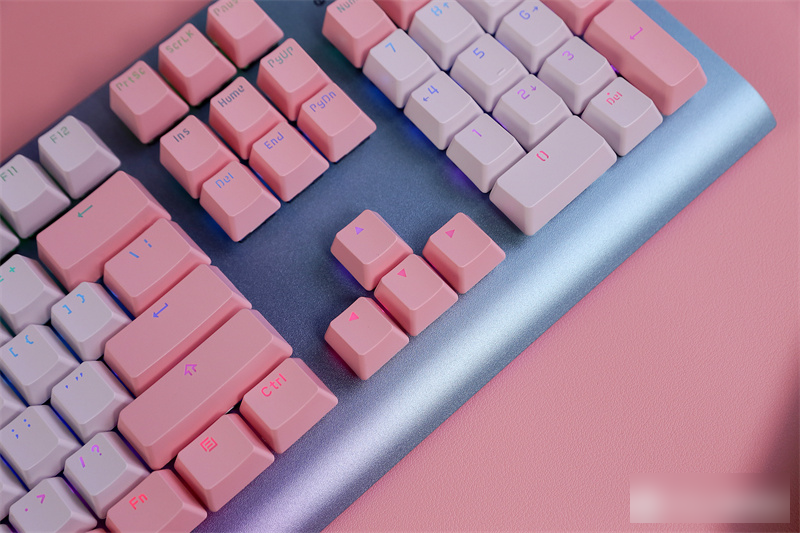
The fresh and sweet pink and white keys are made of ABS material two-color injection molding process, which is dry and delicate to the touch and durable. Equipped with a full-key RGB colorful backlight system, 6 backlight modes and 18 backlight effects, single button and border light effects can be customized through the driver to bring thousands of brilliance of gorgeous and cool lights.
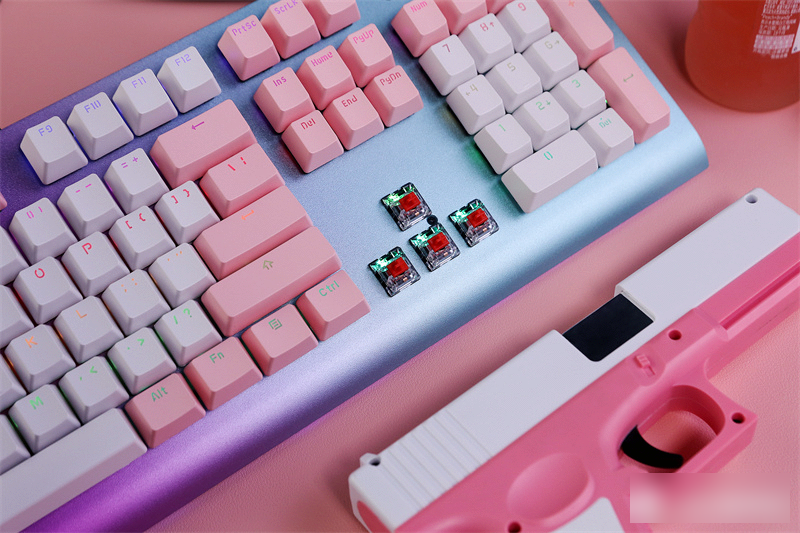

An excellent performance core is hidden under the brilliant appearance. The Dimo F31 Falcon Eagle Aurora Edition e-sports gaming mechanical keyboard is equipped with a real mechanical switch body, with a service life of about 50 million times, sensitive response and excellent hand feel. With full key programmable, efficient operation in complex situations, competitive performance is always online! There is also a full-key no-stroke design, and every operation command is accurate and accurate, and it can handle changing scenes with ease!

Excellent performance core, combined with the mysterious color of Aurora, Dimo F31 Falcon Eagle Aurora Edition e-sports game mechanical keyboard is not only a beautiful landscape on the desktop, but also a treasure artifact for players to win games!
Flow-saving assistant: single-mode 868 single-mode aluminum Tuotuo, the big key adjustment is not good, the gas structure is better, the internal filling can be changed by yourself
Hello everyone, this is Pai Xiaoxing. Today I will bring you a keyboard from one of the most popular keyboard brands abroad—keychron Q3. Speaking of Kechuang, you may not be familiar with the brand. But if we talk about Jingzao, some people will know it. That’s right, Keychron is the manufacturer of Jingzao. At the same time, because of Keychron’s perfect system switching function and various details designed for MAC users abroad, it is very important to do so. There are a lot of customers overseas, so without further ado, let's take a look at this keyboard now.
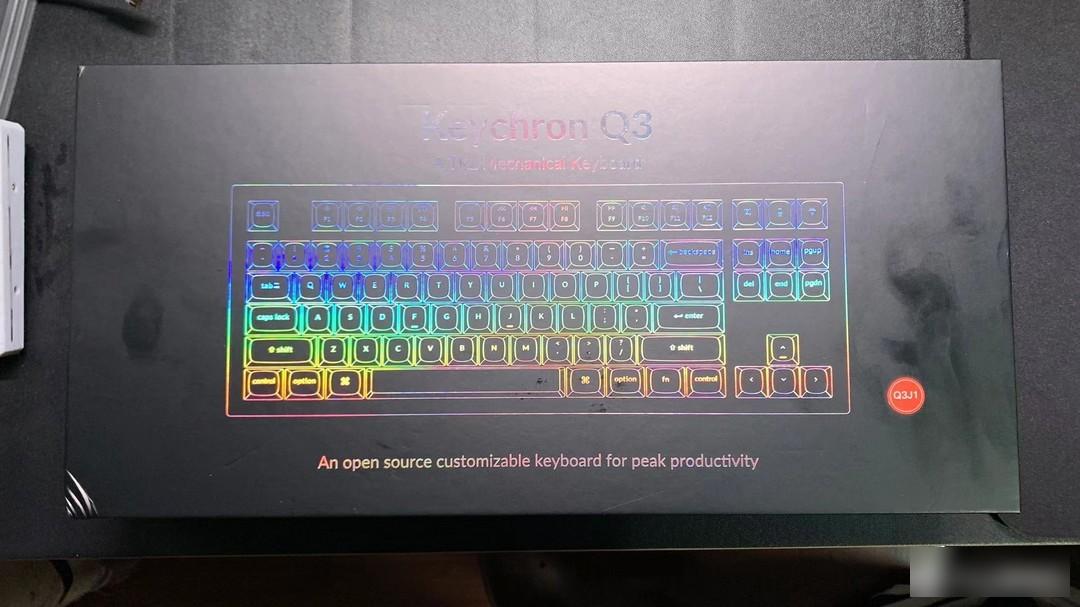
The outer packaging is actually nothing special. The keyboard case adopts the design of the sky and the earth cover. There will be a label on the front of the box to tell you whether your version has knobs or no knobs.

After opening the keyboard package and taking out all the accessories, we can see all the contents of this keyboard:
keyboard body
floor mat
Gasket
Replacement keycaps
data line
spare screw
detail
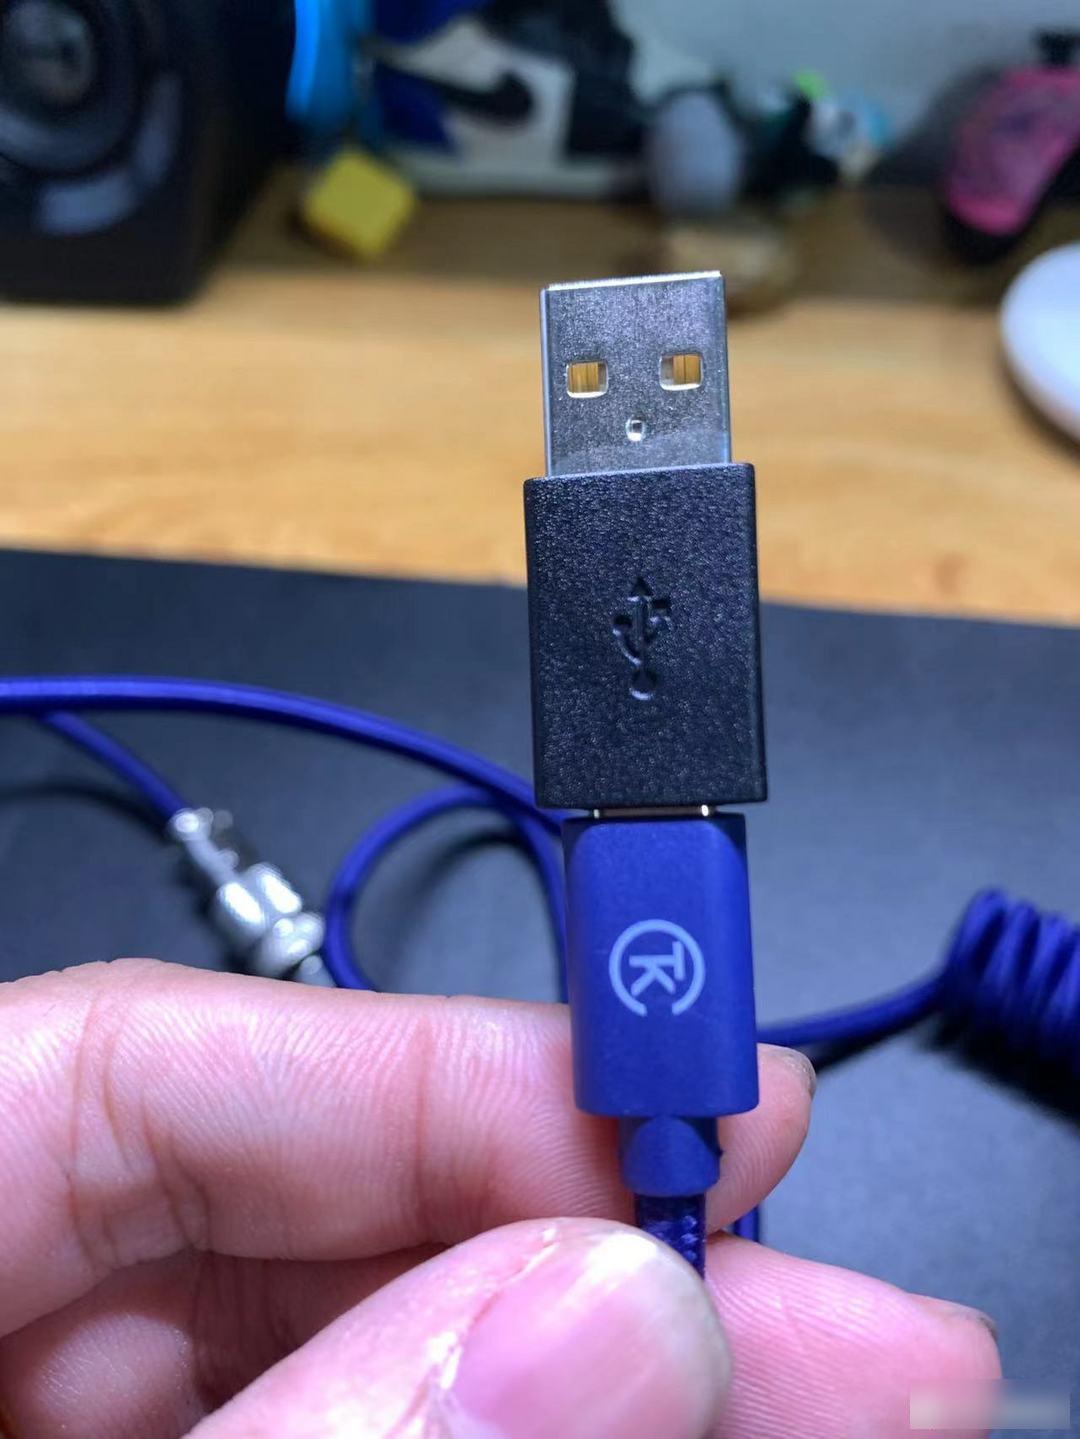
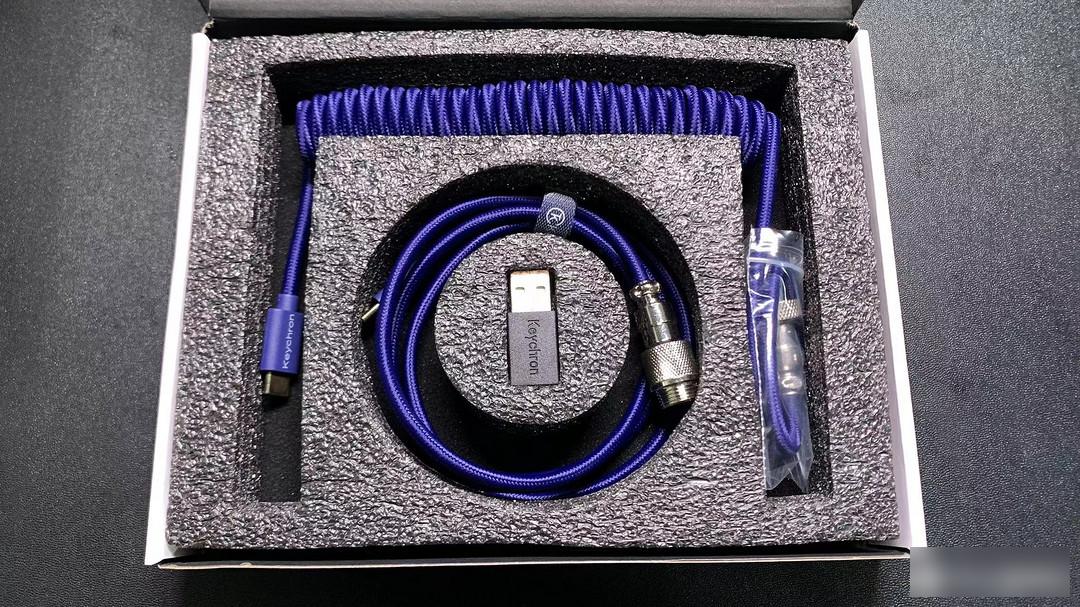
His data cable is very good, he really cares about MAC users, even if it is an aviation plug-in cable, he also takes into account both win and MAC users (the aviation plug-in cable is purchased separately for me, and there is only one data cable in the Q3 package)


The keycap is a standard pbt material with an osa height. The spout of the keycap is well handled and the space does not have obvious seesaw phenomenon. The reprocessing here is still good.

As for the switch body, the keychron is equipped with the basic switch body of Jiadalong. I choose the red switch here, so I don’t need to tell you, it’s just the feel of the ordinary red switch, and there’s not much difference.

The shaft seat is obviously a pentagonal shaft seat, which is a lower light position, which is the south-facing light position mentioned by keychron. As I said in the last Q1, the performance on the space is not very good, and it will appear very lonely.
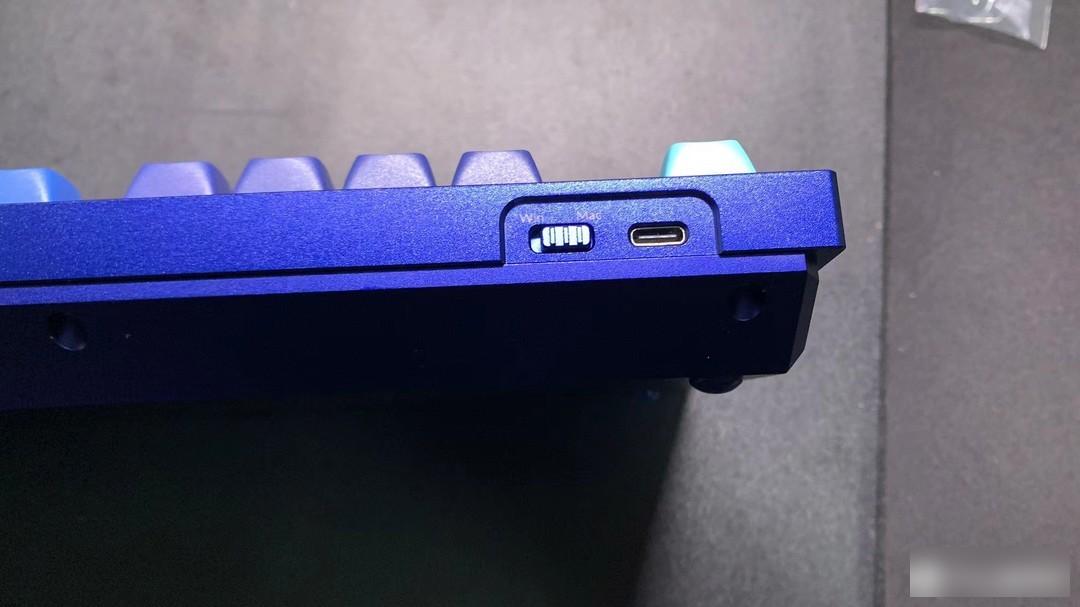
The charging port of the keyboard and the system switching switch are on the upper left of the keyboard. Because it is single-mode, there is no power switch or anything.

The side of the keyboard is not chamfered, but it is treated with a slope, and the height is self-adaptive. There is no chamfering around the keyboard, and there is a little handle to the touch. Generally speaking, it is not bad. . (But it's not comfortable for someone like me to touch)
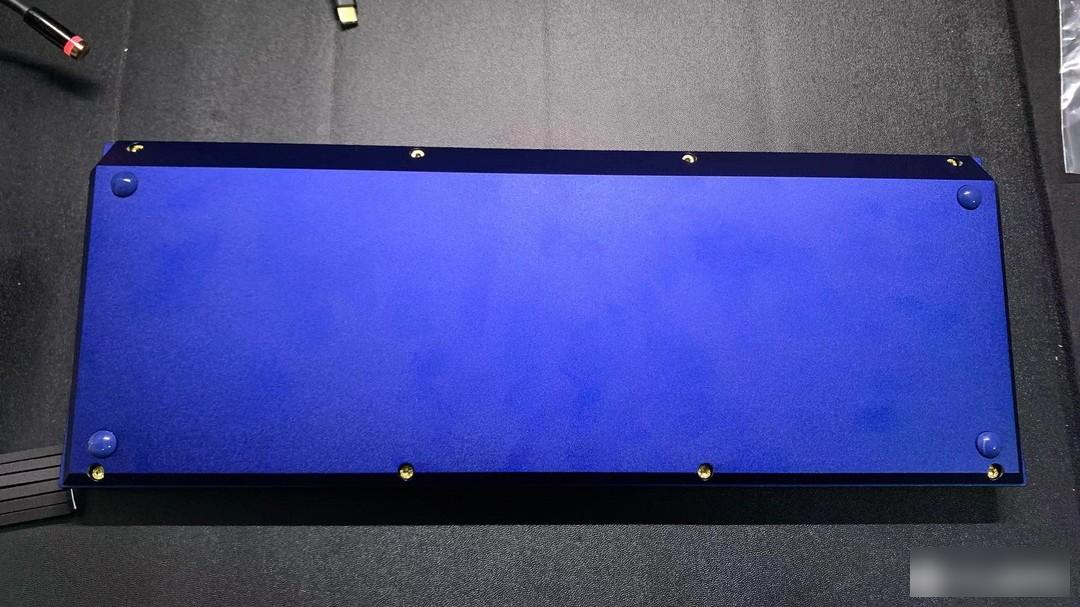
The back is very simple, without any logo or the like, only four foot stickers and eight fixing screws can be seen.

Note when disassembling: this is a hexagon socket screw, we should pay attention to it when disassembling

Disassemble all the keyboard to see all the contents of this keyboard:
Sandwich cotton
Bottom cotton
pcb
Positioning plate
cover
lower lid

The satellite axis adopts the pcb satellite axis, that is, it is directly twisted and fixed on the pcb. In fact, the performance of the large keys of this keyboard is not good, and you need to adjust it yourself.

The sandwich cotton used here is ordinary sandwich cotton. In fact, the noise reduction effect is not too obvious. If you have the ability, you can buy it online according to your needs.
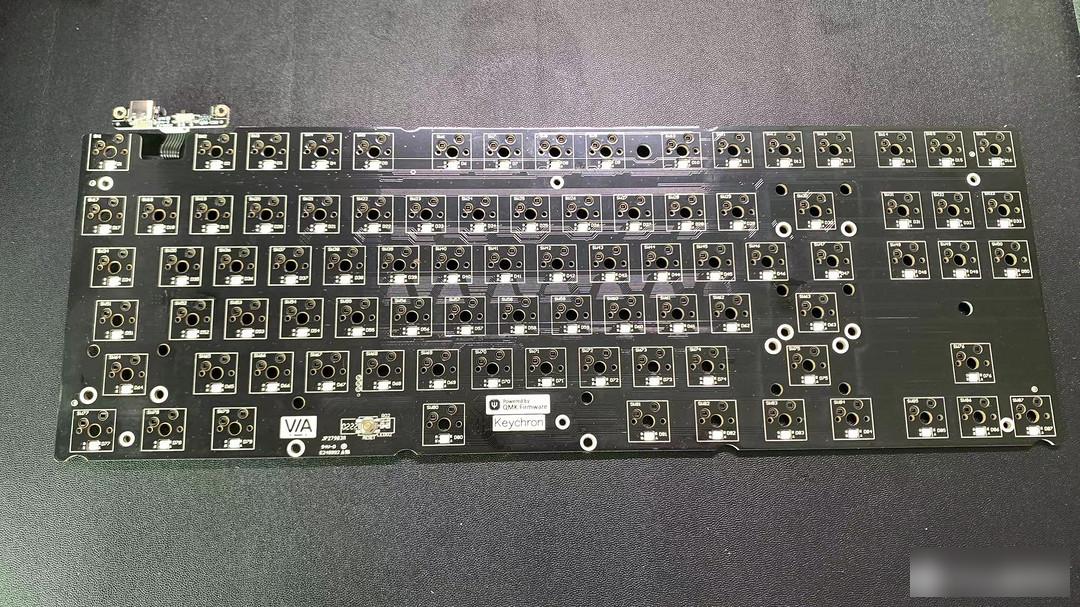
The overall workmanship of the pcb is good. You can see that the c-port has also been processed to separate the small boards. Be sure to pay attention when disassembling.

The bottom cotton is a piece of the most common pearl cotton, which is better than nothing in the noise reduction. Because the density is not enough, the noise reduction effect is not obvious. Here is the same sentence, if you have the ability, you can change it yourself.
My first reaction to this keyboard was that it was heavier than the Q1. It was really heavy. I didn’t weigh the specific weight. In terms of lighting, the lower light position he used was fine, but this space is also the lower light position. , it will look very unbalanced, like a seesaw, and even though the big key uses a pcb satellite axis, which is good, but the adjustment is not good, how can a normal friend buy it home like me? For a complete adjustment, most of them are used directly, so it would be better if the satellite axis adjustment is better. The keyboard is a gas structure as a whole, and the typing sound will be better. But, the positioning board is a steel fixed As a result, he will not play softly. It is very uncomfortable here. The workmanship and details of the whole keyboard are in place. There is no industrial design, but the overall design is not bad.
The gas structure keyboard is softer and more comfortable
Aluminum lumps increase the feel of the keyboard, making the feel more comfortable and self-defense
Very friendly to MAC users, whether it is from the details of the data cable or the replacement keycaps of the keyboard, there is no pressure on Mac users
Single-mode stability, because of the workmanship of Altuotuo and the chip technology of the current wireless receiver, Altuotuo cannot really achieve a stable connection of three modes, so in comparison, the single-mode connection is more stable
I don't know if you like it or not, but I still prefer this simple look.
The weight is too heavy, quite inconvenient to carry
The internal filling material is not good, and the sound deadening effect is not good
Shaft options are minimal.
General Yunrui/Graphic
Copyright statement: All pictures and texts are original and copyrighted. Without permission or authorization, reprinting or citing is prohibited. Life is about constantly feeling, constantly experiencing, and constantly practicing! Thanks to the teachers and friends who helped me along the way.

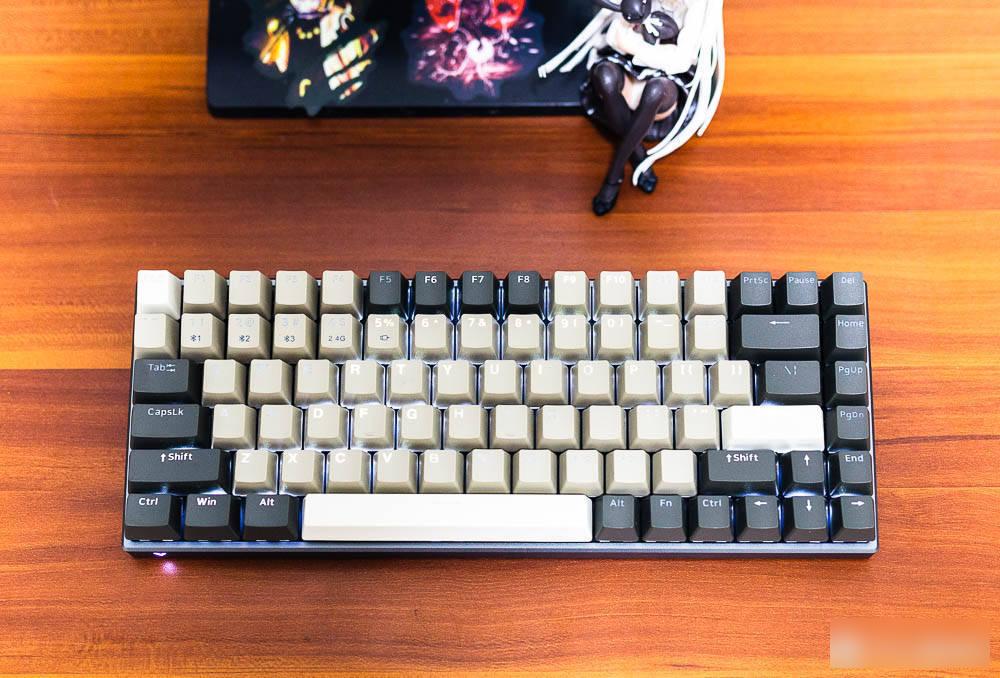
I have always had a soft spot for compact mechanical keyboards, not only because of its compact structure, The utilization rate of the buttons is high, and because it does not take up much of the desktop. Among the compact keyboards, there are mechanical keyboards with 84, 87, and 89 keys that I particularly like, because although the keys are simplified, the basic keyboard structure is still there, but the keypad is omitted. Recently, Rapoo released a new 84-key mechanical keyboard, which is no longer a single color, but uses a variety of customized colors, and has LED lighting effects. Of course, I can’t miss it for those who love compact mechanical keyboards.

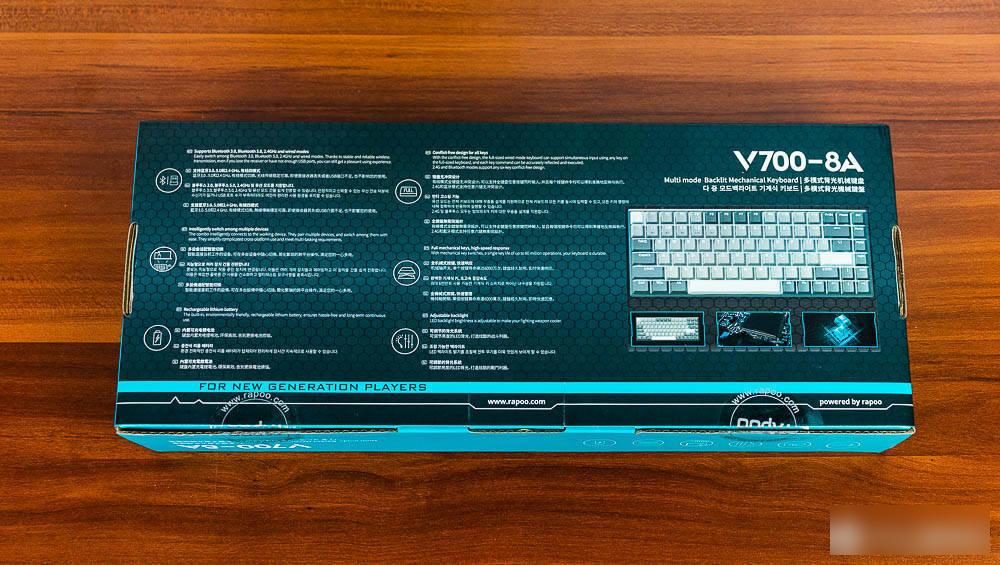
Rapoo V700-8A is a multi-mode backlit mechanical keyboard that supports four connection modes: Bluetooth 3.0, Bluetooth 5.0, wireless 2.4G and wired connection. It can intelligently connect multiple devices and switch at will. Built-in rechargeable lithium battery, avoiding the trouble of battery replacement, wireless/Bluetooth connection, avoiding redundant wire interference. The entire mechanical keyboard adopts a full mechanical switch design, with a lifespan of up to 60 million times, durable and responsive. In the wired mode, it supports full keyboard without punching, and Bluetooth and 2.4G supports any six-key padding, avoiding interference in game competitions. Taking into account the preferences of e-sports gamers, this keyboard has a pure white backlight and has 7 modes with adjustable brightness and frequency. At the same time, this keyboard has three colors of Lonely Brave, Mecha Purple and No Man's Land, and four keyboard switches of black, red, green, and tea. A total of 12 colors and key switches can be combined to meet different user needs. . The one I experienced is the Pennefather V700-8A mechanical keyboard with black switches and no man's land color matching.


After opening the carton, the internal packaging of the keyboard is quite fine, and the built-in foam can ensure that the keyboard will not receive too much impact during transportation. After sorting out, I found that the components of the Rapoo V700-8A multi-mode backlit gaming mechanical keyboard are quite rich. The main components include 1 Rapoo V700-8A multi-mode backlit gaming mechanical keyboard, 1 key puller, Type 1 USB data (charging) cable with C interface, 1 wireless 2.4G receiver, and 1 quick use guide.


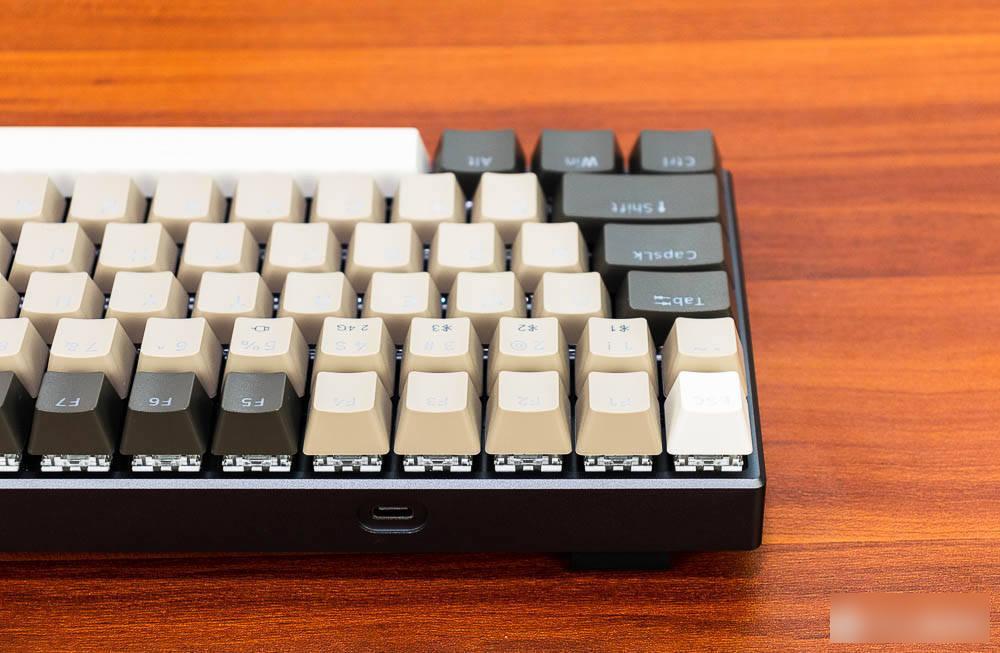
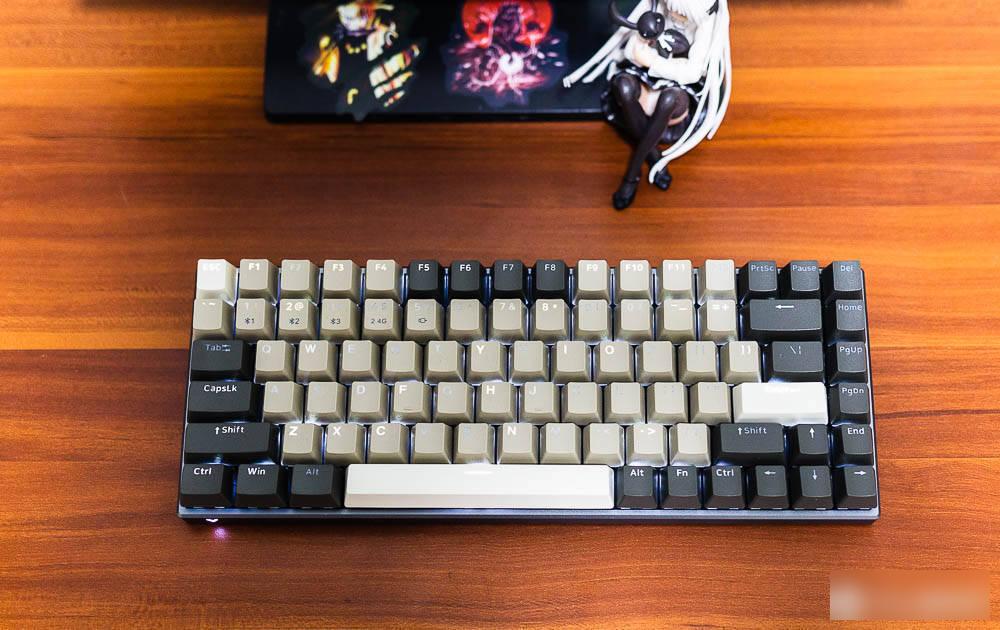
The color matching of the Rapoo V700-8A mechanical keyboard No Man’s Land Edition has its own characteristics. According to my own understanding, no man’s land should give people a feeling of desolation and silence. Most of them are a kind of depression and depression. This kind of environment mostly appears in games, especially some military-themed games. These no-man's lands are often not as calm as they appear on the surface, but there are hidden killing chickens. Therefore, the color matching adopts light brown, brown gray, matte white and other colors. The keyboard alone will not be too outstanding, but if you also turn on the pure white backlight, it will be another flavor. Because the colors are relatively close, and the translucent letters are not too obvious when the light effect is turned off.

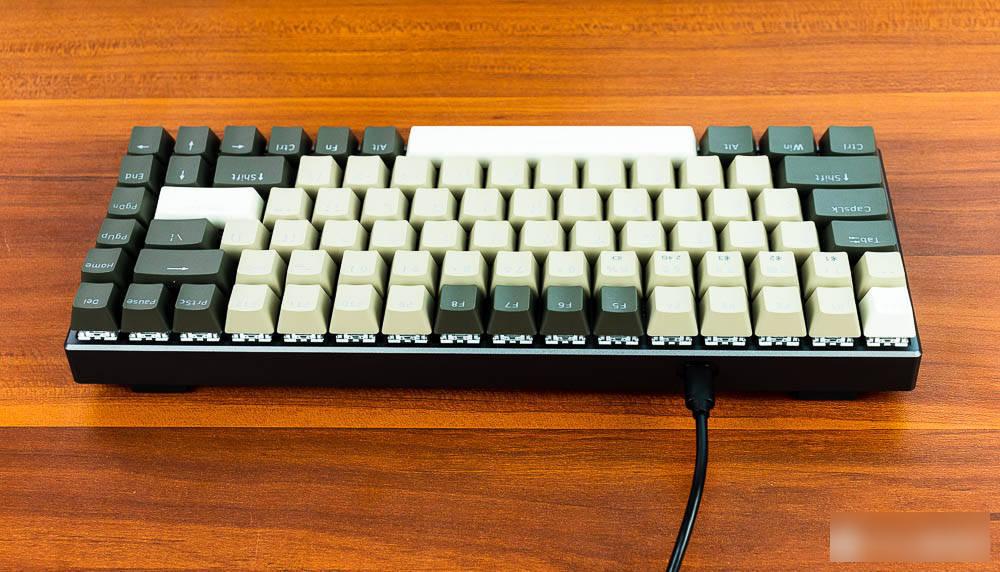
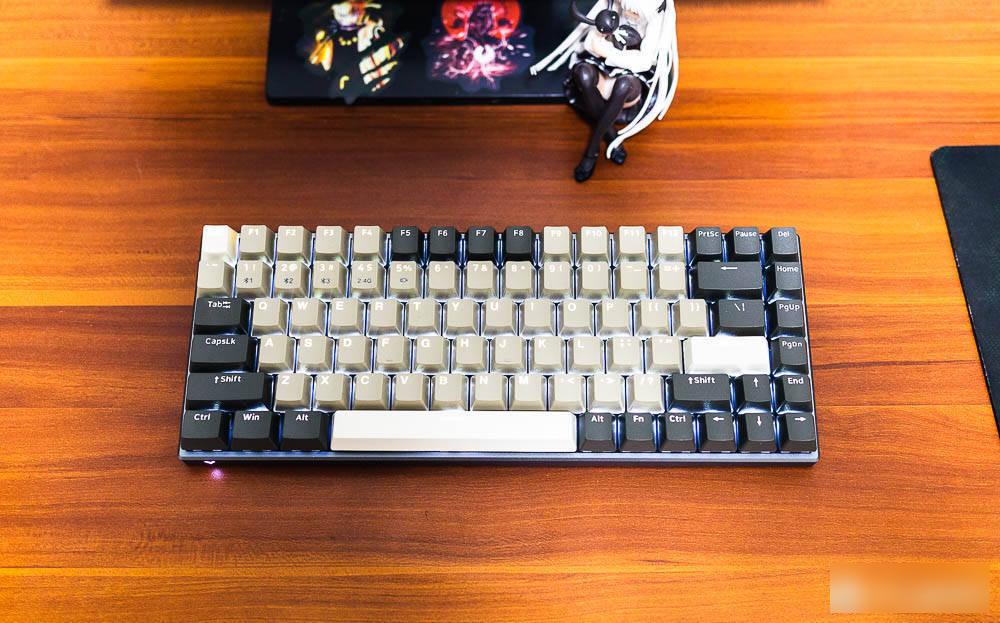
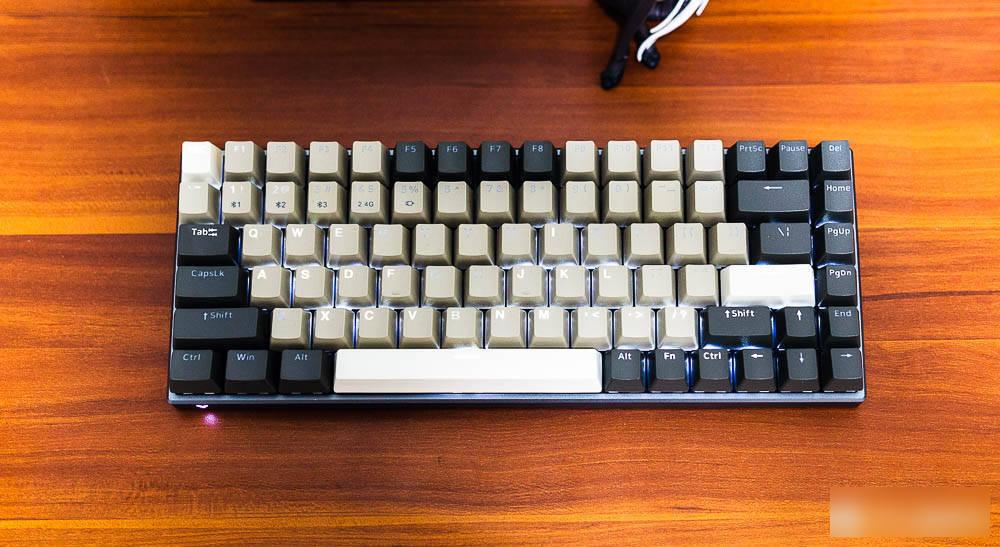
After turning on the light effect, it feels completely different. But in any case, this keyboard adopts an 84-key compact keyboard layout, and the key line separation design greatly reduces the desktop space occupation, and is easy to carry, giving people a simple and orderly feeling. The ultra-narrow aluminum alloy frame adopts sandblasting oxidation process CNC trimming, and there is a brand V series Logo in front of the key, which is quite simple and eye-catching. The overall line of the keyboard is clear, simple and elegant, full of technological texture, and durable, which makes people love it.
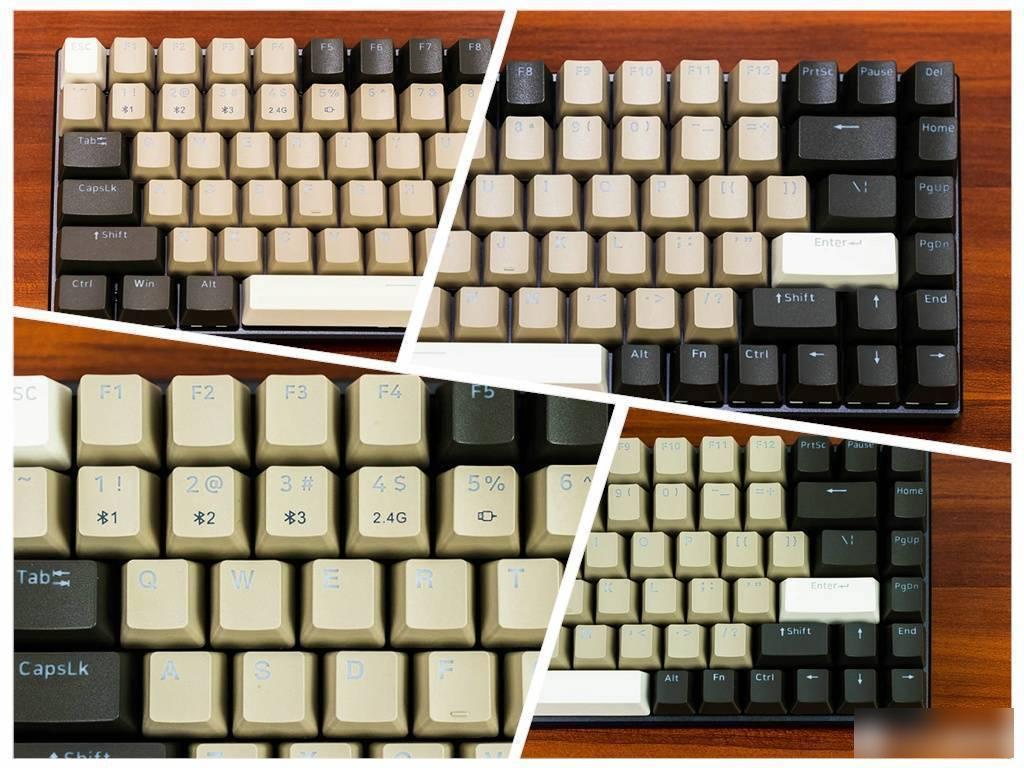
The keys of the Rapoo V700-8A mechanical keyboard are basically the same as those of ordinary keyboards, except that there is an extra line of marks on the number keys 1-5, 1-3 are three different Bluetooth marks, and the fourth is wireless 2.4G. The number 5 is the mark of the wired connection. Through the combination of FN and 1-5 number keys, you can switch between different devices, and one keyboard can connect up to five paired devices. The backlight mode can be adjusted by FN+right Ctrl, the distribution is ripple mode, constant light mode, single light mode, breathing mode, starry mode and curve mode. Use FN and the left and right arrow keys to decrease or increase the change frequency of the LED backlight, and use FN and the up and down arrow keys to adjust the brightness of the backlight.
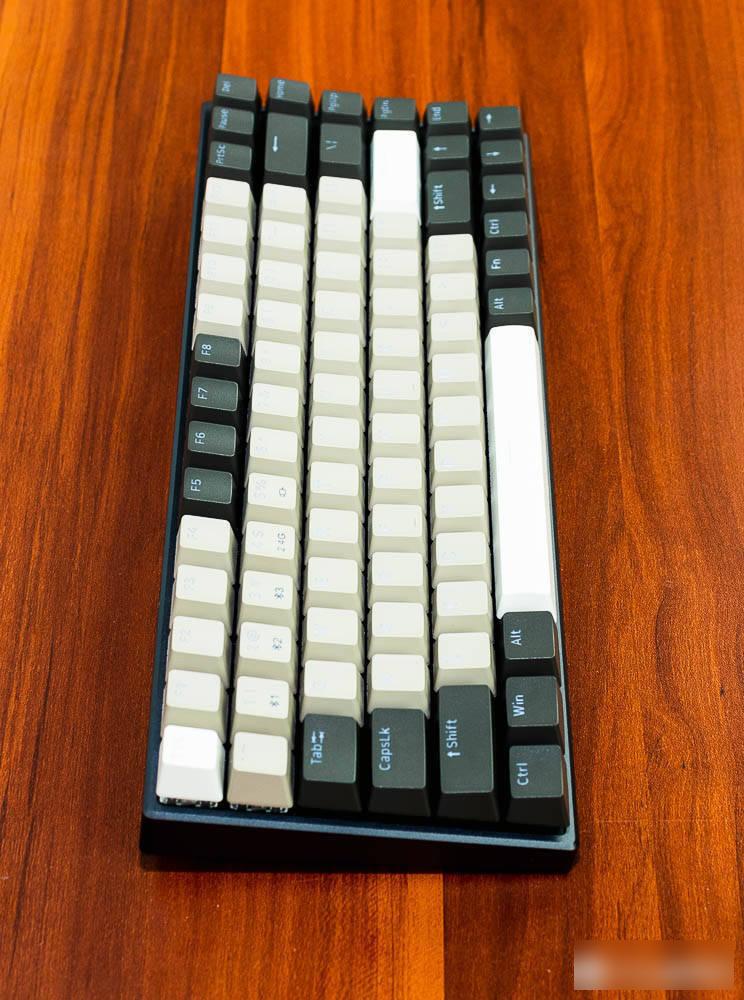
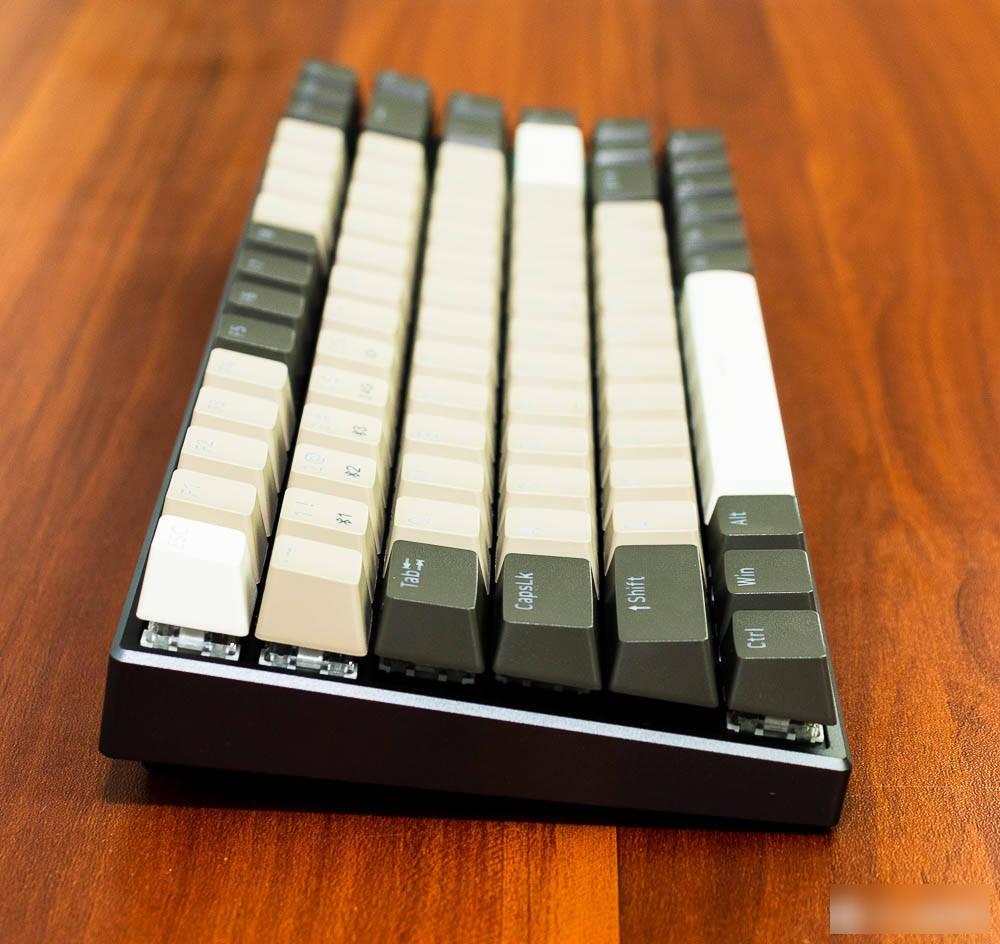
The Rapoo V700-8A mechanical keyboard is inclined at a certain angle, which makes the keys have a sense of hierarchy. There are no other designs on the left and right sides. Viewed from the side, you can clearly see its floating buttons. This design is more resistant to dirt, dust and pollution, and will be better.
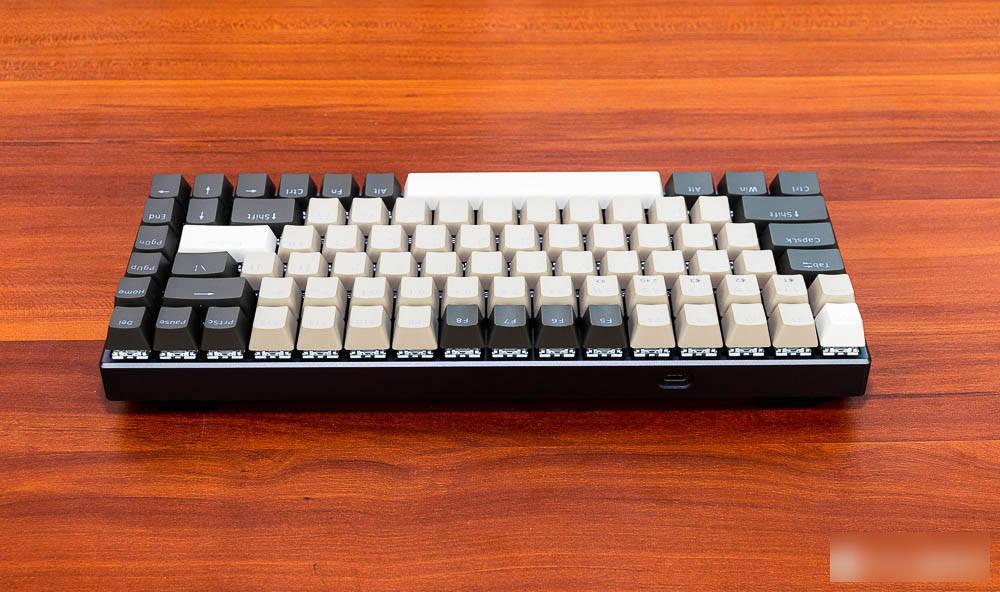

On the left front of the Rapoo V700-8A mechanical keyboard, there is a USB Type The C interface can not only charge the keyboard, but also act as an interface for wired connection. This mechanical keyboard has a built-in 4000mAh lithium battery, which supports charging while using. With Rapoo's low-power wireless technology, it can be used continuously for 25-225 hours when fully charged and wirelessly (up to 1 week to 2 months). The keyboard is equipped with a USB about 1.5 meters long type The C-interface data cable can be used for charging or as a wired connection. However, wireless 2.4G or Bluetooth connection is generally used. When there is no power, a wired connection will be used in case of emergency.
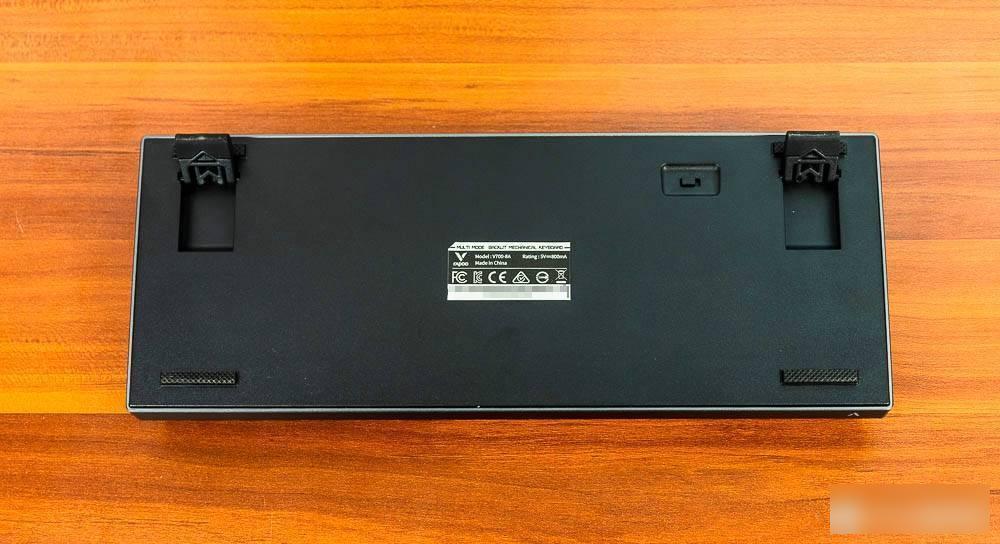
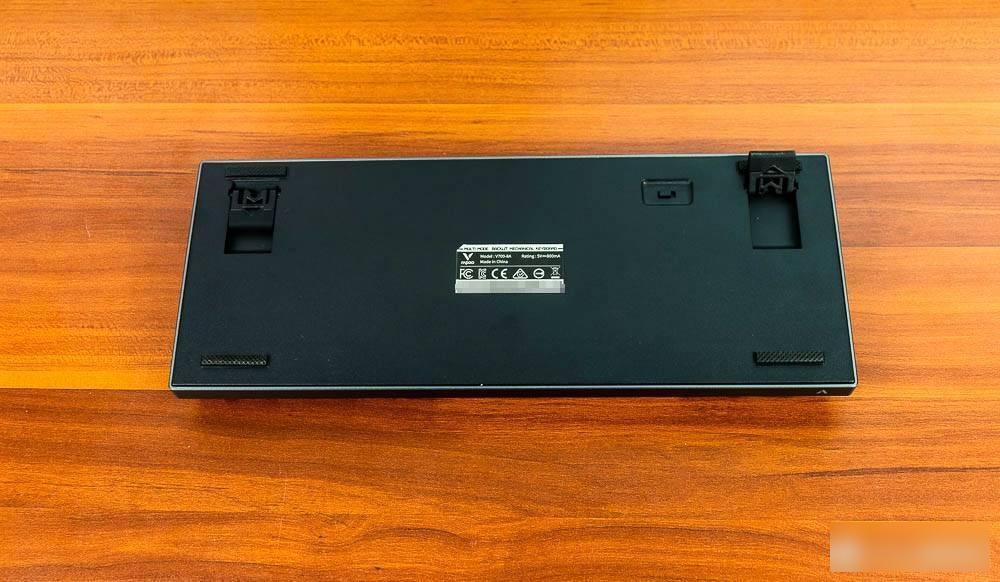
In the middle of the bottom surface of the Rapoo V700-8A mechanical keyboard, there is a product label affixed with information such as the product model, charging voltage and current. There are four non-slip foot pads at the four corners of the keyboard, and the keyboard is designed with a bracket, which can support a certain slope and make typing or gaming more comfortable. On the bottom of the keyboard, also see a keyboard power switch labeled ON and OFF.


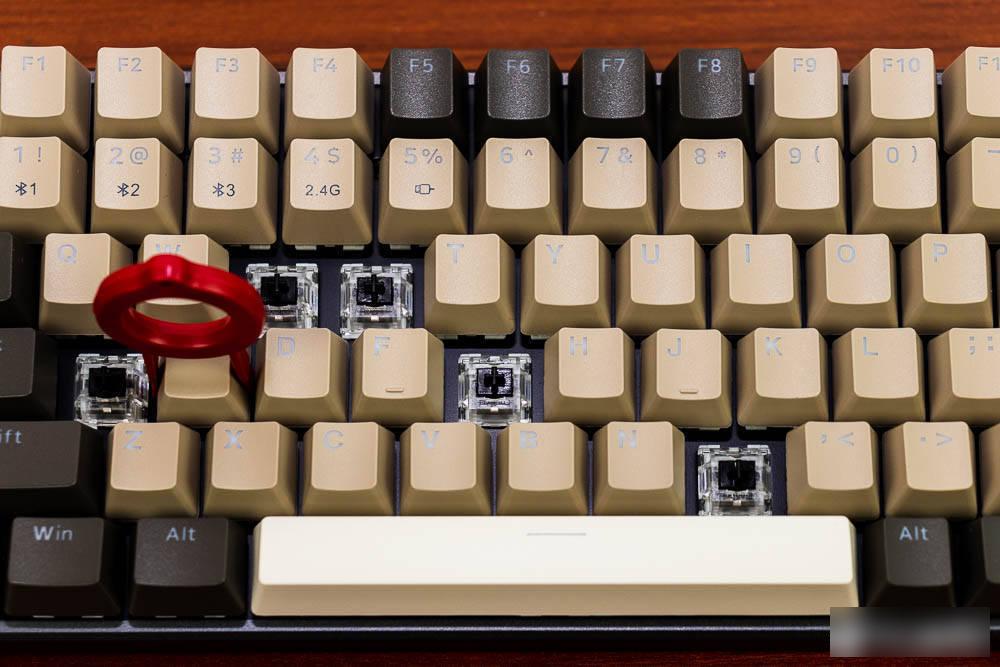

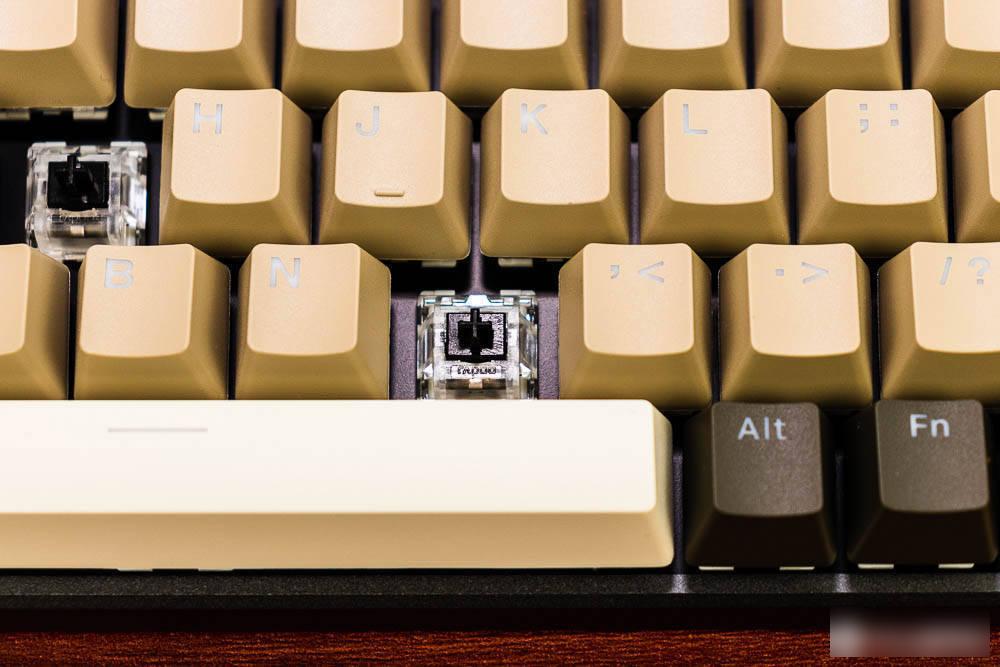
The Rapoo V700-8A mechanical keyboard uses Rapoo’s own mechanical key switches. As mentioned earlier, this keyboard has four different key switches, which are black switches, green switches, red switches, and brown switches. 60 million times percussion life. Pull out the keycap with a key puller, you can see the black key shaft, and there is the English LOGO of Rapoo on the key shaft. The start of the black switch requires greater pressure, and the trigger is quick, suitable for professional games. The key stroke is 2.0±0.6mm, the trigger pressure is 60±20cn, and there is no sense of paragraph. When I first started using it, the feeling of the black switch was a bit tight, mainly due to the high trigger pressure.
The Rapoo V700-8A mechanical keyboard adopts two-color injection-molded keycaps, which are uniform in light transmission, fade-resistant, and wear-resistant, fully meeting the needs of daily use, and the knocking feel is also good. The light-transmitting effect of keycaps can only be shown when they are actually used. You can see from the above figure that the backlight of some keycaps is turned on, and you can see obvious letters. For the keycaps with the backlight turned off, then The letters are less obvious. The transmitted light is relatively uniform, which adds a lot of color to the keyboard.

Although the pure white backlight is relatively monotonous, with the color matching of the keyboard, the Pennefather V700-8A mechanical keyboard still adds a lot of color. These are two typical backlight effects, one is fully open and the other is curved, which can be clearly seen. Feel the change in the curve of the backlight. In addition, through the supporting driver software, independent programming of each button can be realized, and multiple sets of configuration files can be saved to switch between different scenarios.
Summarize:
Objectively summarize the advantages and disadvantages of the Rapoo V700-8A mechanical keyboard:
advantage:
1 Customized keycap color design, quite game player plot
2Support wired/wireless 2.4G/Bluetooth 3.0 and 5.0 connection methods, and can freely switch between 5 adapter devices
3 The keyboard layout is compact, the keys and wires are separated, the desktop takes up little space, and it is easy to carry
4 Aluminum alloy narrow frame design, CNC trimming, sandblasting and oxidation process, extraordinary texture
5 Adopt Rapoo's own mechanical switch, with a lifespan of 60 million hits, four key switches of black, red, tea and green, suitable for different users
6 Built-in 4000mAh out of store, strong battery life, and supports charging while using
7 adjustable pure white backlight, 7 modes and 4 levels of brightness, adding a lot of color to the keyboard
8 wired mode full-key no punch design, wired any 6 key no punch
9 Through supporting driver software, 84-key independent programming can be realized
10 keycaps double-color injection molding, uniform light transmission
11 non-slip tripod, stable and comfortable
insufficient:
1. The touch of the black switch is slightly forbidden, there is no sense of paragraph, and the trigger pressure is high. It is different from the CHERRY black switch. Users who are used to the CHERRY black switch need to adapt
The full text is over, thank you for your appreciation, if you like this article, please give a thumbs up or pay attention to the author, thank you
Dareu released a new type of mechanical switch today, called "ski switch", which means smooth and fast response, and is suitable for players who play games for a long time without moving.
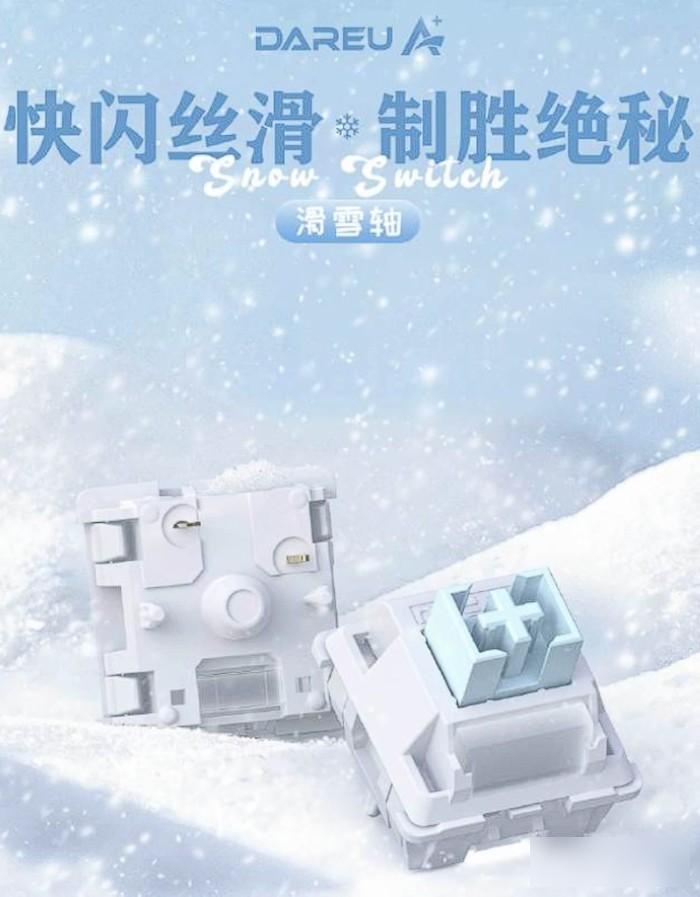
This "ski switch" adopts a rare white color design, the switch body is light ice blue, and the shaft body is reinforced to reduce left and right shaking, and it is compatible with conventional cross keycaps.
This switch emphasizes linearity, fast triggering, and strong rebound. It uses double-stage gold-plated springs. The total key stroke is only 3.3mm, the trigger stroke is 1.3mm, and the pressure is 50 grams. It is equivalent to an improved red switch. Trigger, snapback gamer.
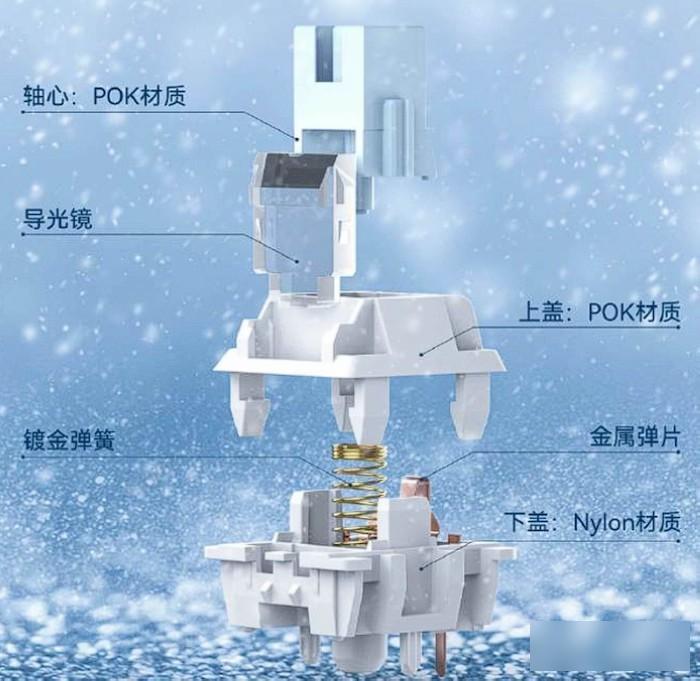
In terms of materials, the upper cover and shaft core are made of POK material that is smoother than POM, and the lower cover is made of Nylon material, which is thin and smooth when leaving the factory.
In addition, there is a light guide mirror on the side, which allows the patch LED light to penetrate stronger and more uniformly; the bottom is a double-pin design, and there are 4 reinforced feet next to it, which can be used on keyboards that support hot swapping.
It is understood that this Dareu "ski shaft" will start pre-sale on May 15th, and the price has not yet been announced. Players who like white may like it. Summer is coming, and it can bring a little bit of coolness, etc. look.
expand
Welcome to our comprehensive guide on mastering the art of pasting on a keyboard! In this article, we will equip you with effective techniques to enhance your efficiency, save valuable time, and elevate your overall typing experience. Whether you're a seasoned typist or just starting your keyboard journey, our step-by-step instructions and insightful tips will surely improve your productivity. So, join us as we explore the intricacies of this essential skill and uncover the various innovative methods to perfect your pasting prowess. Get ready to revolutionize the way you work on your keyboard and unlock a world of convenience at your fingertips!
Understanding the Benefits of Proper Keyboard Pasting Techniques
In today's technological world, keyboards have become an essential tool for both work and leisure activities. Whether you are a professional typist, a gaming enthusiast, or simply someone who spends a significant amount of time using a computer, knowing how to properly paste on a keyboard can greatly enhance your productivity and overall user experience. This step-by-step guide will provide you with effective techniques to master the art of keyboard pasting, along with an understanding of the benefits it brings.
Keyceo Tech, a leading brand in the computer peripherals industry, aims to provide users with high-quality and ergonomic products. With their exceptional keyboards, they understand the importance of using proper pasting techniques for optimal performance. Let's delve into the world of keyboard pasting and explore the various benefits it offers.
1. Avoiding Mistakes: When pasting on a keyboard, accuracy is crucial. Using the right technique ensures that you don't accidentally hit the wrong keys or insert incorrect information. This can be particularly beneficial for professionals working with sensitive data, minimizing the risk of errors and potential security breaches.
2. Faster Workflow: By mastering proper keyboard pasting techniques, you can significantly speed up your workflow. Instead of manually typing out long paragraphs or repetitive lines of code, you can simply copy and paste them with ease. This saves valuable time that can be allocated to other important tasks, enhancing overall productivity.
3. Efficiency in Data Entry: For individuals involved in data entry tasks, proper keyboard pasting techniques are essential. They eliminate the need to type each piece of information individually, allowing for rapid input of data. This becomes especially helpful when dealing with extensive spreadsheets or databases, streamlining the process and reducing the chances of human error.
4. Seamless Gaming Experience: Gamers are no strangers to the importance of keyboard functionality. Proper pasting techniques enable quick access to in-game commands or communication with team members. By efficiently pasting pre-determined phrases or codes, gamers can react swiftly and effectively, gaining a competitive edge in their gameplay.
5. Ergonomic Comfort: Keyboard pasting techniques can also have a positive impact on your physical well-being. Repetitive typing motions can strain your hands and wrists, leading to discomfort or even injuries like repetitive strain injuries (RSIs). By utilizing effective pasting techniques, you can reduce the strain on your muscles and minimize the risk of developing such conditions, promoting long-term comfort.
To master the art of keyboard pasting, follow these step-by-step techniques:
Step 1: Highlight the text or information you wish to copy using the cursor or the Ctrl + shift + arrow keys.
Step 2: Once the desired text is highlighted, press the Ctrl + C keys to copy it.
Step 3: Position the cursor where you want to paste the copied text and press the Ctrl + V keys.
Step 4: Voila! The text is pasted onto your desired location.
By adopting these simple yet effective techniques, you can experience the numerous benefits of proper keyboard pasting.
In conclusion, understanding and implementing proper keyboard pasting techniques can greatly improve your efficiency, accuracy, and overall comfort when using a keyboard. Whether you are a professional seeking to optimize your work processes or a gamer aiming for better performance, mastering keyboard pasting is a valuable skill. Keyceo Tech is dedicated to providing top-notch keyboards that enhance your overall user experience. Remember, the key to a seamless and productive keyboard experience lies in the way you paste! So, start practicing these techniques and reap the benefits today.
Preparing for a Successful Paste: Essential Tools and Materials
Paste applications have become increasingly popular in the tech industry. From personalizing keyboards to adding functionality, pastes offer an exciting opportunity to enhance the overall aesthetic and usability of your keyboard. In this comprehensive guide, we will walk you through the step-by-step process of effectively pasting on a keyboard, highlighting essential tools, and materials necessary for a successful outcome. Whether you are a gaming enthusiast or a professional typist, this guide will help you add a touch of uniqueness to your keyboard setup.
1. Choosing the Right Paste:
Before we dive into the intricacies of applying paste, selecting the right paste for your keyboard is crucial. There are various types of pastes available, such as keycap stickers, keyboard skins, and custom-made keycaps. Evaluate your requirements, preferences, and budget to make an informed decision. Keyceo Tech offers a wide range of high-quality paste options specifically designed for keyboards, allowing you to align your choice with your specific needs.
2. Gathering Essential Tools and Materials:
To ensure a seamless pasting experience, it is important to gather the necessary tools and materials beforehand. Here is a list of items you will need:
a) Cleaning agent: Start by thoroughly cleaning your keyboard surface. A cleaning agent like isopropyl alcohol or a mild detergent will help remove any dirt, grease, or dust.
b) Microfiber cloth: Use a soft, lint-free microfiber cloth to gently wipe the keyboard surface and ensure it is completely dry before applying paste.
c) Tweezers: A pair of tweezers will prove invaluable in handling smaller components during the pasting process.
d) Soft brush: A soft-bristled brush can help remove any dust or debris that may have accumulated on the keyboard.
e) Pasting tool: Depending on the type of paste chosen, you may need a specialized tool, such as an applicator or adhesive strips, to facilitate precise and accurate placement.
f) Protective film/toothpicks: In cases where you are using individual keycap stickers or custom-made keycaps, clear protective films or toothpicks can be helpful for alignment purposes.
3. Preparing the Keyboard Surface:
Prepare your keyboard surface to create an optimal canvas for the paste. Begin by unplugging the keyboard from your computer and removing any loose or removable keycaps. Use the soft brush to gently clean the surface, ensuring no debris or dust particles are left behind. Next, dampen the microfiber cloth with the cleaning agent and wipe the entire keyboard surface, paying special attention to areas with heavy usage or visible dirt. Allow the keyboard to air dry completely before proceeding.
4. Applying the Paste:
The application technique may vary depending on the type of paste chosen. However, the general approach involves:
a) Keycap Stickers or Keyboard Skins: Align each sticker or skin over the respective keycap, ensuring it adheres smoothly without any air bubbles. Gently press down using the tweezers or your fingertips to secure it in place.
b) Custom-made Keycaps: If you have opted for custom-made keycaps, carefully remove the protective films (if any) and align each keycap on the respective switch. Apply gentle pressure until the keycap clicks into place.
5. Finishing Touches:
After pasting, reattach any removable keycaps and reconnect the keyboard to your computer. Take a moment to test the functionality of the keys to ensure smooth operation. Admire your newly pasted keyboard and revel in the visual appeal it adds to your setup.
By following this step-by-step guide, you can ensure a successful and visually stunning keyboard paste application. Don't be afraid to explore different paste options, as Keyceo Tech offers a range of high-quality products to suit your preferences. With the right tools, materials, and techniques, you can transform your ordinary keyboard into a personalized work of art that showcases your unique style and enhances your typing experience. Get ready to enjoy a keyboard that truly stands out from the crowd!
Step 1: Ensuring a Clean and Dry Surface for Adhesion
In this comprehensive guide, we will walk you through each step to effectively paste on a keyboard, ensuring a clean and dry surface for optimal adhesion. Whether you are customizing your keyboard with Keyceo's high-quality stickers or adding other decorative elements, this guide will provide you with the necessary techniques to achieve a professional and long-lasting result.
Step 1: Ensuring a Clean and Dry Surface for Adhesion
To start the pasting process, it is crucial to prepare the surface of your keyboard for optimal adhesion. Follow these steps:
1. Gather the necessary tools:
- Isopropyl alcohol or a mild cleaning solution
- Microfiber cloth or lint-free wipes
- Compressed air can (optional)
- Cotton swabs or soft brush (optional)
2. Safety precautions:
- Ensure your keyboard is unplugged to prevent any damage.
- Work in a well-ventilated area.
3. Remove existing dust and debris:
- Use the compressed air can to blow away loose particles from between the keys.
- Gently brush out any remaining debris with a soft brush or cotton swabs.
4. Clean the keycaps:
- Moisten the microfiber cloth or lint-free wipes with isopropyl alcohol or a mild cleaning solution.
- Wipe down each keycap thoroughly, paying particular attention to areas that come into frequent contact with your fingers.
- For stubborn dirt or stains, use cotton swabs dipped in cleaning solution to gently clean the affected areas.
- Allow the keycaps to air dry completely before moving to the next step.
5. Cleaning the keyboard base:
- Moisten another microfiber cloth or lint-free wipe with isopropyl alcohol or a mild cleaning solution.
- Gently wipe the entire surface of the keyboard base, including the spaces between the keys.
- Be cautious not to let any liquid seep into the internal components.
- Let the keyboard air dry completely before proceeding.
6. Final cleaning touches:
- After the keyboard is dry, use the compressed air can again to blow away any remaining dust or dirt particles.
- Give the keycaps and base a final wipe with a clean, dry microfiber cloth to ensure all surfaces are clean and dry.
By following these steps, you have successfully ensured a clean and dry surface, setting the foundation for optimal adhesion during the pasting process. It is important to note that a clean surface will not only enhance the overall appearance but also prolong the life and durability of your customized keyboard.
As you embark on your journey to customize your keyboard, it is vital to start with a clean and dry surface for effective adhesion. Properly preparing your keyboard ensures the longevity and quality of your customizations. By following the step-by-step techniques outlined above, you are now ready to proceed to the next step in this guide.
Keyceo Tech is committed to providing high-quality key stickers and other keyboard customization options, ensuring that you achieve a personalized and professional look. Stay tuned for our upcoming articles in this series, which will guide you through the remaining steps to achieve a truly unique and customized keyboard experience.
Step 2: Applying the Paste Correctly and Evenly
Welcome to our comprehensive guide on pasting on a keyboard! In this article, we will provide you with detailed instructions on how to apply paste correctly and evenly on your keyboard. We understand the importance of maintaining your keyboard's longevity and functionality, and it all starts with proper pasting techniques. So, let's dive into step two of our guide and learn how to effectively apply paste!
Step 2: Applying the Paste Correctly and Evenly
1. Gather the necessary materials:
Before proceeding with the paste application process, ensure you have the following materials ready: a high-quality lubricating paste designed specifically for keyboards (such as the Keyceo Tech Keyboard Paste), a microfiber cloth, and a small precision applicator.
2. Prepare the keyboard:
Before applying any paste, ensure that your keyboard is clean and free from any dust or debris. Use the microfiber cloth to wipe down the surface of the keyboard, paying special attention to the areas where the paste will be applied.
3. Apply the paste:
Dab a small amount of the lubricating paste onto the precision applicator or a cotton swab. Remember, a little goes a long way, so avoid using excessive amounts of paste. Using gentle and precise movements, carefully apply the paste to the designated areas of the keyboard.
4. Spread the paste:
Once the paste is applied, use the precision applicator or your fingers (if comfortable) to evenly distribute and spread the paste. Ensure that every key receives an equal amount of paste for consistent performance. Take your time with this step to avoid any excess paste build-up that may interfere with the keys' functionality.
5. Allow the paste to settle:
After spreading the paste, give it ample time to settle and adhere to the keyboard components. This typically takes a few minutes. Meanwhile, remove any excess paste that might have accumulated around the keys using the microfiber cloth. Be careful not to disrupt the paste in the process.
6. Test the keys:
Once the paste has settled, it's crucial to test the performance of the keys. Lightly press each key to ensure they are functioning smoothly and without any sticking or stiffness. If you encounter any issues, revisit step 4 and make adjustments as necessary.
7. Clean up:
After confirming that all keys are working correctly, clean up any residual paste that might remain on the keyboard surface or around the keys. Use the microfiber cloth to gently wipe away any excess paste.
Applying paste correctly and evenly to your keyboard is an essential step in ensuring its longevity and optimal performance. By following the step-by-step guide outlined above, you can confidently paste on your keyboard using effective techniques. Remember to use a high-quality lubricating paste, such as Keyceo Tech Keyboard Paste, for the best results. With proper paste application, you can optimize your typing experience and maintain your keyboard's functionality for years to come!
So, get your materials ready, follow the steps diligently, and enjoy a flawlessly pasted keyboard!
Step 3: Post-Paste Tips for Ensuring Long-lasting Adhesion and Performance
When it comes to personalizing your keyboard, customization is key. Adding stickers, decals, or keycap sets can transform a dull and generic keyboard into a personalized statement piece. However, to ensure that your decorations stay in place and maintain their performance over time, proper adhesion techniques are crucial. In this article, we present step-by-step tips and techniques to effectively paste on a keyboard for long-lasting adhesion and optimal performance.
Step 1: Surface Preparation:
Before applying any adhesive material to your keyboard, it is essential to ensure that the surface is clean and free of dust, moisture, and oils. Use a lint-free cloth or alcohol wipes to remove any dirt particles or oils, as they can hinder the adhesive's strength. Ensure that the surface is dry before proceeding to the next step.
Step 2: Choosing the Right Adhesive Material:
The type of adhesive material you select plays a vital role in the longevity of your keyboard decorations. Keyceo Tech offers a range of high-quality adhesive solutions suitable for keyboard applications. The adhesive material should strike a balance between strong adhesion and easy removal, without damaging the keyboard surface. It is crucial to choose an adhesive that is compatible with your keyboard's material, such as plastic or metal.
Step 3: Applying Adhesive Material:
In this phase, follow these tips for effectively applying the adhesive material to your keyboard:
1. Cut the adhesive material into desired shapes or sizes that match your intended design.
2. Align the adhesive material precisely on the keyboard surface, ensuring it fits snugly without any wrinkles or creases.
3. Press down firmly on the adhesive material, starting from the center and working your way outwards. This technique ensures proper bonding and eliminates air bubbles.
4. Smooth out any wrinkles or bubbles using a credit card or a similar flat object. Apply even pressure, moving from the center towards the edges.
Step 4: Curing Time:
Allow the adhesive material to cure for the recommended time mentioned by Keyceo Tech. This duration may vary depending on the type of adhesive used. It is essential to refrain from using the keyboard during this period to ensure proper adhesion and prevent premature damage to the decorations.
Step 5: Protective Measures:
To safeguard the longevity of your keyboard pasting, consider the following protective measures:
1. Avoid using aggressive cleaning agents or solvents that can damage the adhesive material or keyboard surface.
2. Do not expose the keyboard to excessive heat or direct sunlight, as this can cause the adhesive material to weaken or deteriorate faster.
3. Regularly clean the keyboard with a soft, lint-free cloth to remove dust and dirt that can accumulate around the edges of the adhesive material.
Pasting on a keyboard is a fantastic way to personalize your device, but ensuring the durability and longevity of the decorations is equally essential. By following the steps outlined in this guide, you can achieve long-lasting adhesion and maintain optimal performance for your keyboard. Keyceo Tech offers a comprehensive range of adhesive solutions specifically designed for keyboard applications, ensuring you have the right products to create a unique and attractive keyboard design. Enjoy the process of customizing your keyboard, and let your creativity shine through!
Conclusion
In conclusion, mastering the art of pasting on a keyboard is an essential skill for any individual or company looking to optimize their efficiency and productivity. Throughout this step-by-step guide, we have explored a variety of effective techniques that can revolutionize the way we interact with our keyboards. As a company with seven years of experience in the industry, we understand the importance of staying ahead of the technological curve and continually improving our workflows. By following the tips and tricks outlined in this article, we can unlock a whole new world of possibilities, streamlining our tasks and accomplishing more in less time. So let's embrace these techniques, elevate our keyboard game, and embark on a journey towards ultimate productivity. Remember, practice makes perfect, and with dedication and commitment, you too can become a keyboard pasting master in no time. Happy pasting!
Factory Adress: No.11,FengpingRoad