Best quality Gaming Keyboard is designed with appearance and functionality which are consistent with what is expected by customers. Keyceo Tech Co., LTD has a strong R&D team to research the changing requirements on the product in the global market. In addition, the product is highly cost-efficient and practical. The adoption of high-quality materials and advanced production technology ensures that the product is with a long service life and reliability.
We are very hopeful about a brighter future of our Keyceo branded products since their influence have already reached not only the domestic market but also the global market due to both their high-performance and our satisfactory after-sales service that comes with them. With our diligent work, our brand's overall competitiveness and customers' degree of satisfaction have been highly improved.
Benefits are the reasons customers buy the product or service. At Keyceo, we offer high quality Best quality Gaming Keyboard and affordable services and we want them with features which customers perceive as valuable benefits. So we try to optimize services such as product customization and shipping method.
How can I clean my computer keyboard?
CAREFULLY use a small paintbrush and a vacuum cleaner, set to low suck, to remove all the crumbs and general crud. Then carefully wipe it with a warm, damp cloth. Use cotton wool buds and the brush to get into the crevices. Do not be tempted to remove the keys.
------
how do I clean my computer keyboard?
I take all my keys out and wash and dry them, then use a toothbrush to clean all the food and stuff from the keyboard itself. then wipe it all down nicely with a cloth and then put all the keys back on. Works great for me. Just dont wash the whole keyboard. The electronic parts wont like it.
------
My laptop computer keyboard got wet and not it does not work. Any info would greatly be appreciated?
you can have your keyboard replaced for around $100 less if you replace it yourself
------
how do you clean your computer keyboard?
what kind of keyboard? Desktop keyboards sometimes, not always, but sometimes, can accumulate a lot of dust and sometimes require you to pop out a key, use compressed air and get the stuff below the keys to that open area of where you popped out a key to get the junk out. laptops...can be a tad more sensitive to the key popping thing...but you ought to do well with compressed air (canned air) with it as well. Heck even turning it upside down and gently shaking sometimes frees up stuff to be blown out of it.
------
does a computer keyboard have a circut card in it?
Yes top right corner there the light are normally, if you have a wireless keyboard they are some where in there, with a small wireless chip attached. that's why when you spill a liquid on your keyboard and its wired you can fry your motherboard
------
What's a good way to clean a computer keyboard?
I have used alcohol, Clorox wiipes, and I have sprayed Windex on a paper towel. They all worked! I always have the computer and keyboard off first. I give time for any moisture to evaporate.
------
What's the best way to clean a desktop PC computer keyboard?
if its a new keyboard (2 years or so) you can put it in the dish washer, top rack. No, I am not kidding
------
how do you fix a computer keyboard that won't press certain buttons?
Are they just stuck, then you need to clean your keyboard
------
computer keyboard is broken. please help?
First of allwow! I did not no you would take your keys off! Second of all ask your mothers and fathers or peers Im certain they are going to no what is fallacious. If now not, name a comuter location! byeee!
------
Why is the computer keyboard designed the way it is with the alphabets all jumbled up? Who came up with it?
I dont know. Thats a good question
------
what does f-1 to f-12 means on a computer keyboard?
Those are the Function keys.....Built in short cut keys for some programs.....Typing F8 during start up will put you in safe mode on some qputers
------
Poll: When did you learn to type on the computer keyboard?
like 9 now im 19
------
Why is a computer keyboard set out the way it is?
The 1874 Sholes & Glidden typewriters established the QWERTY layout for the letter keys that is used nowadays in Anglophone countries for virtually all computer keyboards and the majority of other keyboards. Other nations using the Latin alphabet may use variants of the QWERTY layout, for example the French AZERTY layout. It is generally acknowledged that the QWERTY design was concerned with trying to minimize jamming of the keys. How this was accomplished is a matter of some dispute. It is easy to find claims that QWERTY was intentionally designed to slow typing down so as to minimize jamming, although there does not appear to be any hard evidence to support this claim. There were many other typewriter designs competing with QWERTY during the latter part of the nineteenth century although QWERTY eventually came to dominate the market. News reports of typing contests during that period indicate that QWERTY did quite well. Radically different layouts such as the Dvorak keyboard have been marketed for many decades but have not been able to replace the QWERTY layout, despite the advantages claimed by their proponents. The Dvorak layout placed the frequently used letters in the home row in order to minimize movement of the fingers while typing most words. There is little dispute of this fact, although there is a great deal of dispute about whether finger movement actually increases typing speeds [See QWERTY]. However, many say the Dvorak keyboard improves typing accuracy and comfort over the QWERTY keyboard. Many non-Latin alphabets have keyboard layouts that have nothing to do with QWERTY. The Russian layout, for instance, puts the common trigrams , , and on adjacent keys so that they can be typed by rolling the fingers. The Greek layout, on the other hand, is a variant of QWERTY.
Wired Ergonomic Split Keyboard with Pillowed Wrist Rest, USB Computer Arched Keyboard Design for Natural Typing, Split Keyboard Compatible for Windows/Mac, US English Layout. Wired Ergonomic Split Keyboard with Pillowed Wrist Rest.
USB Computer Arched Keyboard Design for Natural Typing.
Less Strain , less Discomfort : Our keyboard will help prevent strain and fatigue you will normally endure when using other traditional keyboards.
Integrated Wrist cushion :A cushioned palm rest provides support and comfort for an enhanced typing experience.
Split Ergonomic Design :Our keyboard layout is divided into two zones to promote natural palm, wrist, and forearm positioning.
Full-sized layout :117 keys allow you to easily complete any form of computer work.
23 Shortcut/Multimedia keys :Seamlessly navigate apps or commands with the press of a button.
LED Indicators :For Caps Lock, Num Lock, and Functions Lock.
Adjustable kickstand :Achieve the perfect typing angle or lay the keyboard flat on the desk.
5 Pcs Keyboard feet pad are make sure the keyboard will not move during the use .
4 PCS LED ( Num lock/Capslock/Scroll lock/Fn lock )
Plug and Play with USB-A Port
Support 2.4G Wireless Vesrion
Split Keyboard Compatible for Windows/Mac, US English Layout
From a hundred yuan to thousands of yuan, I may have used more mechanical keyboards than 99% of people. But the latest FEpro75 launched by Ai Stone gave me a surprise far beyond this price.
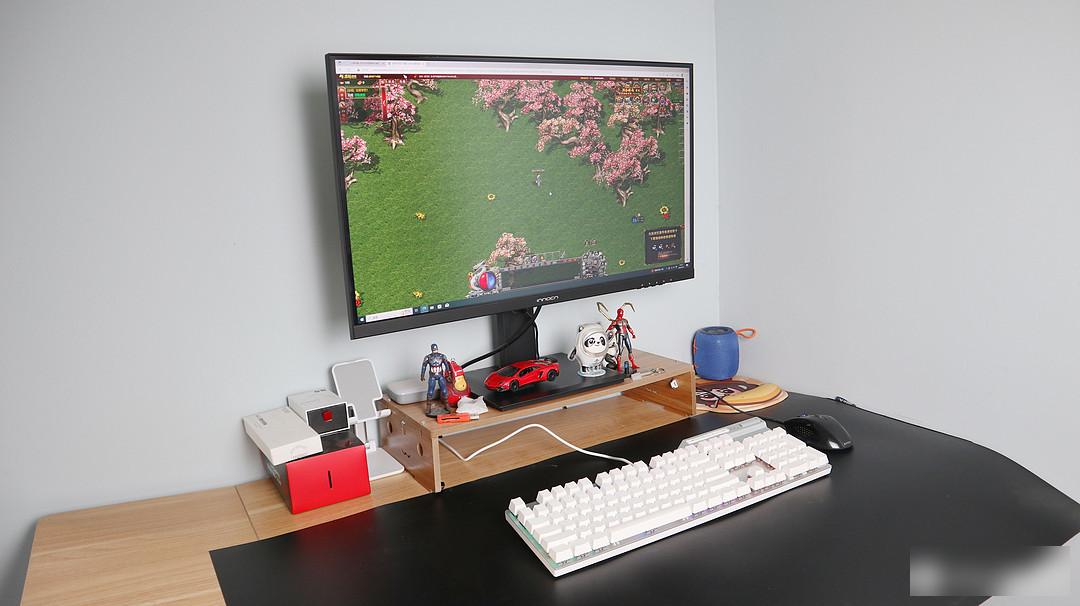
The first is appearance, white YYDS! It goes perfectly with the white table top. As a mechanical keyboard, RGB lighting is naturally standard. You can adjust the lighting mode effect in real time through shortcut keys or software, and the game operation is directly improved by 100%.
The adaptability is also very nice. It supports wired, bluetooth and built-in 2.4G receiver connection. Whether it is PC, notebook or iPad, it can be switched seamlessly. With the 40-day battery life brought by the 3800 mAh battery, it is basically Say goodbye to battery life anxiety.
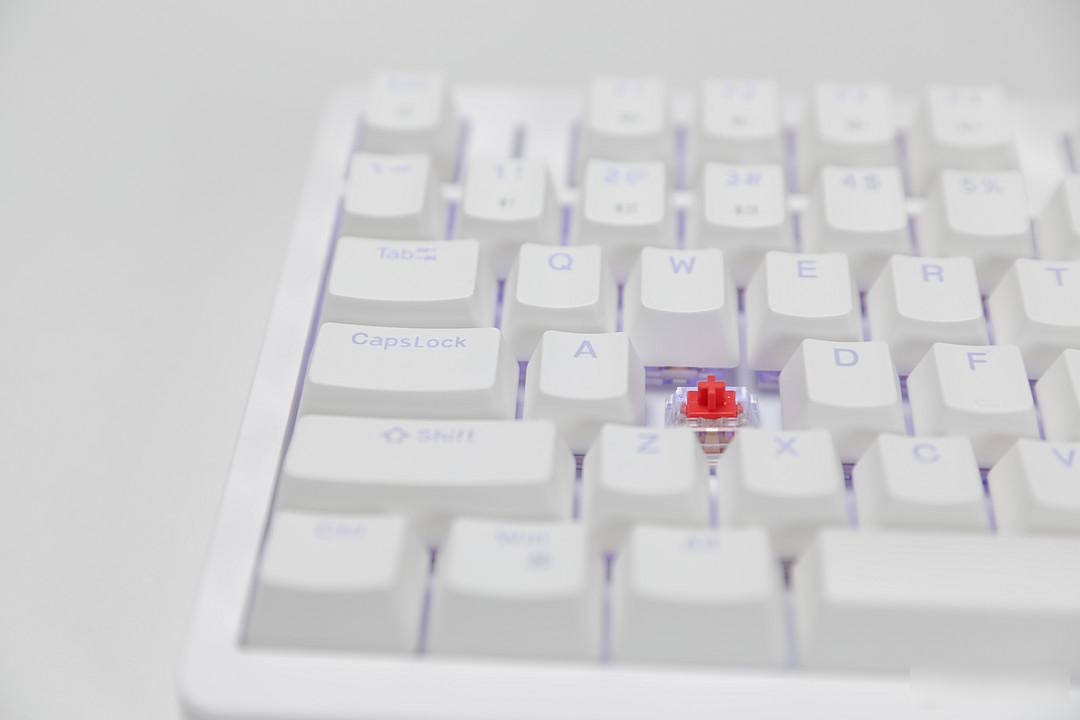
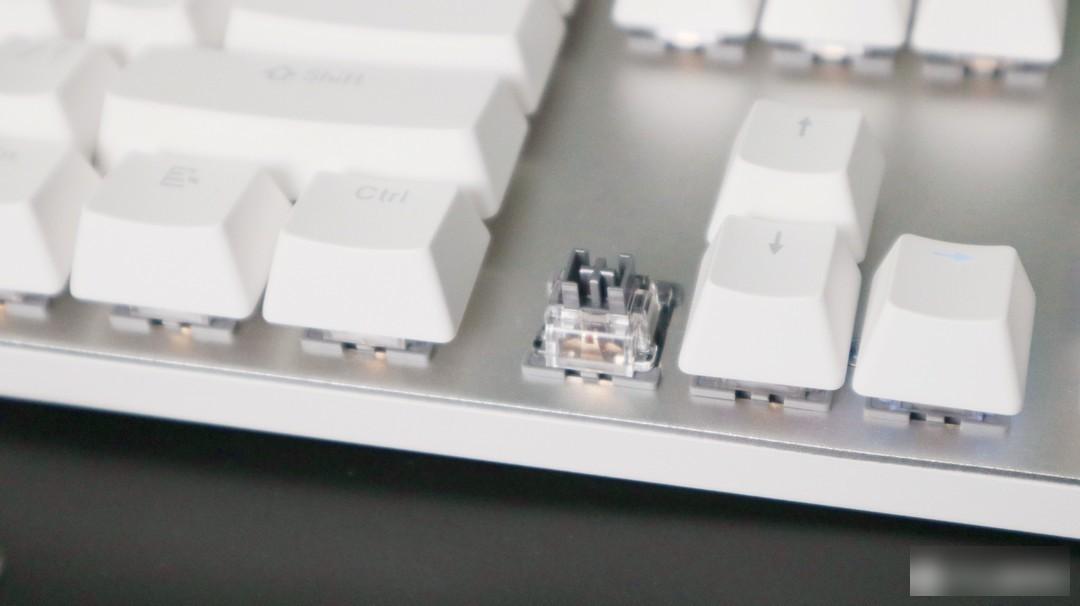
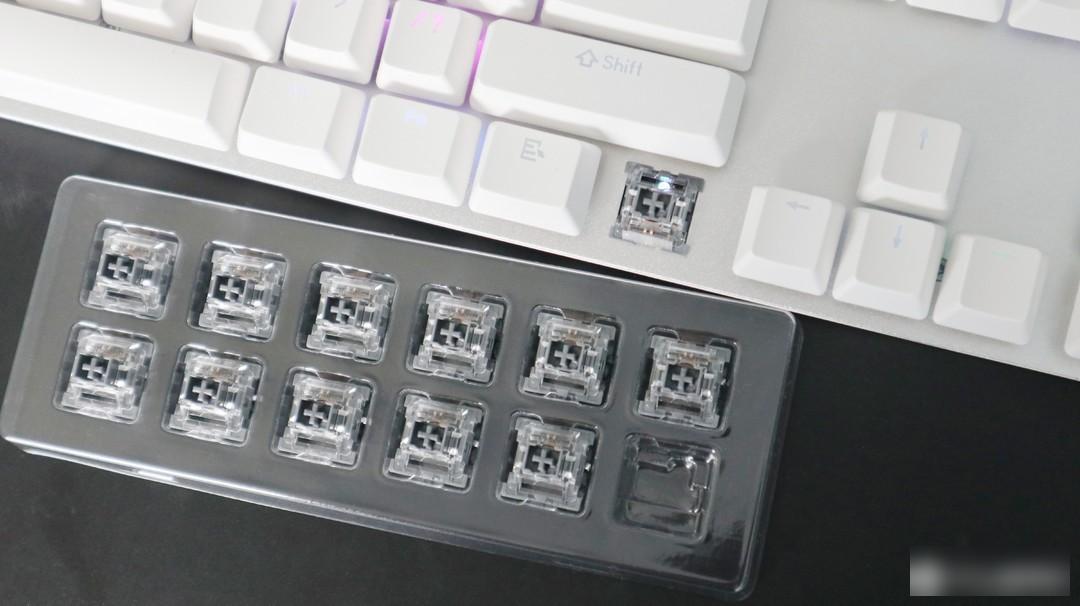
I chose the red shaft for the shaft body, which feels as silky as Dove. There is no rush and no sense of paragraph in the whole process. With the noise reduction design, it is quite suitable for people like me who often code and use, and I am not afraid of disturbing others. There is also a hot-swappable design, which is very convenient if the shaft body needs to be replaced, and there is a huge space for DIY.
After a few days of use, the strength of this keyboard convinced me to use it as the main equipment. And now the Double Eleven event, you can get it for only 279 yuan, what kind of bicycle do you need at this price?
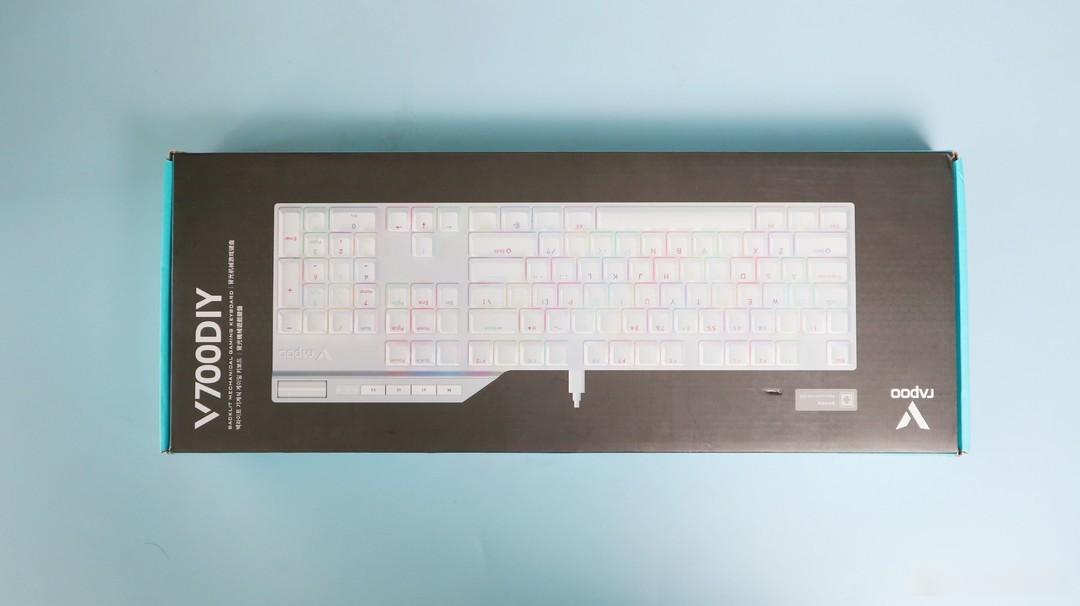
Playing games is almost what most boys like to do in their spare time, and of course I am no exception. The most important thing to play games is to have a good keyboard, because even if you lose, you can only be controlled by the family leader due to the economic power, so even if you have a favorite gaming keyboard, you can’t get it quickly. However, this time, just in time for the Rapoo V700DIY big release price, you can buy it for only 279 yuan. I bought this Pennefather V700DIY keyboard, and after using it for a few days, I think it is very good, so I will share it with you here.
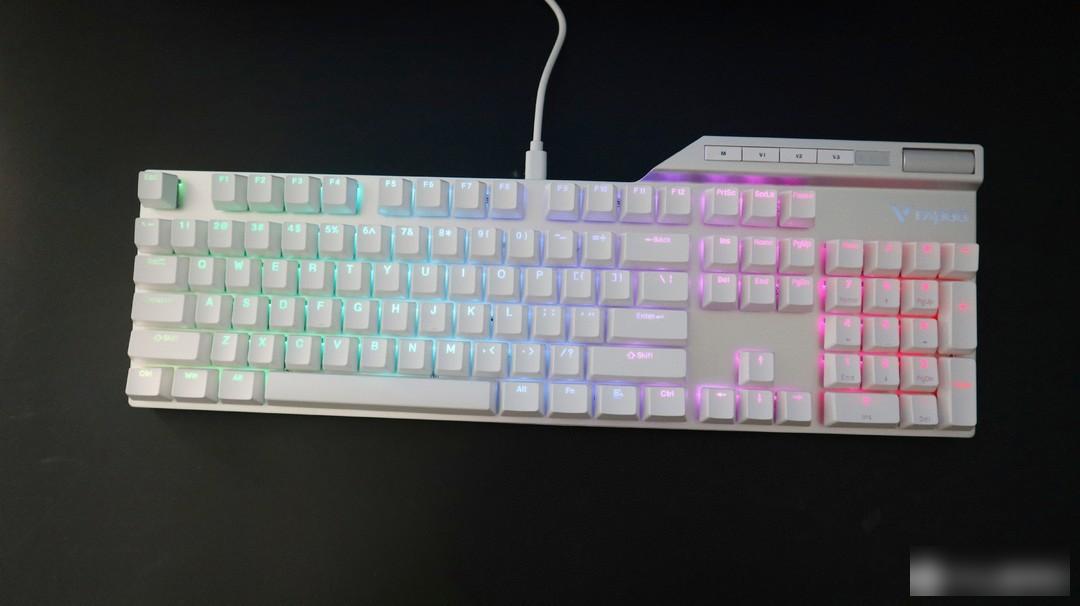
The front of the packaging box of this Rapoo V700DIY is designed with a rendering of the keyboard, which looks quite amazing, and its appearance is not inferior to the mechanical keyboard with a price of 1,000 yuan.
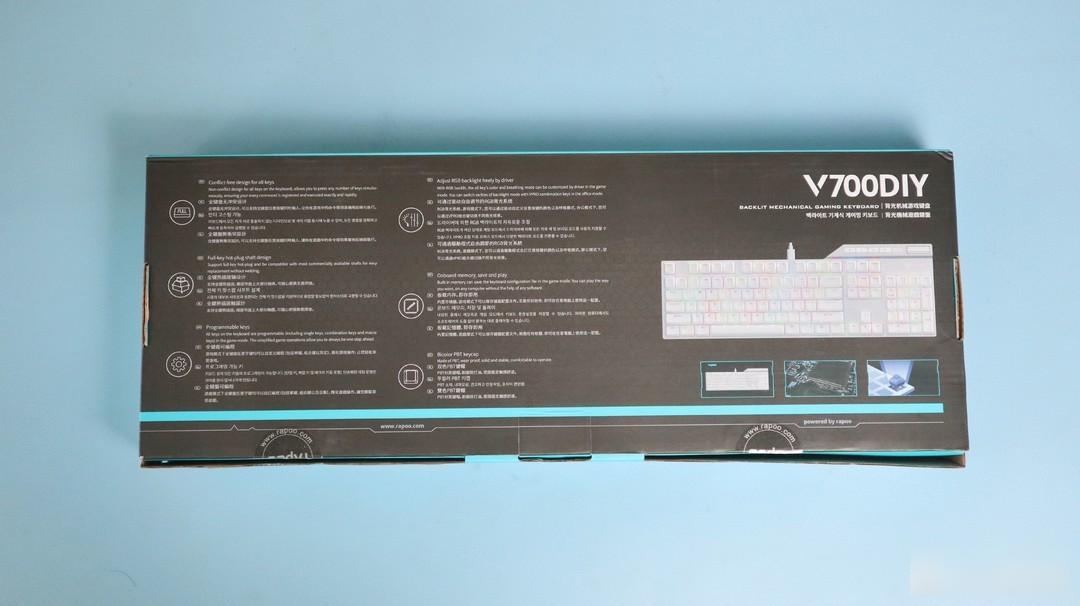
On the back of the package is a multilingual function introduction of the Rapoo V700DIY mechanical keyboard, presumably because it has a relatively wide market and is designed for the sake of customers.
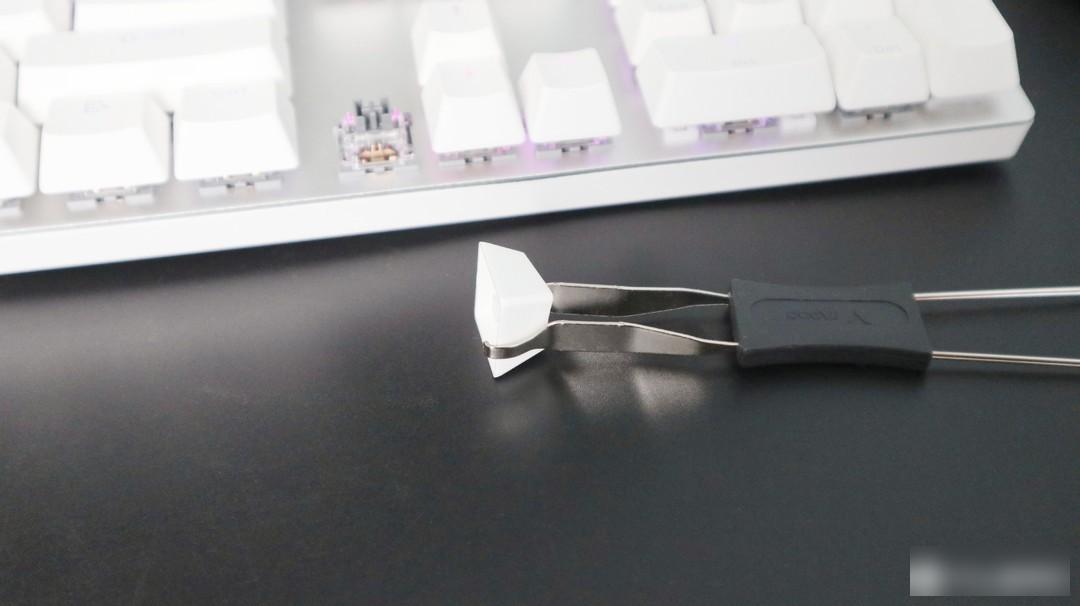
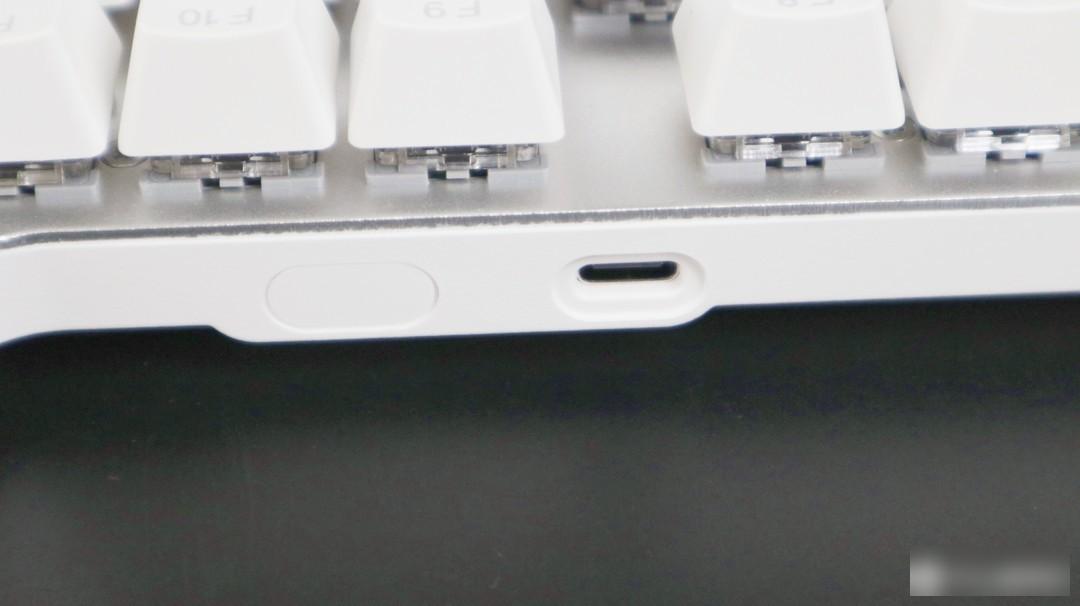
Opening the package, we can see that in addition to the keyboard itself, it also provides an instruction manual, a type-c interface power supply cable, and a key puller. Overall, it is not a problem to satisfy the use.
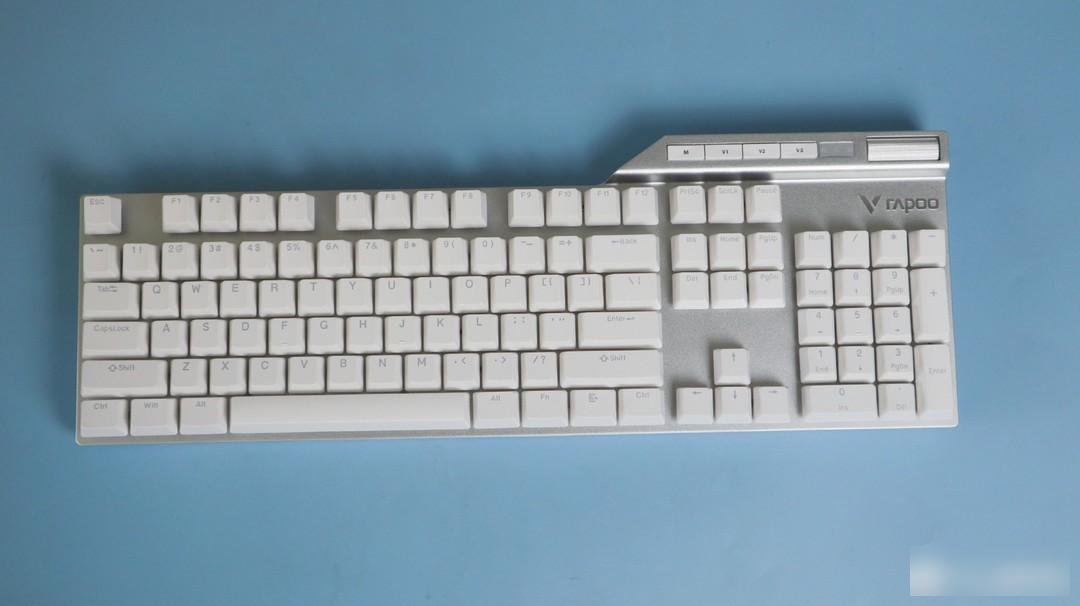
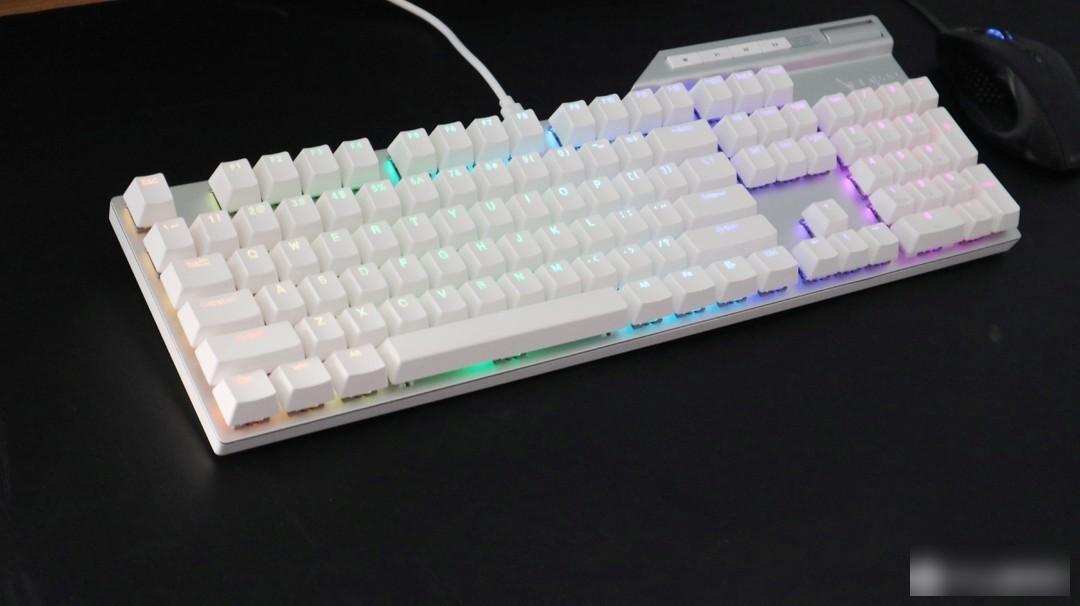
The overall size of the Rapoo V700DIY gaming mechanical keyboard is 435*149*48, and the weight is 835 grams, which is quite heavy in the hand.
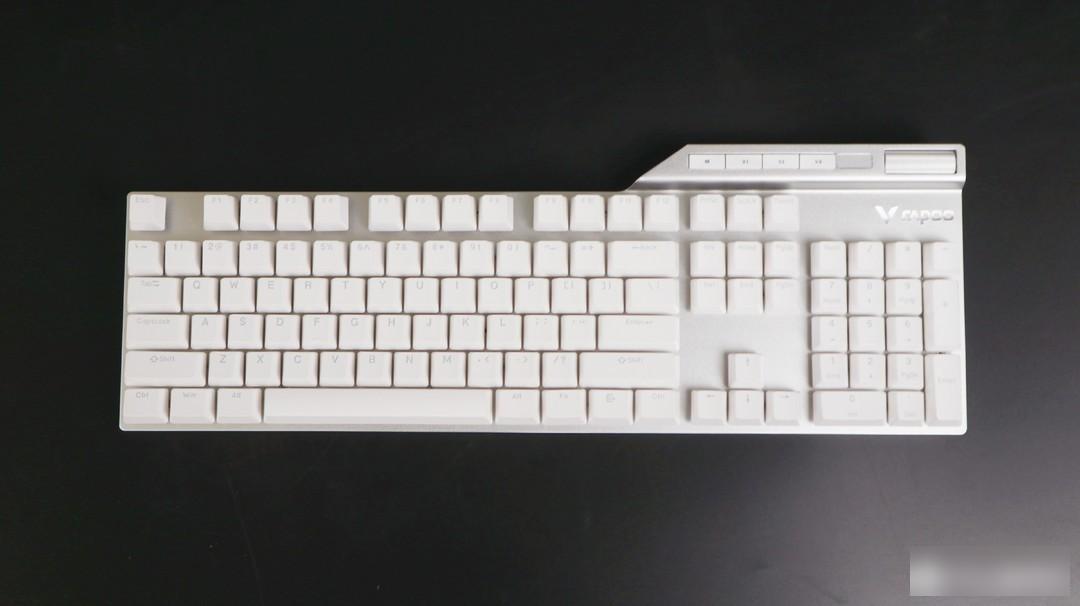
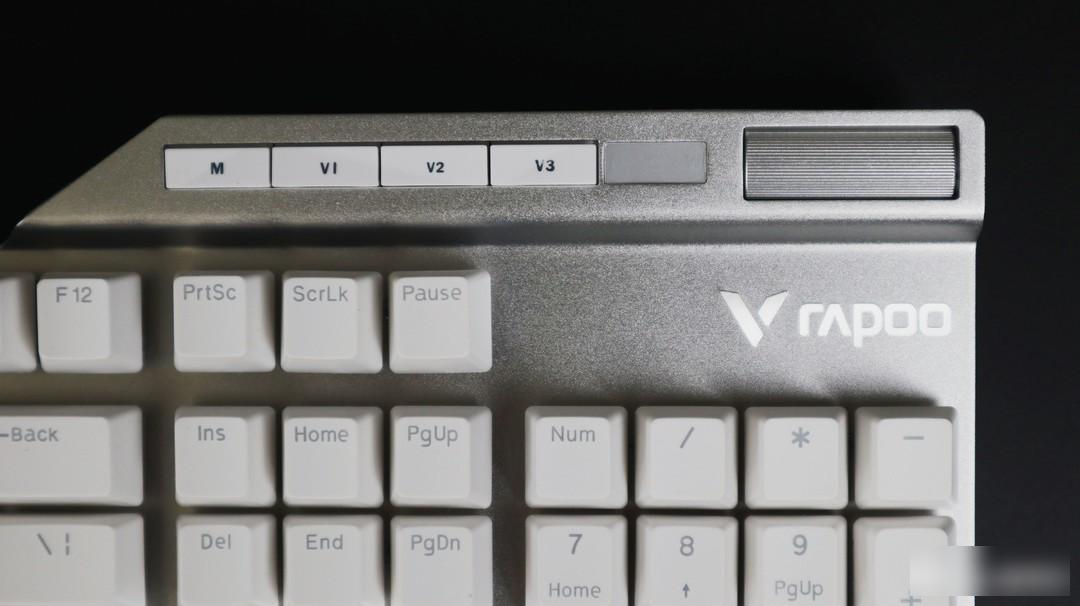
The front adopts a simple and narrow frame design style, with the tough dorsal fin shape in the upper right corner, which raises the overall grade of the keyboard to a higher level.
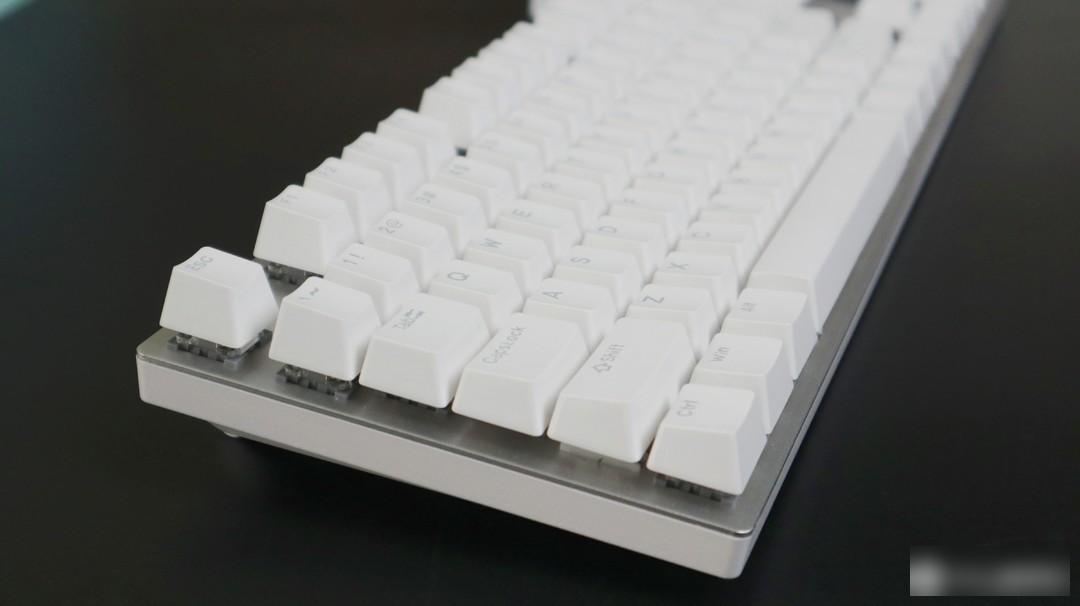
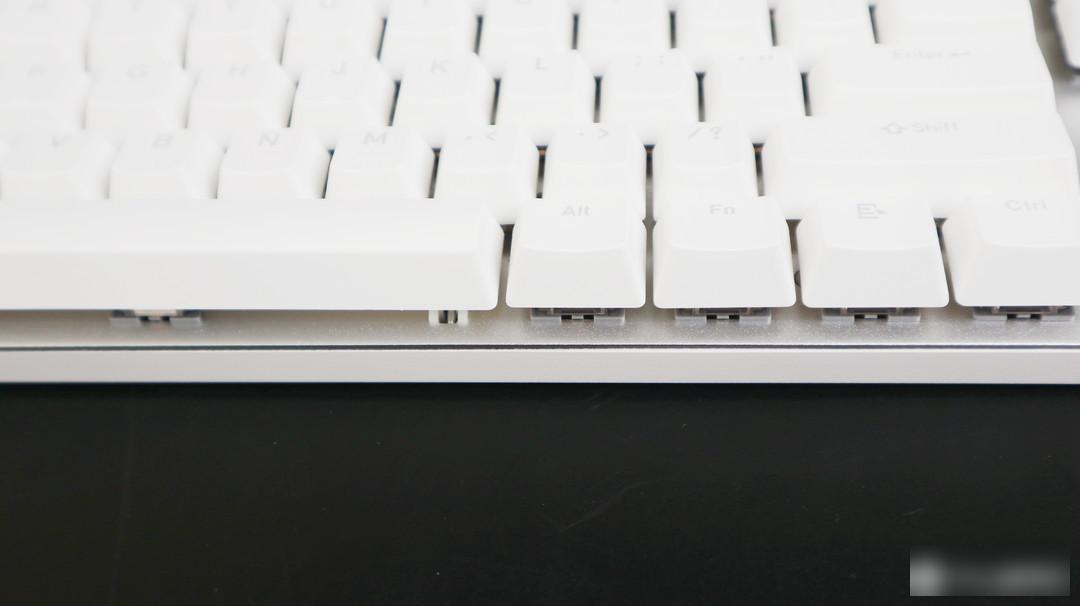
The floating ergonomic keycap and the silver aluminum alloy top cover not only feel better to use, but also look as good as keyboards of the same price.
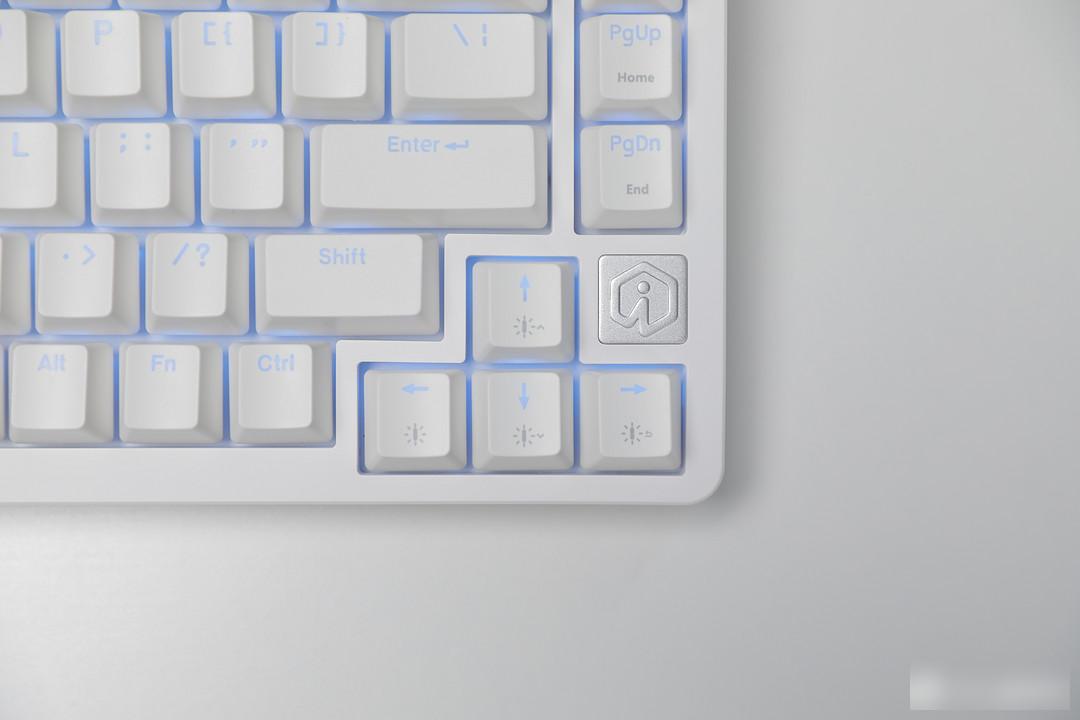
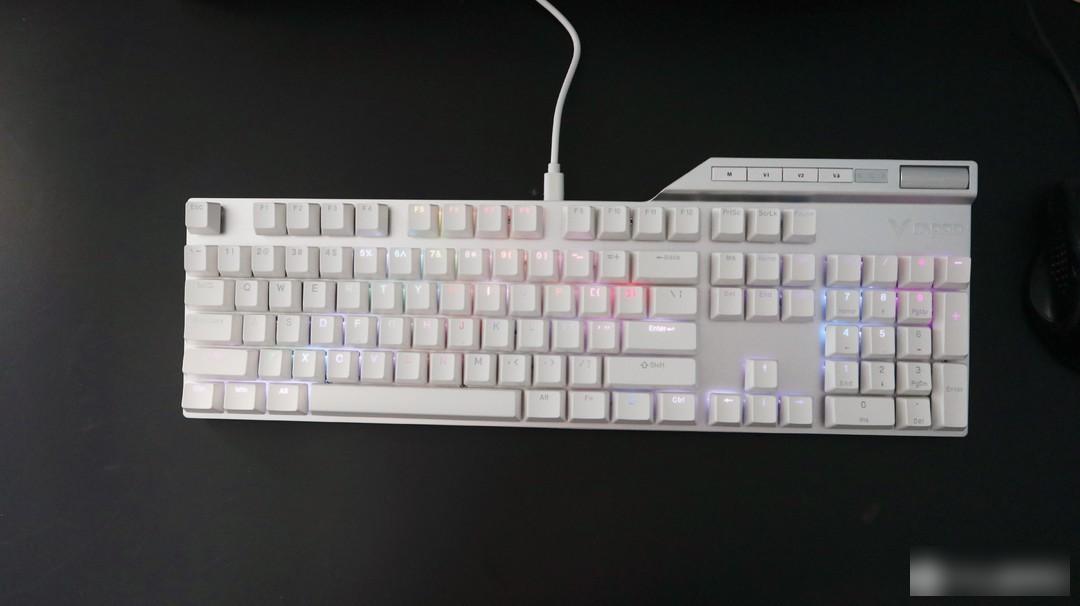
There are several function buttons designed in the shape of the dorsal fin, the most interesting of which is the finger-sliding scroll wheel design, which can adjust the brightness/volume of the light. The other few are ordinary buttons, the M button is to set the game/office mode, the V1 button switches the light mode, the V2 button is the scroll wheel mode switch button, and the V3 is to turn on/off the mute. The advantage of this design is that when you need to modify the mode , and the corresponding function keys can be found soon.
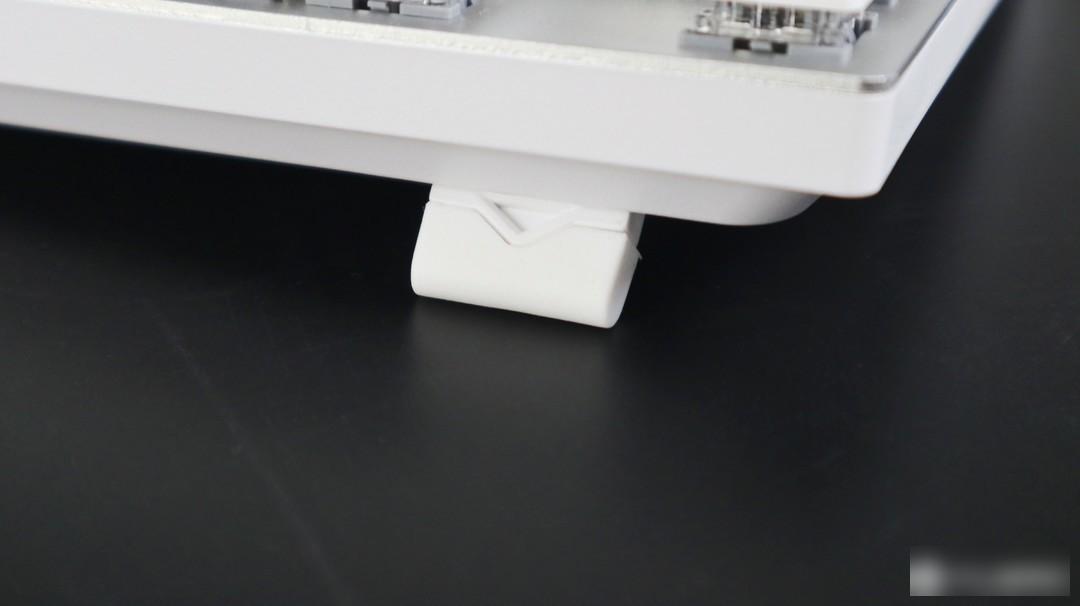
The silicone tripod at the bottom can flexibly adjust the support angle, like when I use it, it is generally tilted at a 30-degree angle, and I think it is just right.
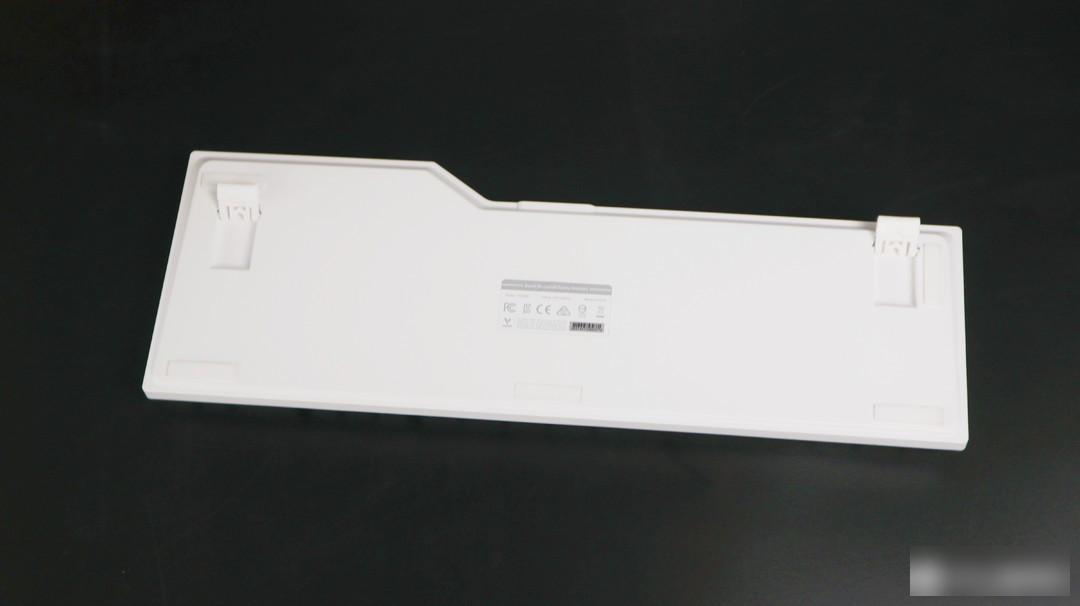
Used with anti-slip stickers, it can better ensure the stability of the keyboard on the desktop, even when playing games.
The Rapoo V700DIY mechanical keyboard adopts PBT two-color injection molding process, which is full of materials and has a fine-grained touch, which is very comfortable to the touch. The light transmission is uniform and the light effect experience is good. Even if you use it for the first time, you will like this feeling.
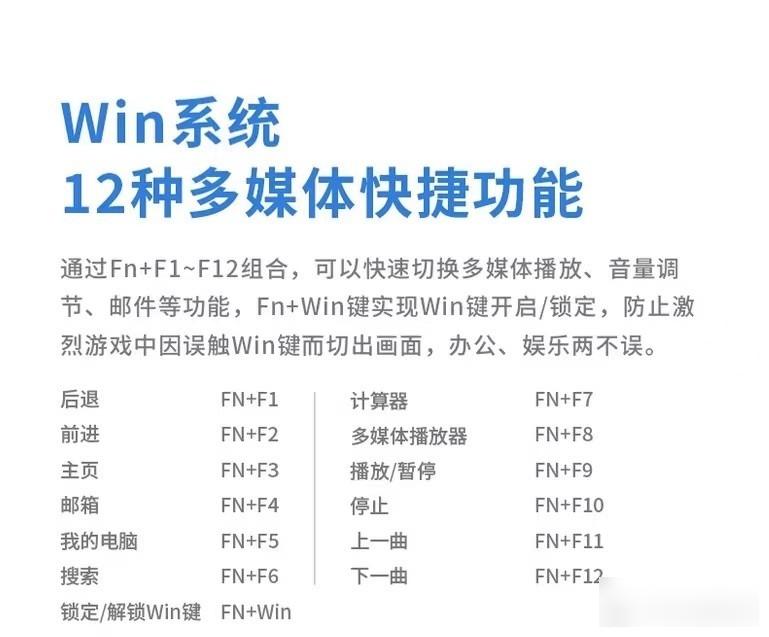
Through the combination of Fn+F1-F12, functions such as multimedia playback, volume adjustment, and mailbox can be quickly switched. Since there are many functions, I will not repeat them one by one. A picture is attached below for your reference. Moreover, the opening and locking functions can also be realized through the combination of Fn+Win, so as to avoid affecting the game experience due to accidental touch when playing games.
Most of the mechanical keyboards I used in the past did not support numeric keypads. When doing some digital calculations or entering verification codes, the actual user experience will not be very good. This time, the Rapoo V700DIY supports a full-size layout of 104 buttons. After connecting the USB, you can realize the full-key no-click, whether you are working or playing games, you can feel its smoothness.
The hot-swappable metal shaft seat is used, which is anti-oxidation and strain-resistant, and the contact is stable and firm. It supports a service life of up to 10,000 times, so it can be said that there is no need to replace it for life.
Rapoo’s fast silver shaft has a total stroke of 4mm, a trigger stroke of 0.8-1.8mm, and a trigger pressure of 35-55g. The service life of a single shaft is 50 million times. Even if dust falls into it, it can avoid jamming and failure, and it can be used for a long time Can also maintain a comfortable experience.
The Rapoo mechanical keyboard supports two states. The office mode and game mode can be realized through the M key. In the office mode, 18 lighting modes can be switched through the V1 key. In the game mode, the V1 key can be used to switch or drive the software. There are as many as 19 lighting modes, which support one-button independent setting of the magic light color, custom personalized lighting, and five-level brightness adjustment.
Through the supporting driver software, multiple sets of configuration files can be saved to achieve multi-scene switching operations. A total of 104 keys except 5 multi-function keys can be programmed independently, and multiple customizations (combination keys, lighting, macro editing, cloud synchronization) can be easily realized How to play, you can also share your configuration files to the cloud, allowing other players to share your custom happiness.
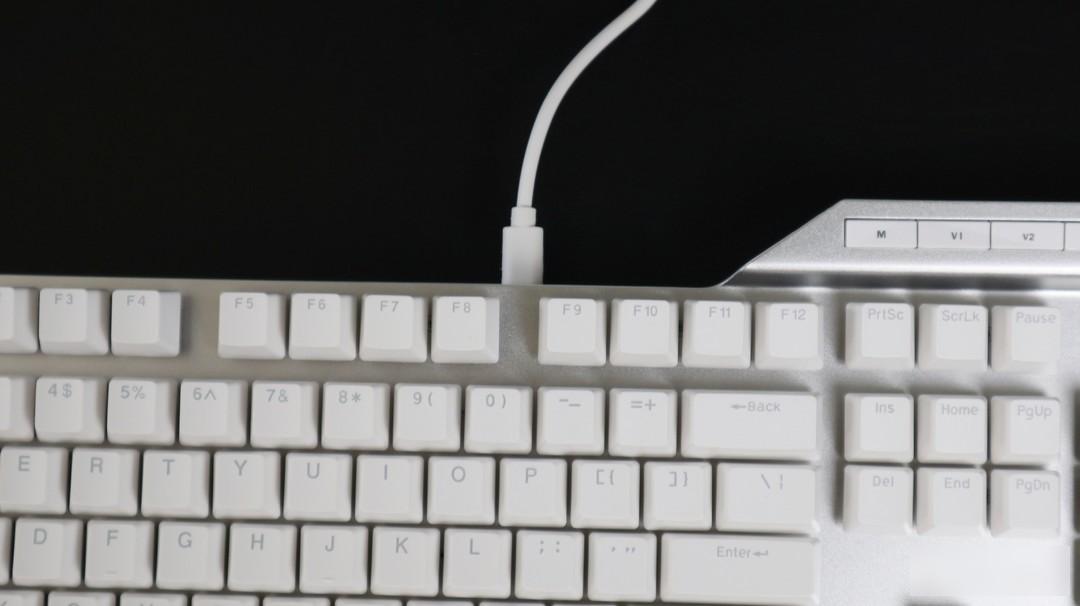
The gold-plated anti-oxidation USB interface has strong corrosion resistance and can keep data stable for a long time. The 1.5-meter detachable storage cable is easy to carry and has a good user experience.
This Pennefather V700DIY mechanical keyboard has a simple and narrow frame design, which has a higher appearance value. The floating ergonomic keycap design has a good hand feel and a high appearance value. In addition, there is a fast silver switch with a good user experience. It is really a very good product. Gaming mechanical keyboard, friends who like it can learn about it.
Are you tired of using a standard keyboard that causes discomfort and strain after hours of typing? Look no further! In this article, we will guide you through the process of assembling your own ergonomic keyboard, tailored to fit your unique needs and preferences. Say goodbye to wrist pain and hello to a more comfortable and efficient typing experience. Read on to discover how you can create a keyboard that supports your wrists and promotes better posture.
In today’s fast-paced world, many of us spend a significant amount of time using keyboards. Whether it’s for work, gaming, or simply browsing the internet, the hours spent in front of a computer can take a toll on our bodies. This is why understanding the importance of ergonomic keyboards is crucial for maintaining our health and well-being.
When it comes to assembling your own ergonomic keyboard, it’s important to consider the different components that make up a truly ergonomic design. From the layout of the keys to the angle and positioning of the keyboard, each aspect plays a vital role in ensuring that your hands, wrists, and arms are kept in a natural and comfortable position.
One of the key components to look for in an ergonomic keyboard is the split design. This means that the keyboard is divided into two separate sections, allowing you to position each half according to the natural angle of your wrists. This helps to reduce the strain on your wrists and forearms, which can be a common issue with traditional keyboards.
Another important feature to consider is the tenting or tilting of the keyboard. This refers to the ability to adjust the angle of the keyboard to suit your individual needs. By tilting the keyboard, you can reduce the strain on your wrists and help to maintain a more natural and relaxed posture while typing.
Additionally, the shape and contour of the keys themselves can make a significant difference in the overall comfort of the keyboard. Look for keys that are shaped to fit the natural curvature of your fingers, allowing for a more natural and comfortable typing experience.
When it comes to choosing the right ergonomic keyboard, it’s important to consider the specific needs of the individual. This is where the expertise of an ergonomic keyboard manufacturer comes into play. These professionals are able to provide valuable insights and recommendations based on their knowledge and experience in the field of ergonomic design.
An ergonomic keyboard manufacturer will have a deep understanding of the different factors that contribute to a truly ergonomic design. From the materials used to the layout and positioning of the keys, they are able to offer expert guidance on how to assemble a keyboard that not only looks and feels great but also promotes better ergonomics.
In conclusion, the importance of ergonomic keyboards cannot be overstated. With the amount of time we spend using keyboards on a daily basis, it’s crucial to prioritize our health and well-being by investing in a keyboard that is designed with ergonomics in mind. By understanding the key components of an ergonomic keyboard and seeking the expertise of an ergonomic keyboard manufacturer, you can assemble a keyboard that not only enhances your typing experience but also protects your long-term health.
If you're considering assembling your own ergonomic keyboard, you'll quickly find that one of the most important steps is choosing the right components. With the wide variety of options available, it can be overwhelming to determine which components will best suit your needs. In this article, we will explore the important factors to consider when selecting components for your custom keyboard.
The first step in choosing components for your custom ergonomic keyboard is to consider the layout. Do you prefer a standard layout, or are you interested in a more unique configuration, such as a split or ortholinear layout? Additionally, consider the size of the keyboard. A full-sized keyboard offers a number pad and all standard keys, while a smaller form factor may be more comfortable and ergonomic for some users.
Next, you'll want to consider the switches for your custom keyboard. Switches determine the feel and sound of your keyboard, so it's important to choose ones that align with your preferences. There are various types of switches available, including mechanical, membrane, and hybrid switches. Mechanical switches are known for their durability and customizable feel, while membrane switches are quieter and offer a softer typing experience. Hybrid switches combine the best of both worlds, offering a comfortable typing experience with a tactile bump.
When selecting keycaps for your custom keyboard, you'll want to consider the material and profile. Keycaps come in a variety of materials, including ABS, PBT, and POM. PBT is known for its durability, while ABS offers a smooth, glossy finish. Additionally, keycaps come in various profiles, such as OEM, Cherry, and SA. Each profile offers a different feel and aesthetic, so it's important to select the one that best suits your preferences.
Another important component to consider for your custom ergonomic keyboard is the case. The case not only provides protection for the internal components but also determines the overall aesthetics and feel of the keyboard. When choosing a case, consider the material, such as plastic, aluminum, or wood, as well as the design and layout. Some cases offer a low profile for a sleek, minimalist look, while others provide a more ergonomic shape for increased comfort during extended use.
In addition to the main components of the keyboard, it's important to consider other accessories that can enhance the functionality and aesthetics of your custom keyboard. This may include a wrist rest for added comfort, LED lighting for a personalized touch, and custom cables for a unique look.
In conclusion, assembling your own ergonomic keyboard requires careful consideration of the components that will best suit your needs. By taking into account the layout, switches, keycaps, case, and additional accessories, you can create a custom keyboard that is both comfortable and tailored to your preferences. Whether you're a seasoned enthusiast or new to the world of custom keyboards, selecting the right components is a crucial step in the process.
In today’s digital age, many people spend hours in front of a computer, typing away on a keyboard. This repetitive motion can lead to discomfort and even serious health issues if not addressed properly. That’s where ergonomic keyboards come in. These specially designed keyboards are crafted to provide a more comfortable typing experience, reducing the strain on the wrists and fingers. While there are many pre-assembled ergonomic keyboards on the market, some individuals may prefer to assemble their own to tailor it to their specific needs. This step-by-step guide will walk you through how to assemble your own ergonomic keyboard.
First and foremost, it’s important to gather all the necessary components. The main parts of an ergonomic keyboard include the circuit board, switches, keycaps, stabilizers, and a case. These components can be sourced individually from an ergonomic keyboard manufacturer or obtained as part of a DIY keyboard kit. When choosing these components, it’s crucial to consider factors such as key switch preferences, layout options, and case materials to ensure the final product meets your ergonomic needs.
Once all the components are ready, the assembly process can begin. Start by securing the circuit board to the case using the appropriate screws and standoffs. Some cases may require additional preparation, such as screwing in stabilizers for larger keys or installing dampening materials to reduce noise. Next, the key switches should be inserted into the designated slots on the circuit board, taking care to align them properly. The stabilizers should be clipped onto the larger keys, ensuring smooth and consistent movement.
After the switches and stabilizers are in place, it’s time to attach the keycaps. Depending on the layout chosen, this step may require some attention to detail to ensure the correct keycaps are placed in their respective positions. With the keycaps secured, the ergonomic keyboard should start to take shape and be ready for testing.
Once the keyboard is fully assembled, it’s important to test each key to ensure they register properly. This can be done using keyboard testing software or by simply typing out a sample text. If any keys are not registering, it may be necessary to reseat the switches or troubleshoot any potential issues with the circuit board. Additionally, this is the time to assess the overall comfort and ergonomics of the keyboard. Pay attention to the angle of the keys, the placement of the wrist rest, and the overall feel of typing on the keyboard.
In conclusion, assembling your own ergonomic keyboard can be a rewarding and personalized experience. By following this step-by-step guide and carefully selecting the right components from an ergonomic keyboard manufacturer, you can create a keyboard that fits your specific ergonomic needs. Whether you’re looking to reduce wrist strain, improve typing comfort, or simply customize your keyboard layout, assembling your own ergonomic keyboard provides a versatile and tailored solution. So, gather the components, set aside some time, and embark on the journey of creating your own ergonomic keyboard.
Are you tired of having to strain your fingers and hands to reach all the keys on a standard keyboard? Do you find yourself experiencing discomfort and pain after hours of typing on a traditional keyboard? If so, then it may be time to consider assembling your own ergonomic keyboard. In this article, we will provide you with tips for customizing and fine-tuning your keyboard layout to maximize comfort and efficiency.
When it comes to assembling your own ergonomic keyboard, the first step is to consider the various options available for customization. There are a number of ergonomic keyboard manufacturers that offer customizable components, such as key switches, key caps, and wrist rests. By choosing the right combination of components, you can ensure that your keyboard is perfectly tailored to your individual needs.
One of the most important considerations when customizing your keyboard layout is the key switch type. Key switches come in a variety of options, including tactile, linear, and clicky switches. Tactile switches provide a slight bump when the key is actuated, while linear switches offer a smooth and consistent feel. Clicky switches, on the other hand, produce an audible click sound when the key is pressed. By carefully selecting the right key switch type for your needs, you can ensure that typing is both comfortable and efficient.
In addition to choosing the right key switch type, it is also important to consider the layout of the keyboard itself. Many ergonomic keyboard manufacturers offer split and/or tented designs, which can help to reduce strain on the wrists and hands. By customizing the layout of your keyboard to better accommodate your natural hand positioning, you can minimize the risk of discomfort and pain associated with long hours of typing.
Once you have assembled your ergonomic keyboard, it is important to fine-tune the layout to ensure optimal comfort and efficiency. This can be achieved through the use of key mapping software, which allows you to customize the function and layout of each individual key. By remapping keys to better suit your typing style and preferences, you can reduce the need for awkward hand and finger movements, ultimately minimizing strain and fatigue.
Another important aspect of fine-tuning your keyboard layout is the use of wrist rests. Many ergonomic keyboard manufacturers offer wrist rests that can be attached to the keyboard to provide additional support and comfort. By using wrist rests, you can help to reduce the strain on your wrists and hands, ultimately minimizing the risk of discomfort and pain associated with long hours of typing.
In conclusion, assembling your own ergonomic keyboard can be a great way to maximize comfort and efficiency when typing. By carefully customizing and fine-tuning the keyboard layout, you can ensure that your keyboard is perfectly tailored to your individual needs. Whether it's choosing the right key switch type, customizing the layout, or using wrist rests, there are a number of options available for customizing and fine-tuning your keyboard to maximize comfort and efficiency.
Maintaining and Troubleshooting Your Ergonomic Keyboard
As an avid user of ergonomic keyboards, you understand the various benefits they offer, such as reducing discomfort and strain on your wrists, hands, and arms. However, it’s important to ensure that your ergonomic keyboard is properly maintained and troubleshoot any issues that may arise to maximize its functionality. This article will guide you through the essential steps to keep your ergonomic keyboard in optimal condition.
Cleaning Your Ergonomic Keyboard
One of the most crucial maintenance tasks for your ergonomic keyboard is regular cleaning. The accumulation of dust, crumbs, and other debris can affect its performance and longevity. To clean your keyboard, start by unplugging it or removing the batteries if it’s wireless. Use a soft, lint-free cloth and a gentle cleaning solution to wipe down the keys, surfaces, and crevices. Avoid using harsh chemicals or excessive moisture, as these can damage the keyboard.
If your keyboard has removable keycaps, you can carefully remove them to access the area underneath and clean more thoroughly. Once cleaned, allow the keyboard to dry completely before using it again.
Checking for Wear and Tear
Over time, the keys on your ergonomic keyboard may show signs of wear and tear, such as fading letters or sticking keys. Regularly inspect the keys and the overall condition of the keyboard for any damage or signs of deterioration. If you notice any issues, consider replacing the affected keycaps or contacting the manufacturer for support.
Adjusting and Customizing Your Keyboard
Many ergonomic keyboards offer customizable features to accommodate your specific needs and preferences. Take advantage of these options to adjust the keyboard’s tilt, height, and other settings to ensure a comfortable and ergonomic typing experience. Refer to the manufacturer’s instructions for guidance on how to make these adjustments effectively.
Troubleshooting Common Issues
Despite your best efforts to maintain your ergonomic keyboard, you may encounter occasional issues that require troubleshooting. Some common problems include unresponsive keys, connectivity issues, or software malfunctions. To address these issues, start by checking the keyboard’s connection and ensuring that it’s properly plugged in or has fresh batteries. If the problem persists, consult the manufacturer’s troubleshooting guide or contact their customer support for assistance.
Regular Maintenance Schedule
To ensure that your ergonomic keyboard continues to provide optimal comfort and functionality, establish a regular maintenance schedule. For example, you may decide to clean your keyboard every few weeks, inspect it for wear and tear monthly, and make any necessary adjustments as needed. By staying proactive with your maintenance efforts, you can prolong the lifespan of your ergonomic keyboard and minimize the risk of performance issues.
In conclusion, maintaining and troubleshooting your ergonomic keyboard is essential to preserve its ergonomic benefits and usability. By implementing these maintenance tips and being proactive in addressing any issues that arise, you can enjoy a comfortable and efficient typing experience for years to come. Don't hesitate to reach out to the ergonomic keyboard manufacturer for additional guidance and support when needed.
In conclusion, assembling your own ergonomic keyboard can be a rewarding and satisfying project. Not only does it allow you to customize your keyboard to suit your specific needs and preferences, but it also gives you a greater appreciation for the design and functionality of these essential devices. With our 7 years of experience in the industry, we are confident that the tips and guidance provided in this article will help you in creating a keyboard that promotes comfort, efficiency, and overall well-being. So, roll up your sleeves, gather your tools, and get ready to embark on a DIY journey to a more ergonomic and personalized typing experience.