Keyceo Tech's Are Mechanical Keyboards More Durable
are mechanical keyboards more durable from Keyceo Tech Co., LTD is believed to embrace a promising application in the future. Advanced technology and best raw materials play its role in manufacturing this product. Its high quality meets international standard specifications. Through the unremitting effort of our R&D team in improving the product design, the product not only has a more appealing appearance but also has stronger functionality.
Keyceo has been integrating our brand mission, that is, professionalism, into every aspect of the customer experience. The goal of our brand is to differentiate from the competition and to convince clients to choose to cooperate with us over other brands with our strong spirit of professionalism delivered in the Keyceo branded products and services.
Keyceo not only provides customers with remarkable are mechanical keyboards more durable, but also offers patient and professional customer service. Our staff are always standby to answer the questions and solve the problems.
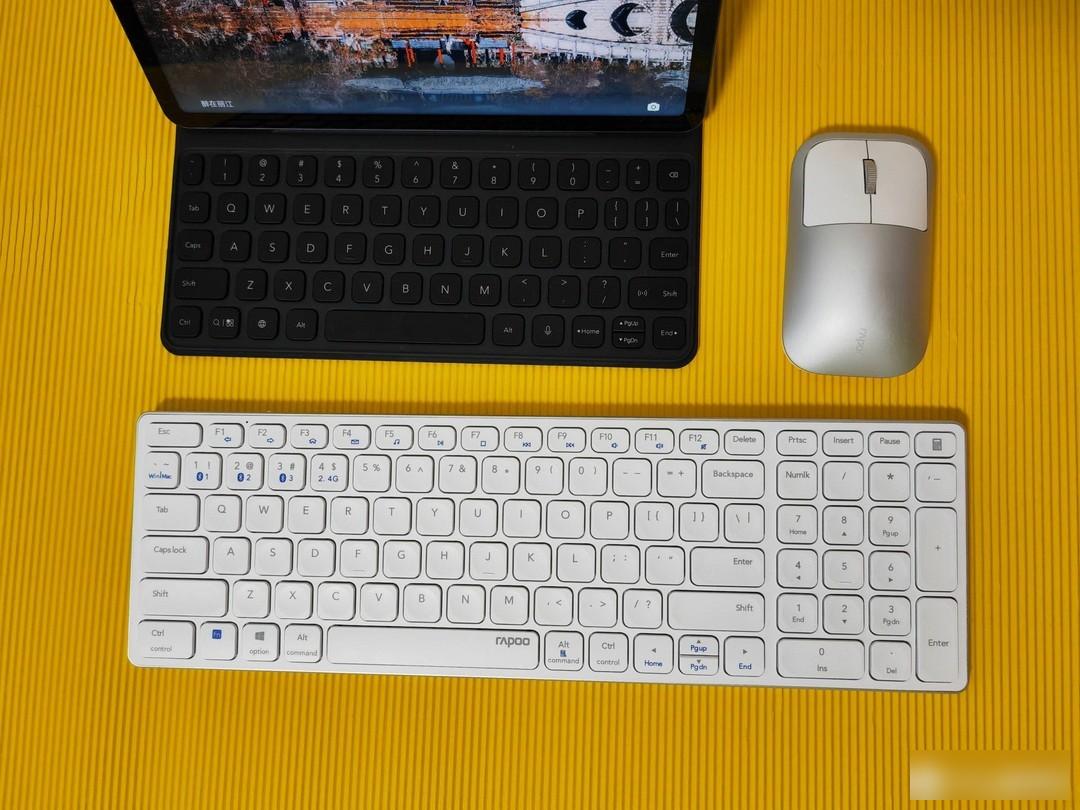
Foreword: With the restart of the project, our office will be transferred from indoor to seaside. Maybe I was careless when packing, the mouse and keyboard actually disappeared when I moved, so I repurchased this set of Rapoo’s fairy peripherals combination online, Rapoo E9350G wireless keyboard and Rapoo M700 wireless mouse. Let’s talk about it. The reason why I will repurchase this set of peripherals is that these two products are not only good-looking, people like it, but also have a very good hands-on experience. The most important thing is that the price is close to the people, so I can’t help but choose they. Next, I will share these two products with you, and those who are interested can pay attention to them.
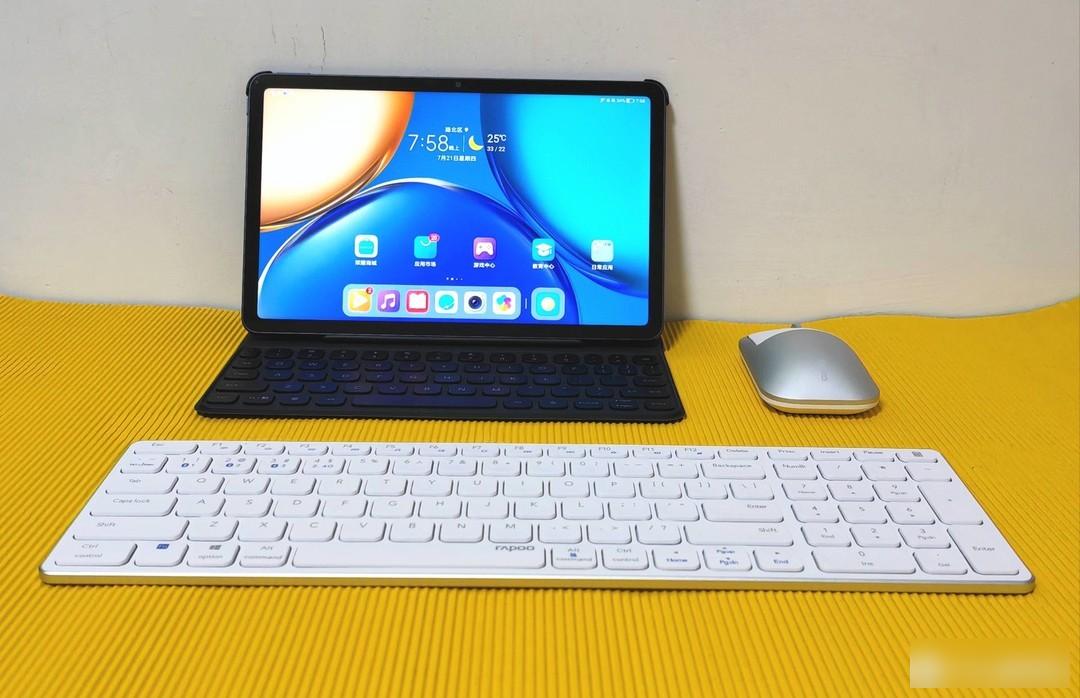
Rapoo E9350G keyboard
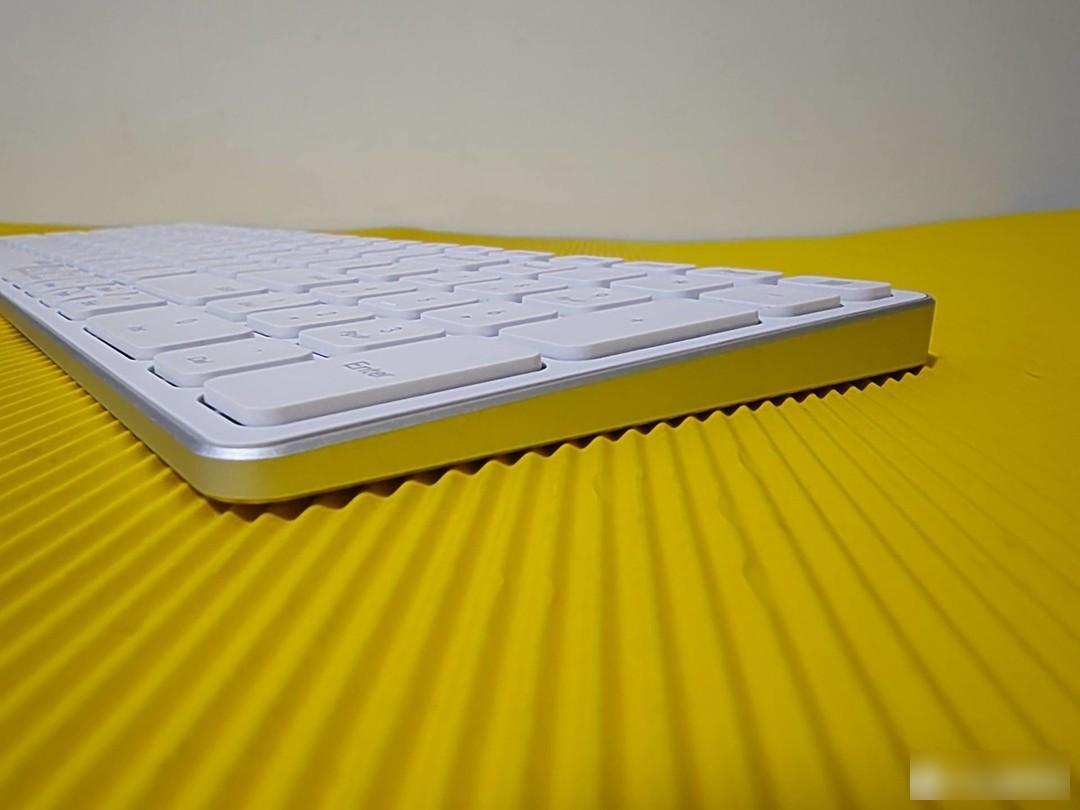
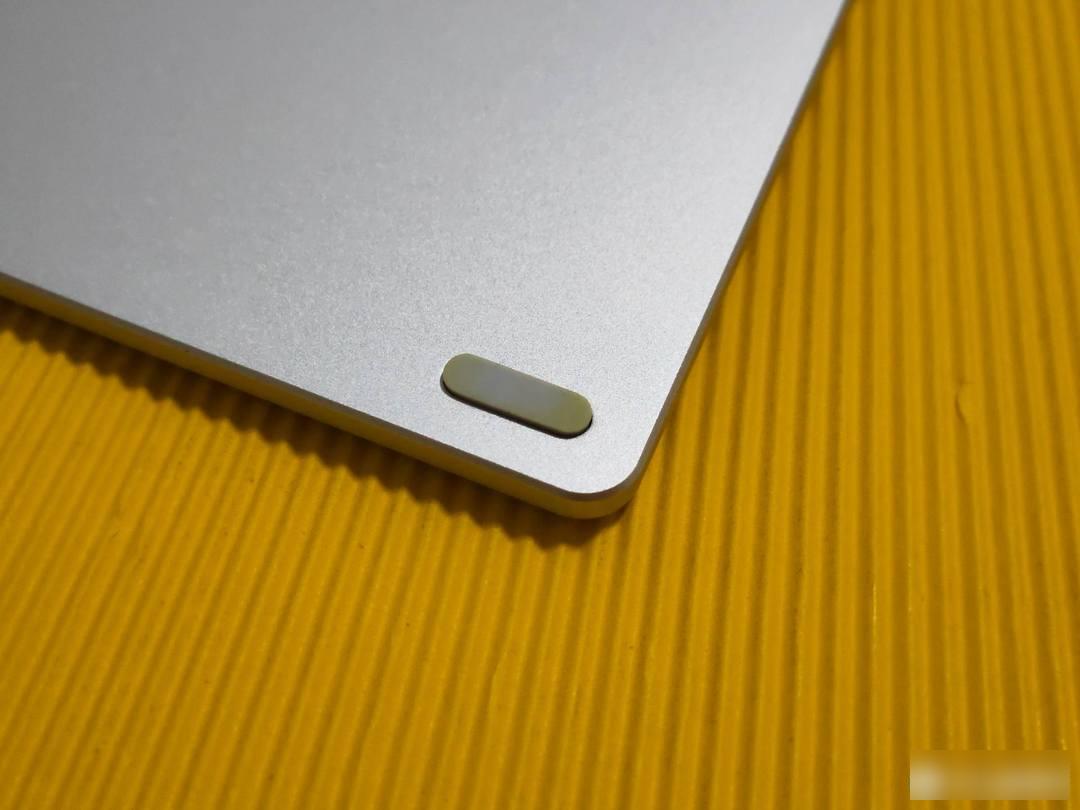
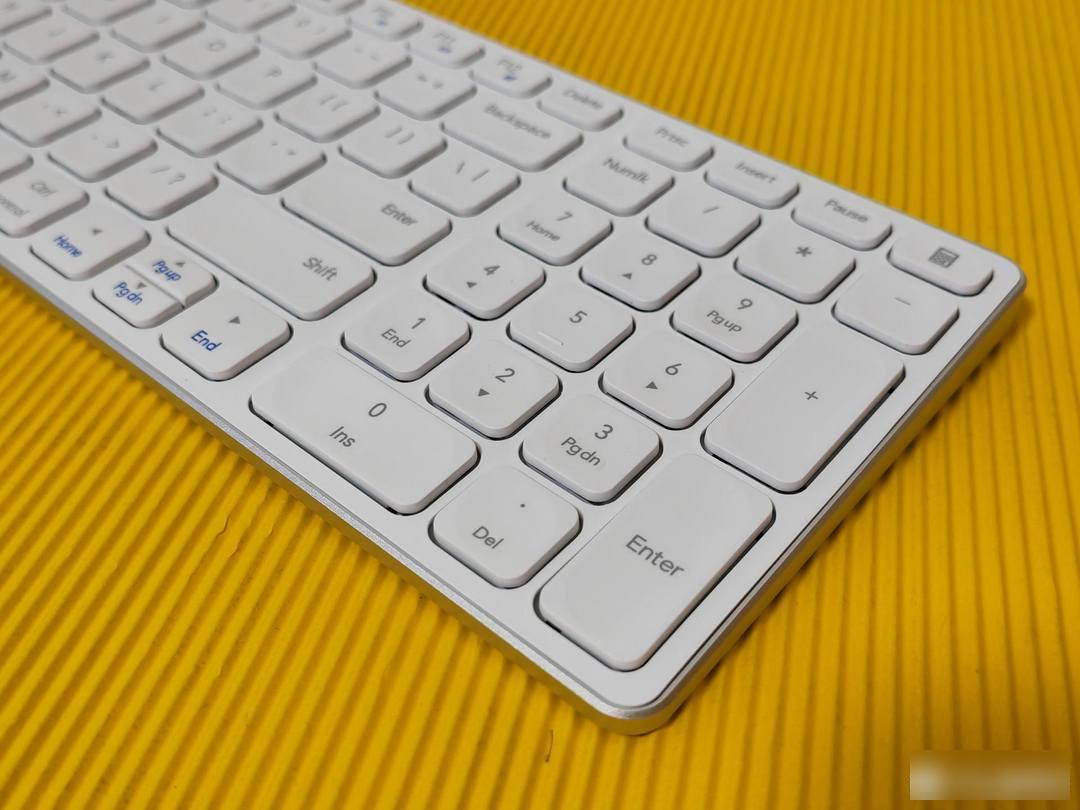
The E9350G adopts a high-front and low-back design, which looks like a sharp knife from the side, so the Blade series deserves its name. The keyboard is designed with 99 keys, and the key arrangement is very compact, which makes the keyboard compact and easy to carry. The keyboard frame and bottom cover are made of aluminum alloy, and the elegant temperament is attractive at first sight. In addition, the four corners of the bottom cover of the keyboard are designed with foot pads to allow it to be placed stably on the table.
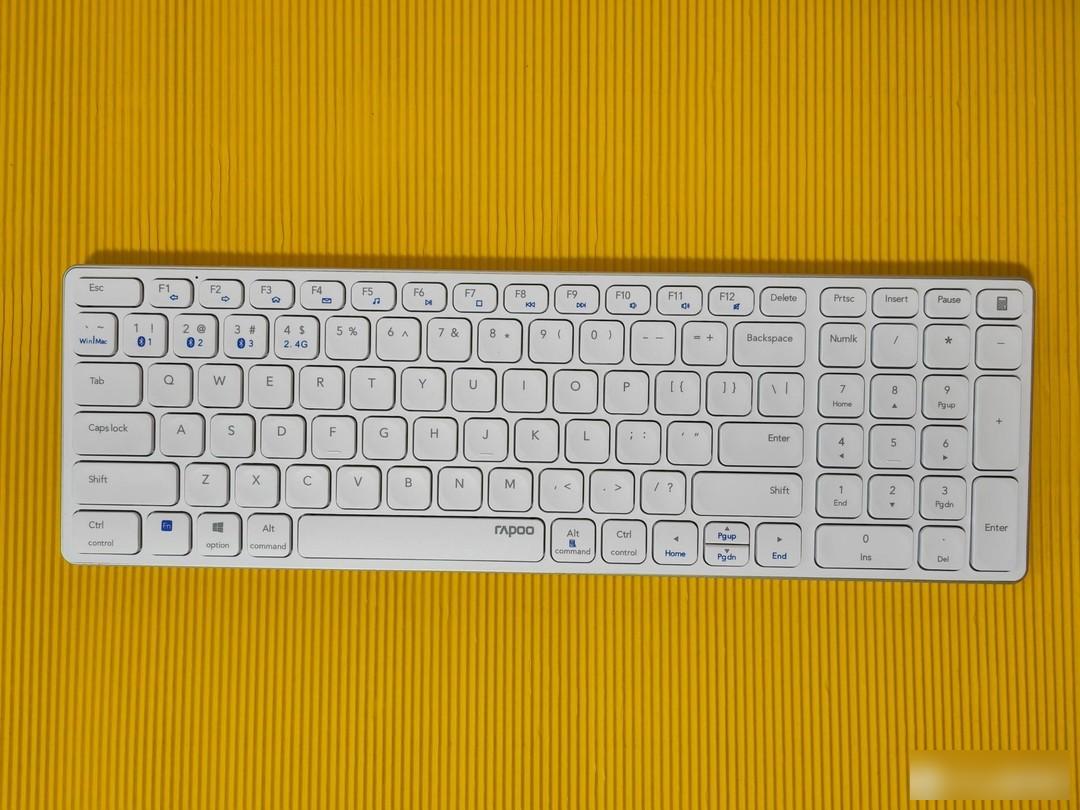
The E9350G uses chocolate block independent keycaps, so that each key is placed on the keyboard base as if chocolate blocks are floating on the water. The keycaps made of selected silica gel particles bring a frosted texture that is very comfortable. The key stroke is 1.5mm. It is very comfortable to write, and can have a sense of flowing water. Each button has a groove design to prevent the button from not responding. In addition, the life of each button is 500W times, which shows the conscience of the manufacturer.
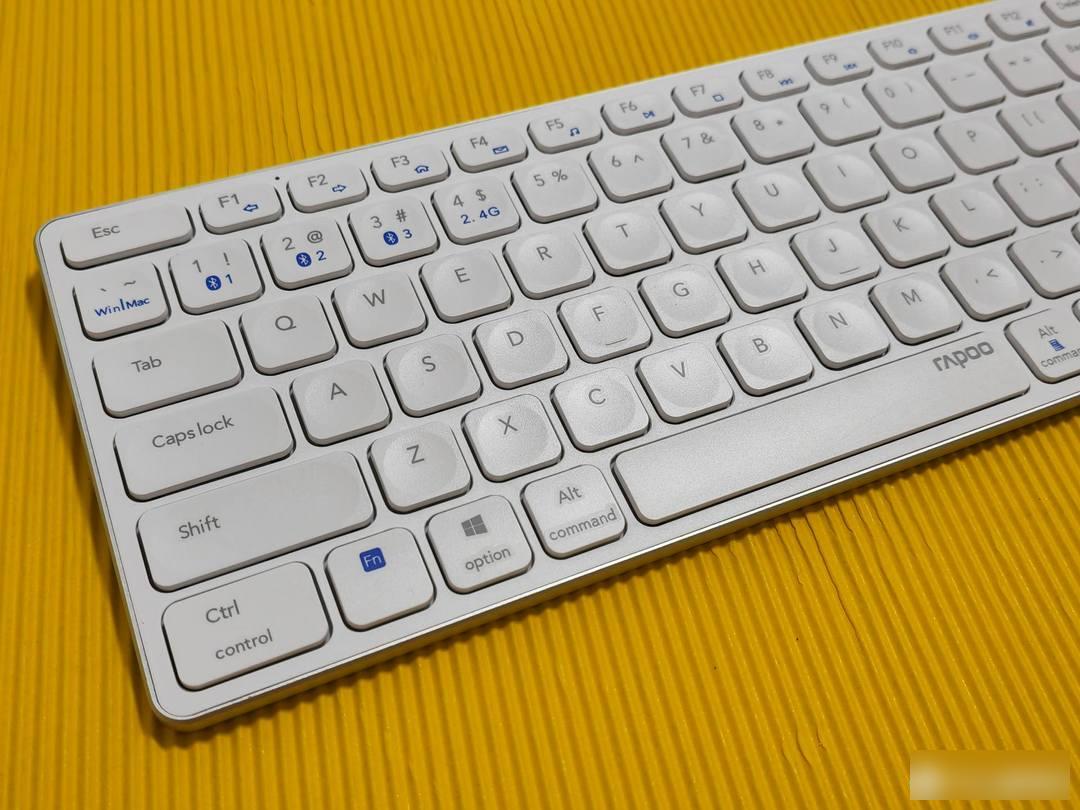
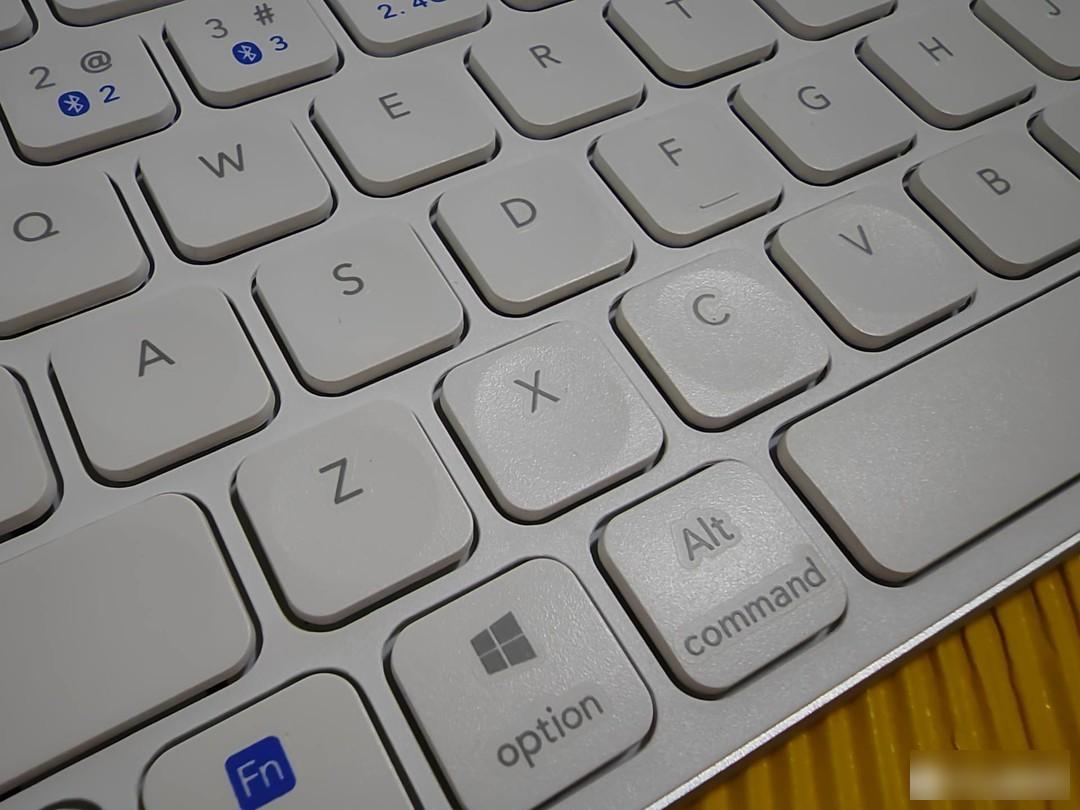
The wiring port of the E9350G is located at the front, and a keyboard switch is designed next to it. The keyboard supports three connection methods of Bluetooth 5.0/Bluetooth 3.0/Wireless 2.4G, and is compatible with Windows and MAC OS series, making it more adaptable. In addition, the keyboard can be connected to up to 4 devices at the same time, which saves it the trouble of switching between devices, which can improve office efficiency.
The E9350G has a built-in 300mAh rechargeable lithium battery, and the battery life can reach 60-96 hours. This battery life is still very good.
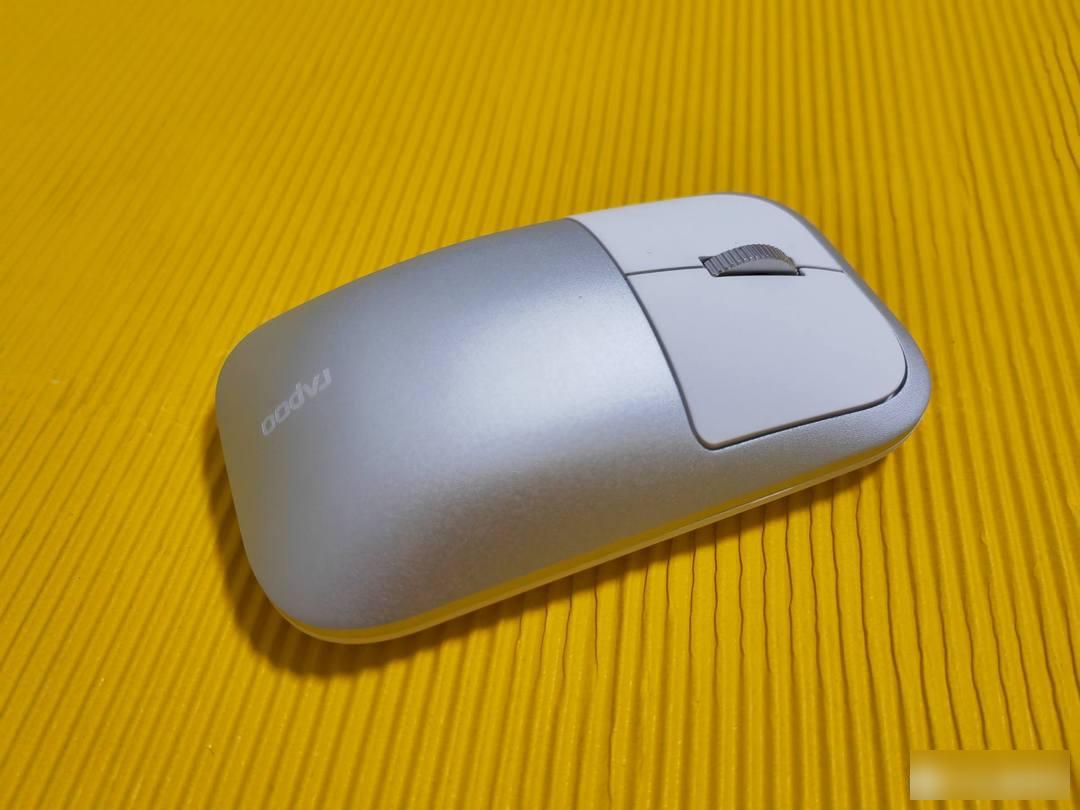
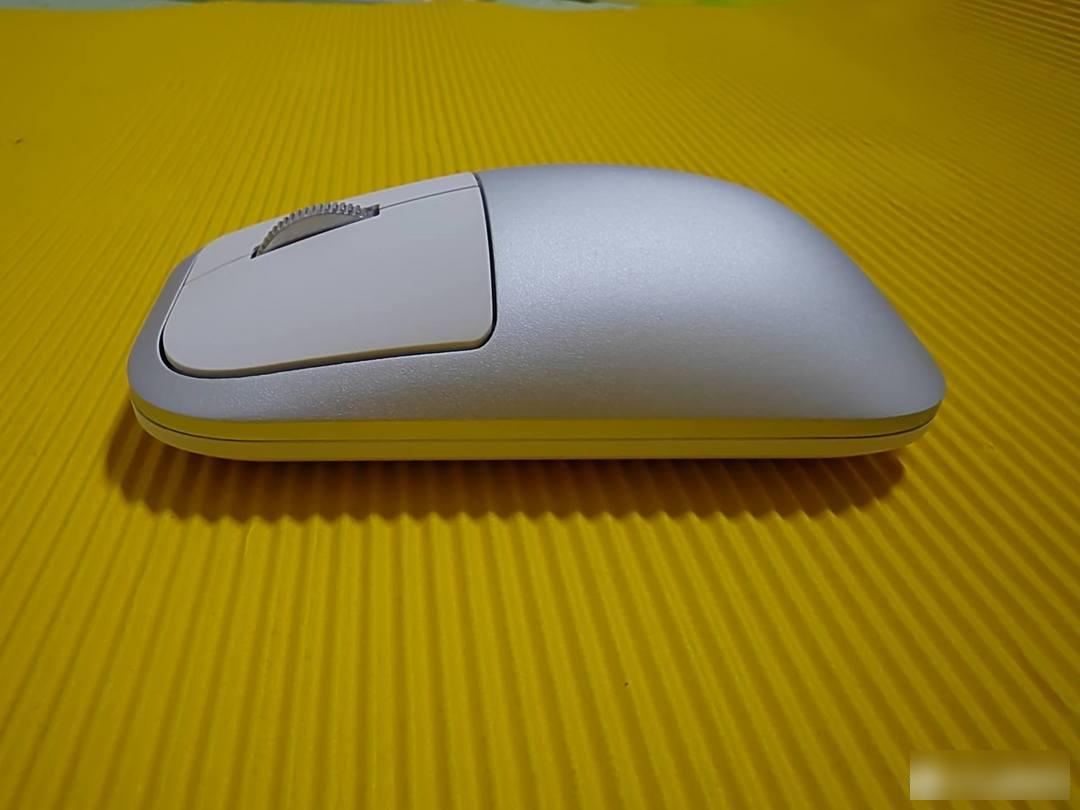
Rapoo M700
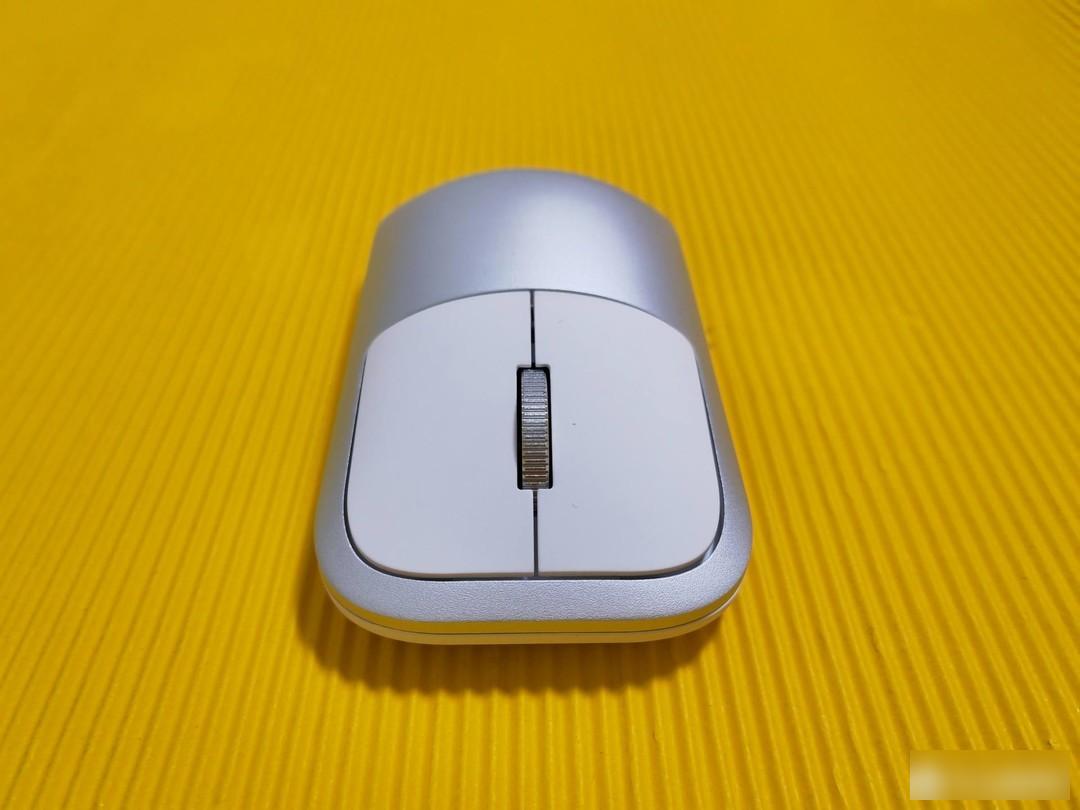
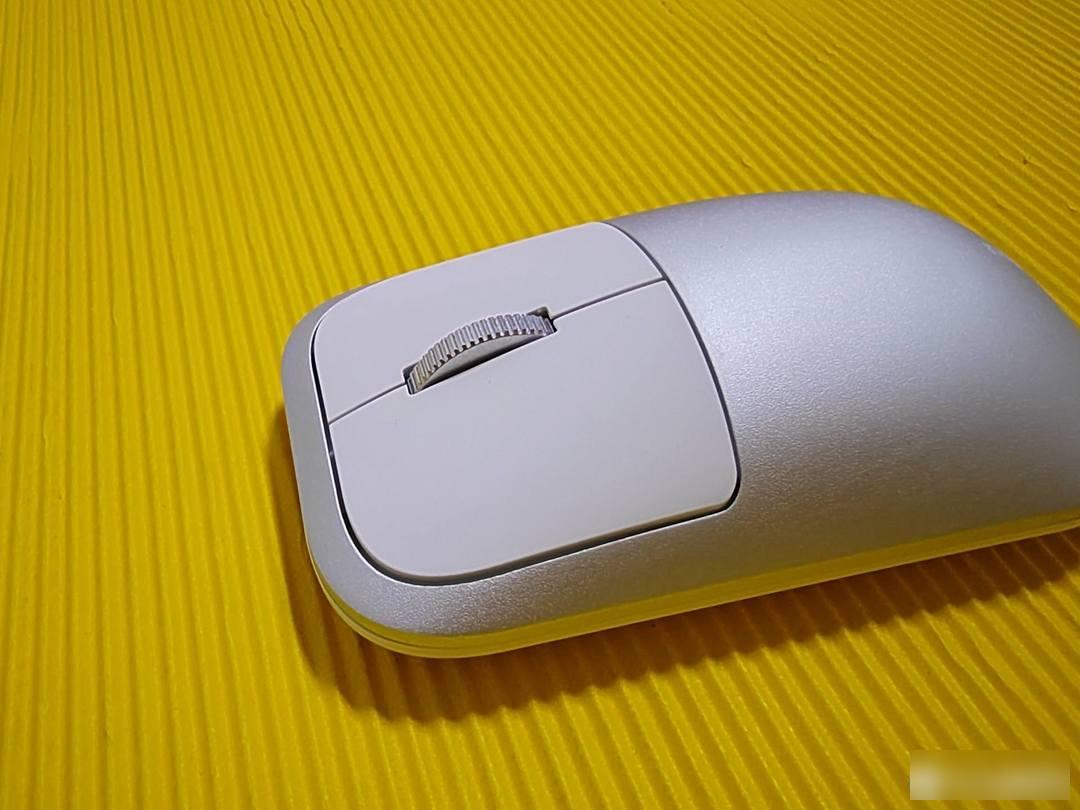
The overall design of the M700 is compact and slim, suitable for travel and business trips. The mouse adopts a hand-symmetrical design, with just the right curve of the back, which can be comfortably grasped whether it is lying or gripping. The metal cover, under the irradiation of light, reflects the metallic luster to highlight the high-end. The solid metal roller brings double enjoyment of vision and feel, anti-skid and anti-sweat, and can easily cope with high and light manipulation. In addition, the left and right buttons of the mouse are soft and slightly moved, which will not disturb others when using it, creating a quiet working and learning environment.
The M700's Bluetooth connection key and switch are located at the bottom. The maximum DPI of the mouse is 1300, which is enough for daily office work; the built-in high-precision tracking engine not only makes its positioning accurate, but also makes it easy to use on various surfaces.
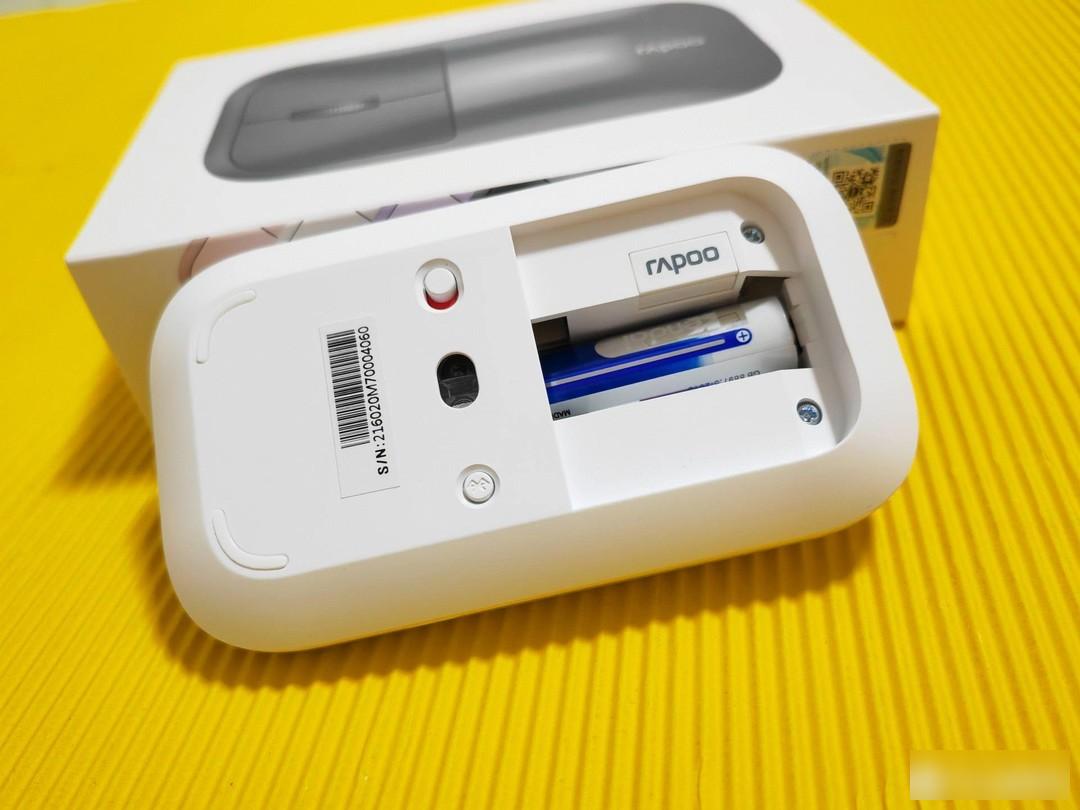
M700 also supports Bluetooth 5.0/Bluetooth 3.0/Wireless 2.4G three connection methods, allowing it to adapt to more types of devices; it can connect up to 3 devices at the same time, and can easily complete quick switching between devices.
The battery life of the M700 is still very powerful, and one AA battery can last for 9 months.
Summarize
Rapoo E9350G wireless keyboard and Rapoo M700 wireless mouse are compact and high-end, so they will definitely attract the envy of colleagues when they are placed in the office. The functions of simultaneous connection and seamless switching of multiple devices will greatly improve office efficiency. The long battery life will also greatly reduce the cost of use. In addition, the price of a set of 300 is really easy to use and not expensive, don’t you think?
As the most frequently contacted peripheral for daily work and entertainment, the keyboard, from the ordinary keyboard in the early stage, to the mechanical switch body and stylization in the later stage, can be said to have evolved all the way. Rapoo, I have more contact with the keyboard. As a domestic brand, its cost-effectiveness has a high evaluation among consumers. In recent years, in addition to maintaining stable innovation in hardware technology, it has also made full efforts in design style. What everyone is talking about is a new work of Rapoo - MT 510 Pro customized silver-axis multi-mode wireless mechanical keyboard. Friends who are interested can refer to whether it can meet your requirements.


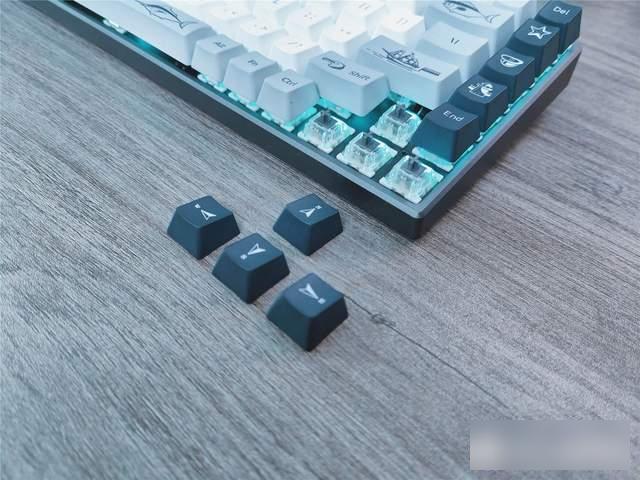
The Rapoo MT 510 Pro uses two colors and patterns with completely different appearance styles, named respectively: "Cute Holiday" and the "Navigation Diary" in my hand. From the perspective of colors and patterns, they adapt to the The perception of men and women, while the sailing diary is more suitable for boys.


The keyboard adopts a compact design with 84 keys, which reduces the size of the entire keyboard by more than one-third compared with the traditional keyboard. It has a backlight function, and can distinguish uppercase and lowercase input through different displays of the backlight, which reduces the space occupied by the independent indicator lights and makes the overall look more harmonious.
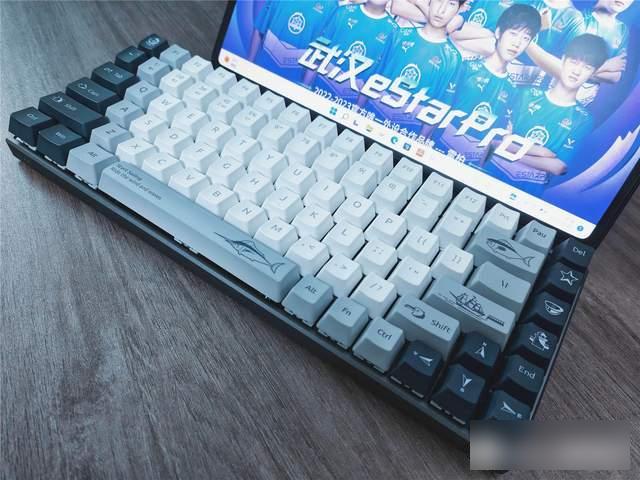

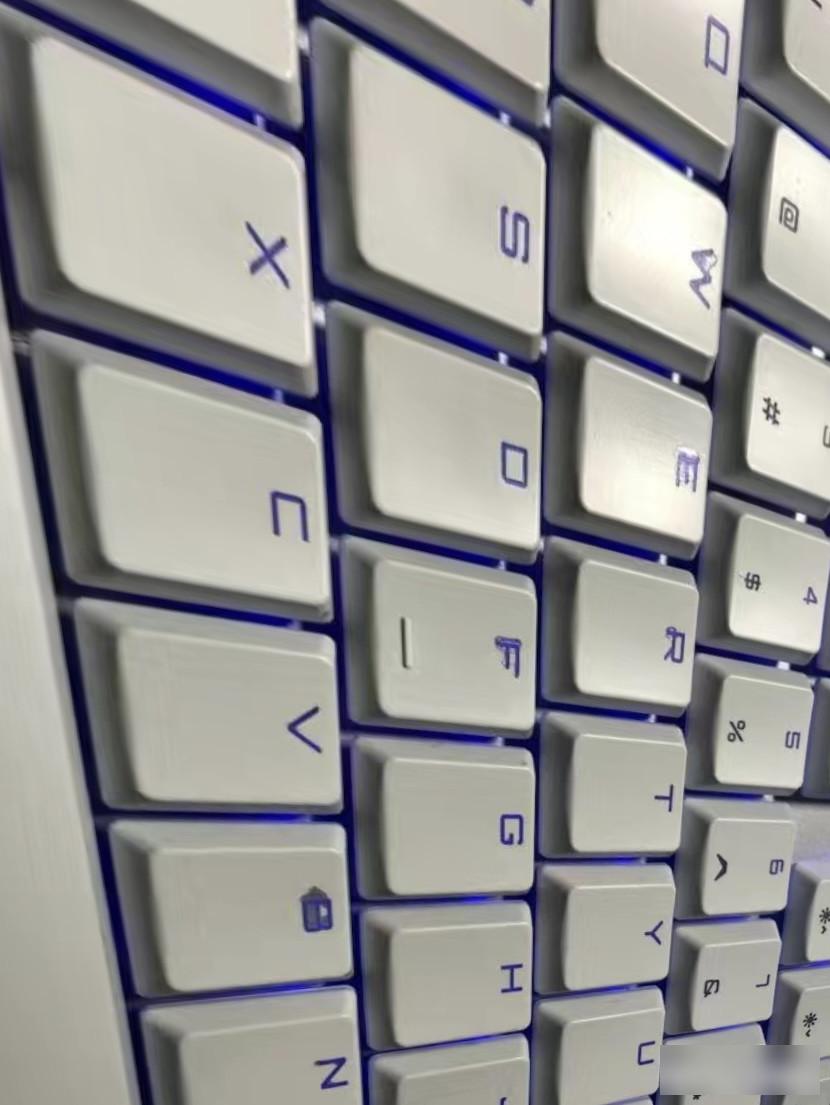
The keycaps are KC-8A keycaps, and some of the pattern elements of the keycaps are a unique style of this MT 510 Pro. Keys such as the ESC key, the uppercase key, the space bar and the Enter key are all embedded with seabirds, fish, etc. Beautiful nautical elements such as boats, submarines, etc., bring users a very relaxed mood. In addition, the keycaps also use PBT sublimation technology, which has anti-aging, anti-wear, anti-fouling and other characteristics, and is not slippery The hand is also a unique feature, which can ensure that the user can accurately touch the touch without mistaken touch.
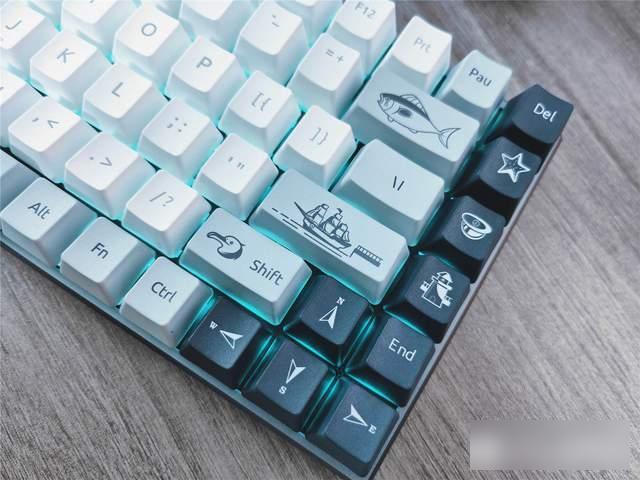
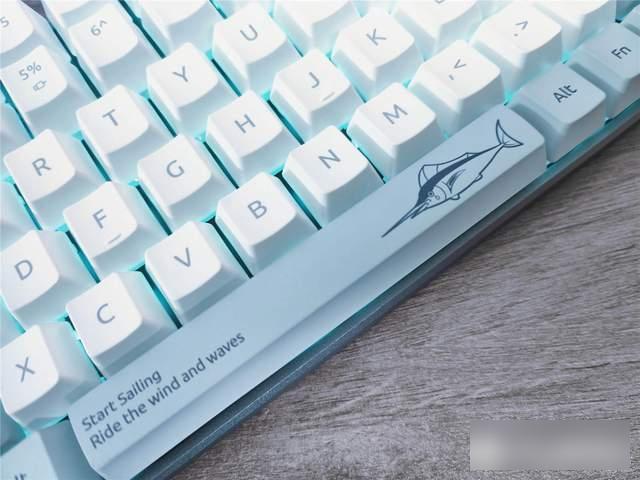

As for the slightly poor light transmittance of the sublimation keycaps that some friends are concerned about, according to my actual measurement, the backlight effect of this Pennefather MT 510 Pro mechanical keyboard perfectly solves this problem. Even in a dark environment, it also has a good effect. The transparent effect can meet the needs of different light scenes.
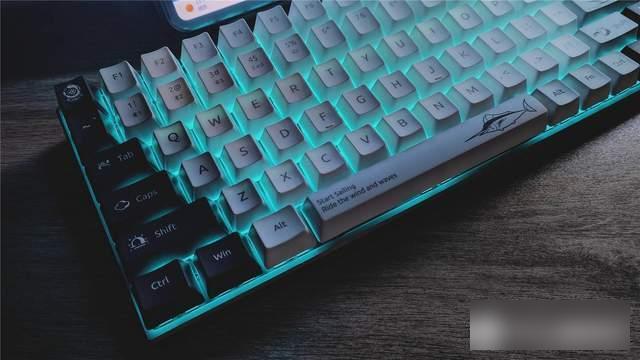
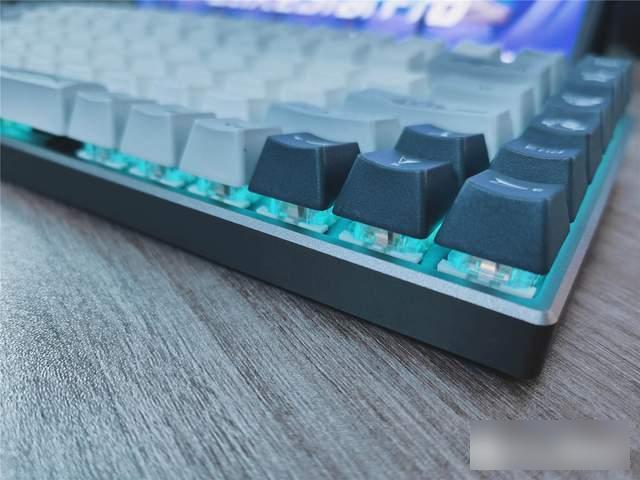
Rapoo MT 510 Pro's aluminum alloy frosted disc base doubles my favor. It feels first-class and has a very high-grade look and feel, which improves the keyboard to a high level. It is similar to the Apple-style CNC cutting and chamfering process, all of which highlight the details of the process. Attention, worthy of affirmation.


The keyboard itself has a certain weight, which is close to 800g. With the four long anti-slip cushions at the bottom, the stability is quite good, but the tripod can only be adjusted up by one level, which is a bit regrettable. The tripod will be more user-friendly, making the height adjustment more comprehensive.
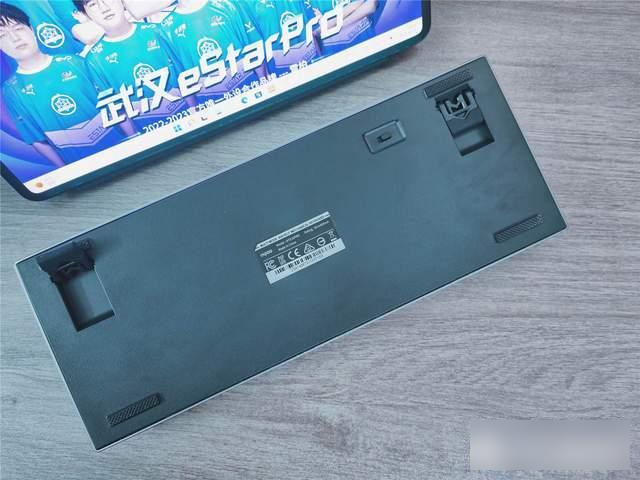

The shortcut combination keys are relatively comprehensive. Through the combination of Fn and numbers 1-5, you can quickly switch between the three modes of Bluetooth, 2.4G and USB wired connection. Among them, Bluetooth can be adapted to three devices to realize the five-mode mode of 3+2. Even if there are 5 computers, one keyboard can handle it, and the battery life of wireless use is also very good. When the 4000mAh lithium battery is fully charged, it can reach 225 hours of long battery life. In terms of normal use range, It can be fully charged for one month at a time, and its wired mode, in case the keyboard runs out of power during use, can also realize the convenience of charging and using at the same time, and there is no need to worry about interruptions in work. In addition to quick switching of modes, shortcuts for multimedia combinations are also in place. Through Fn+F1-F12, 12 kinds of media functions can be quickly operated. In addition, functions such as keyboard backlight brightness, lighting effect, frequency and depth adjustment can also be adjusted through Fn+Ctrl/Arrow keys to adjust, various control methods are still very convenient.


The Rapoo MT 510 Pro keyboard has a compact body but has a good percussion effect. It does not cause trouble because of the compact keys. On the contrary, it greatly shortens the travel of the fingers. In addition, its full-key non-conflict input feature in wired mode , for the pursuit of productivity or end game players, it is a very big boosting feature, whether it is the productivity output at work or the double output of the big move in the game, it can bring excellent blessings, as for the wireless mode , and can also realize 6-key conflict-free operation, which can basically meet great usage needs.

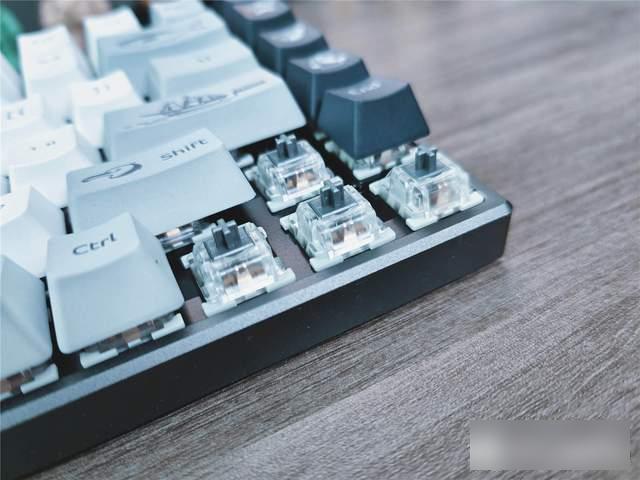
In addition, Rapoo MT 510 Pro is also equipped with its own self-developed linear fast silver switch. In the actual measurement, the tapping of this switch body brought me a kind of tactile feedback that is different from the mechanical keyboard I usually use. Good mechanical crisp feedback, and at the same time has a fast rebound effect, quite sensitive and cool, can enjoy the feedback of the mechanical shaft body, and has a low noise effect, the best of both worlds, no need to worry about disturbing others, it is a choice Quite a good new shaft, friends should pay attention to it.
In view of the characteristics of this pair of keyboards, Rapoo also provides corresponding macro-driven applications for this keyboard, which can customize backlight effects and different button macros according to your own usage habits and different usage scenarios, such as office and games. Configured and stored, you can quickly switch in one step when needed, and at the same time, you can also upgrade the firmware through the application to obtain stable optimization.

Summarize:
Rapoo MT 510 Pro is a compact customized mechanical keyboard. In addition to the new style and elements that bring a good look and feel, its key design and space distribution are more reasonable. At the same time, the innovative linear fast silver switch also brings It comes with mechanical and sensitive feedback and mute effects, and referring to its price of 300, it has a good advantage among keyboards at the same price. Friends who need it can learn about it.
Note: The product is provided by [ZAKER Group]
The author declares that there is interest in this article, please respect the author and the content shared, communicate friendly, and make rational decisions~
For a long time, colorful RGB seems to be the standard configuration of mechanical keyboards. With the gorgeous marquee turned on, it seems to be more comfortable to type on the keyboard.
For me personally, after looking at the colorful marquee for a long time, it seems that the cold light white looks more comfortable, and the notebook I use also uses cold light white as the keyboard background, which is more comfortable for work and entertainment.
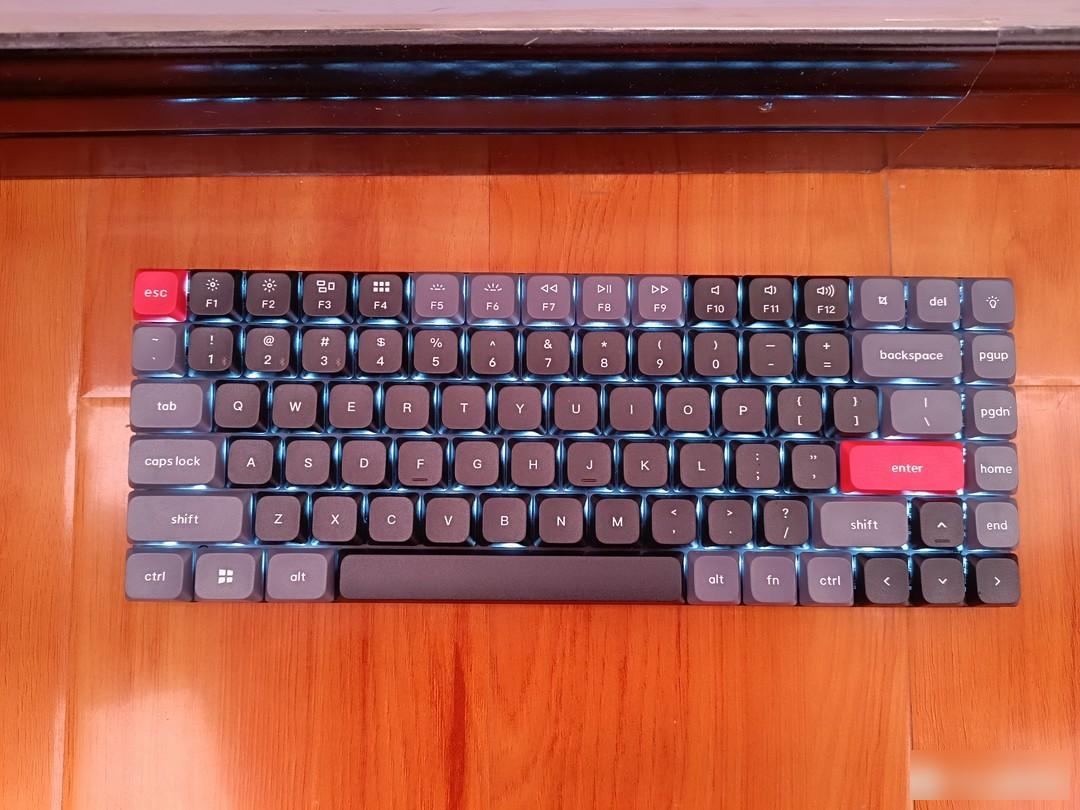
When choosing a mechanical keyboard, this time I chose luminescent white, Keychron's K3Pro, with Bluetooth, a short shaft, and an ultra-thin mechanical keyboard. Compatible with Apple, Android and Windows systems.
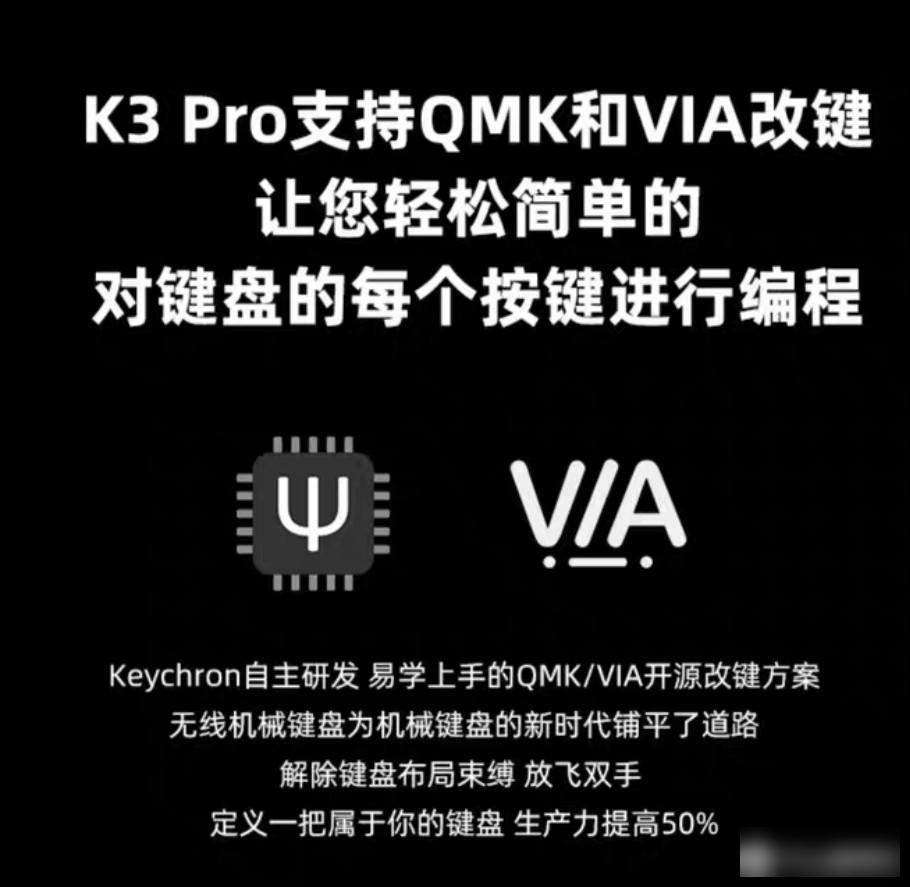
According to the introduction on the webpage, the keyboard has a 75% layout, supports QMK/VIA key change, and adopts Bluetooth and wired dual-mode.
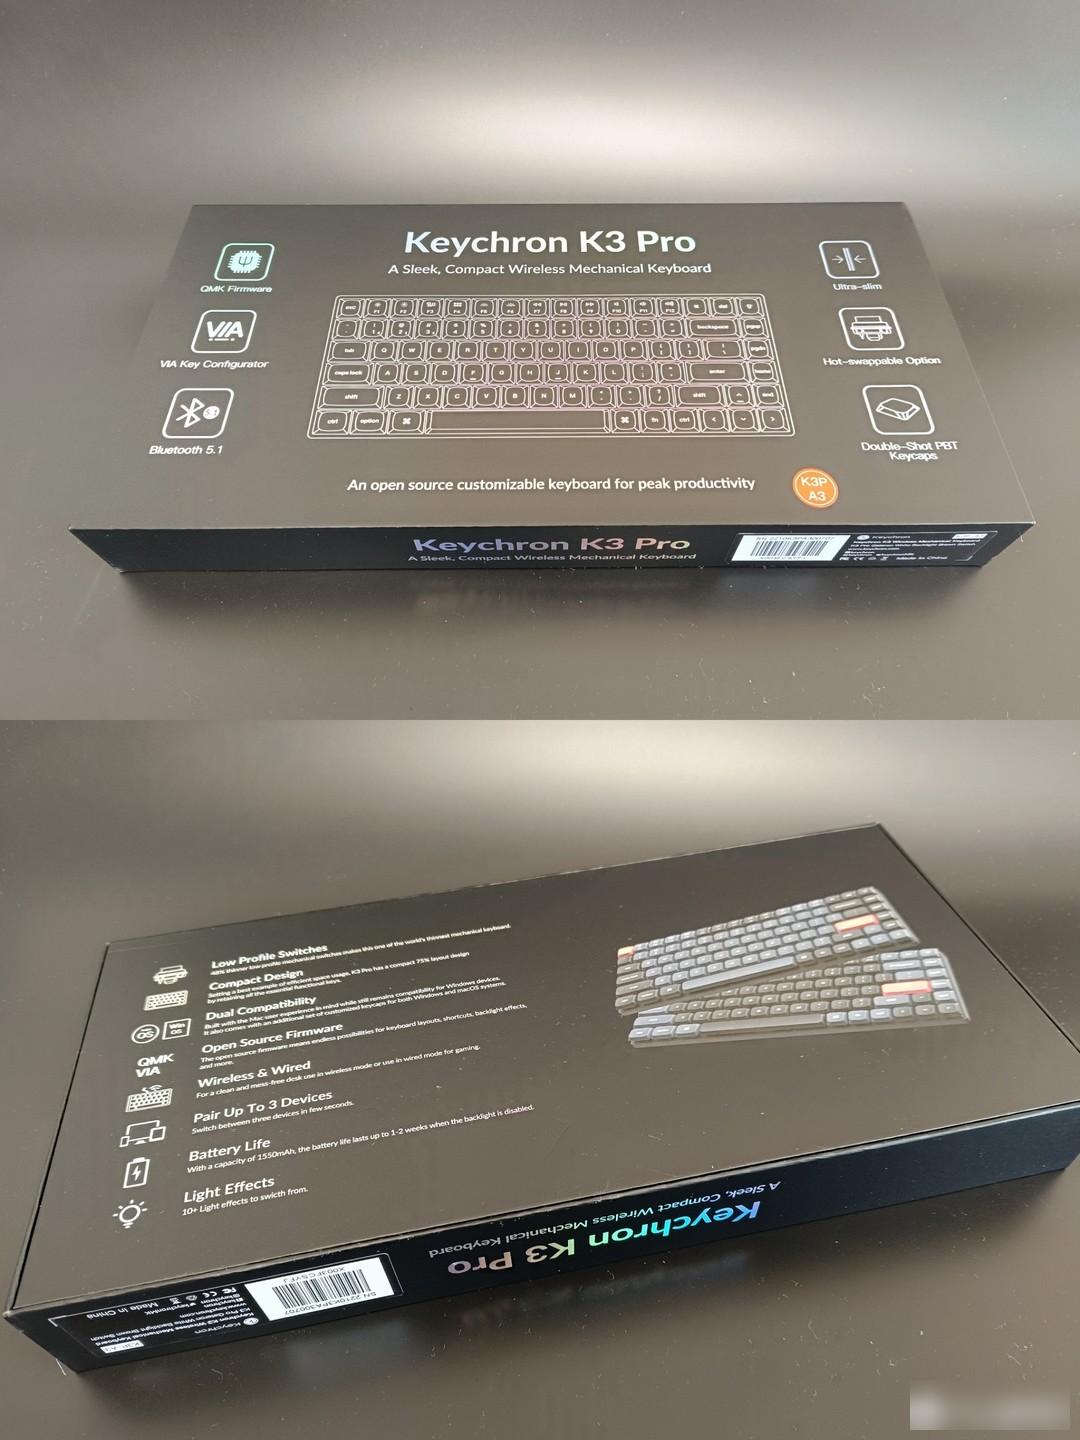
The same multimedia buttons as the Mac, you can easily adjust the screen brightness/darkness, volume, desktop keys, playback pause, etc., arrived today, and share with everyone out of the box.
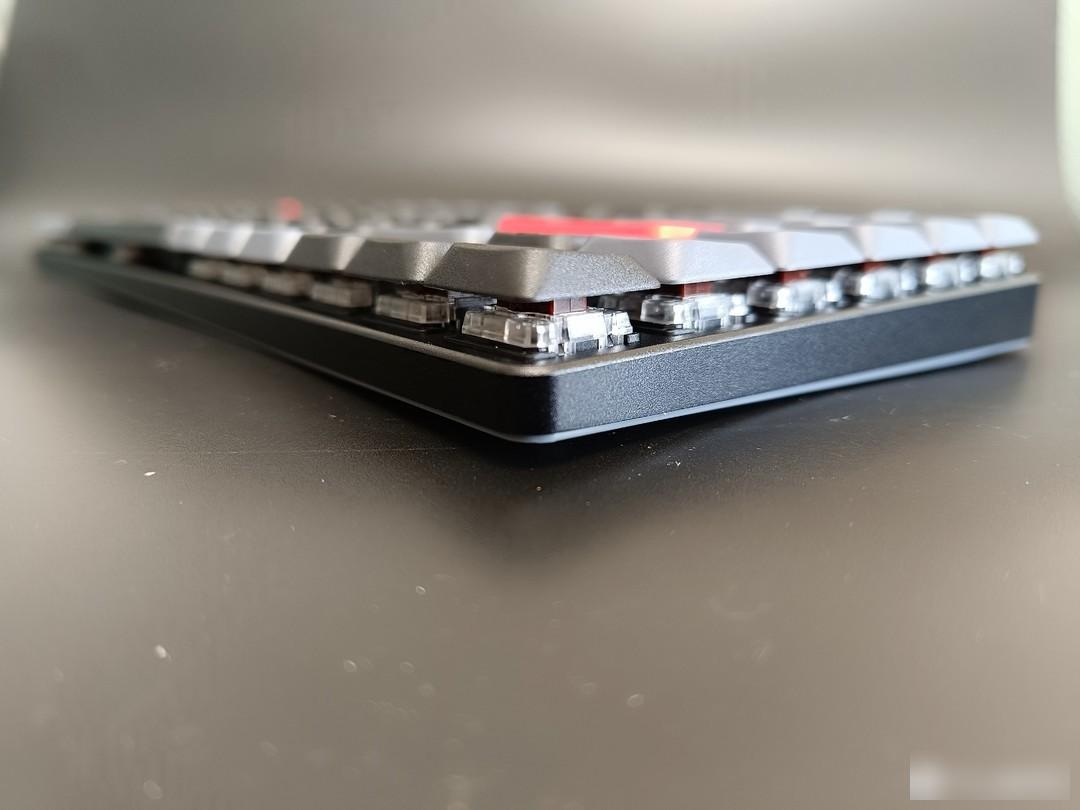
Taken out of the box, the first feeling is that it feels relatively heavy.
The edges are neat on all sides, and the micro-frosted keycaps are comfortable to the touch and rebound quickly.
It is said that this set of keyboards supports QMK and VIA key changes, and each key of the keyboard can be programmed. I am not an in-depth user, so I will not toss about this for the time being.
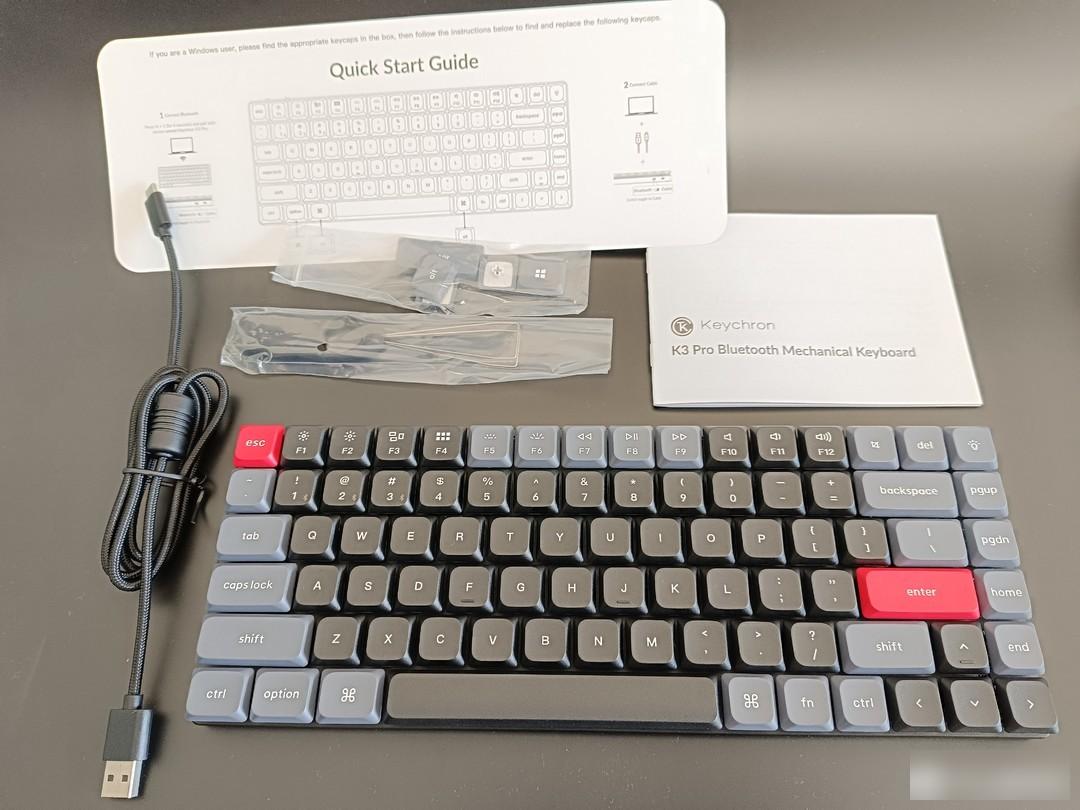
After opening the outer packing box, there are a bluetooth mechanical keyboard, a USB cable, a key puller, a bag of key caps, an instruction manual, and a quick start guide.
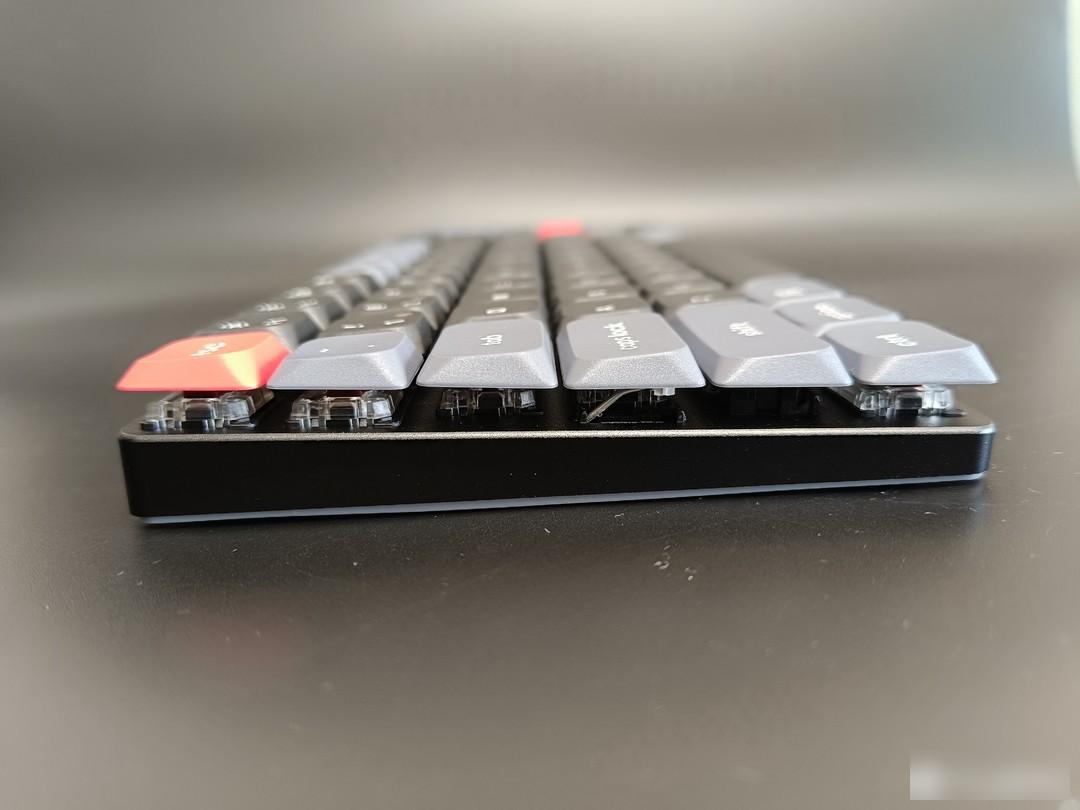
It can be seen that compared with the mechanical keyboard, it is very thin and light, with a low axis body design.
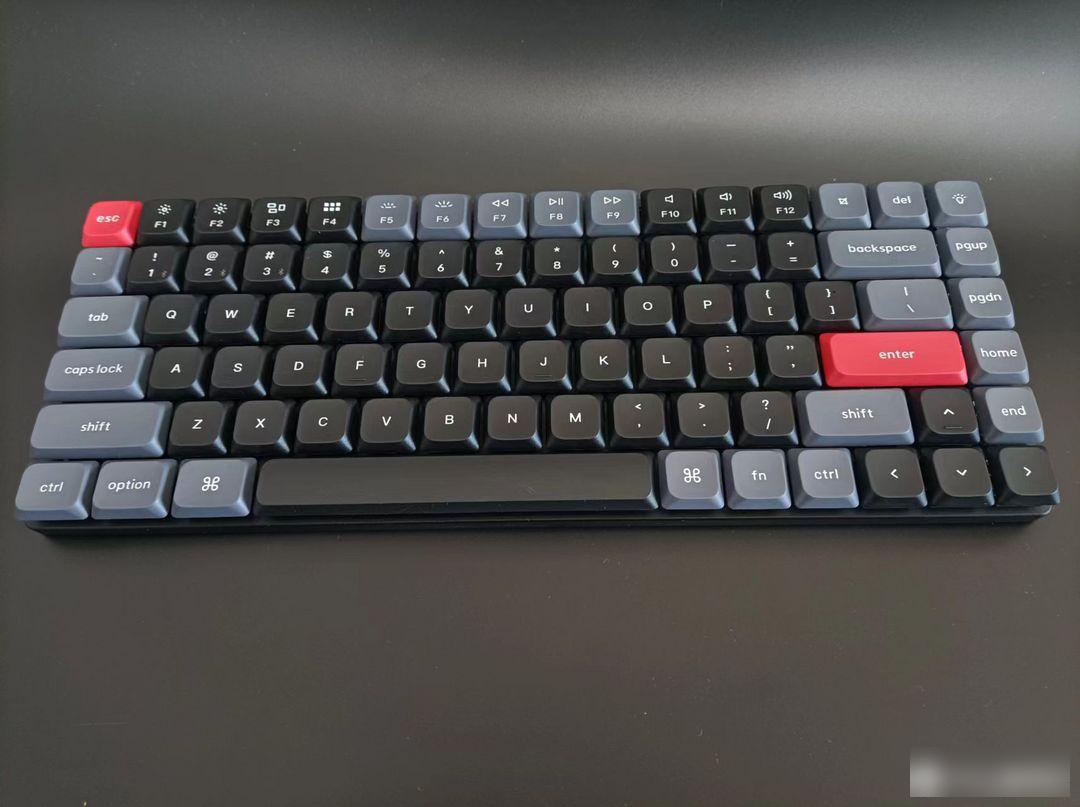
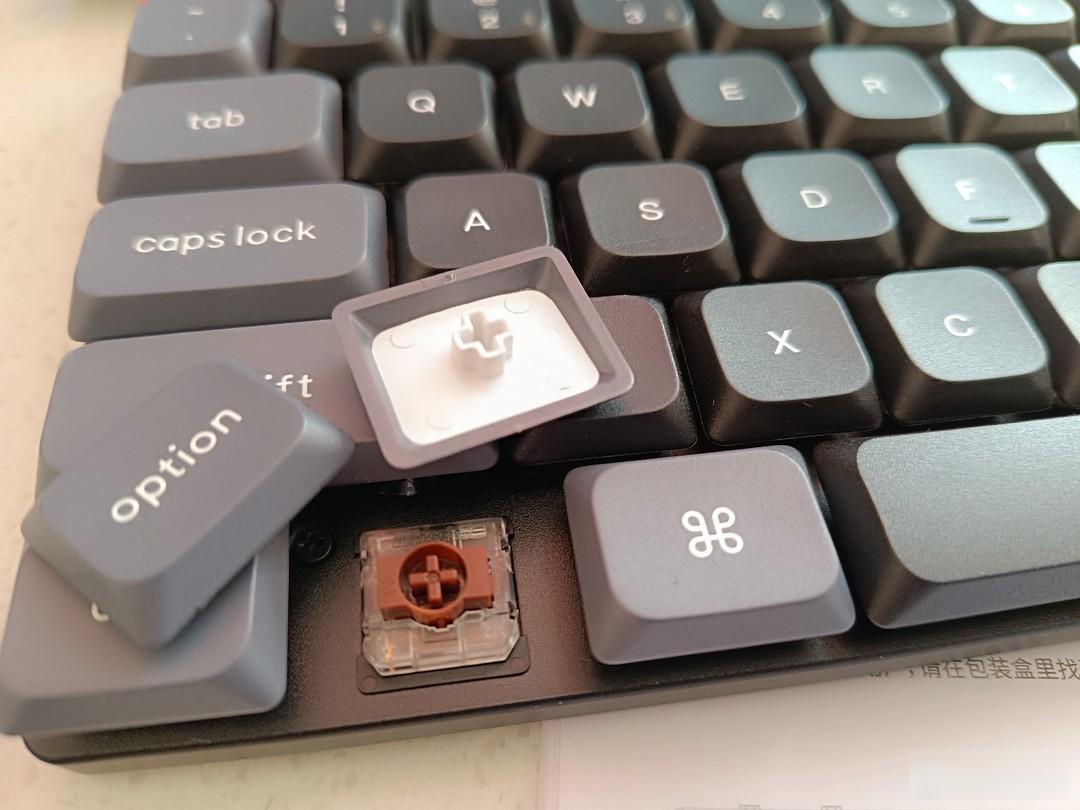
Keychron K3P uses PBT keycaps, three classic colors, PBT content ≥ 40%, more wear-resistant, not easy to oil, resistant to dirt and color.
I tried it without plugging in the power and turning it on. The thin and light shaft feels comfortable to the touch and rebounds quickly. Providing a reliable fingertip feel, the shaft provides precise feedback and a smooth feel with every press.

In the upper left corner of the keyboard, there are switches for windows system, Android system, and Apple system; connection mode switch.

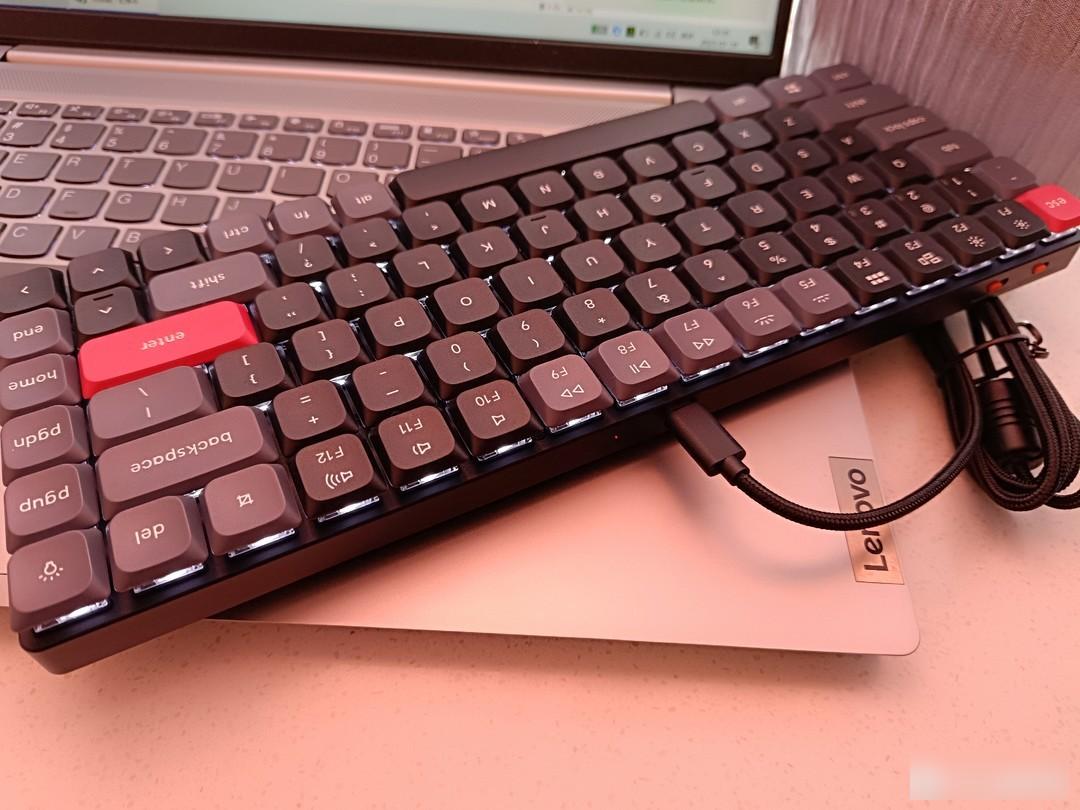
In the middle of the top of the keyboard is the USB charging port and the Type C interface.
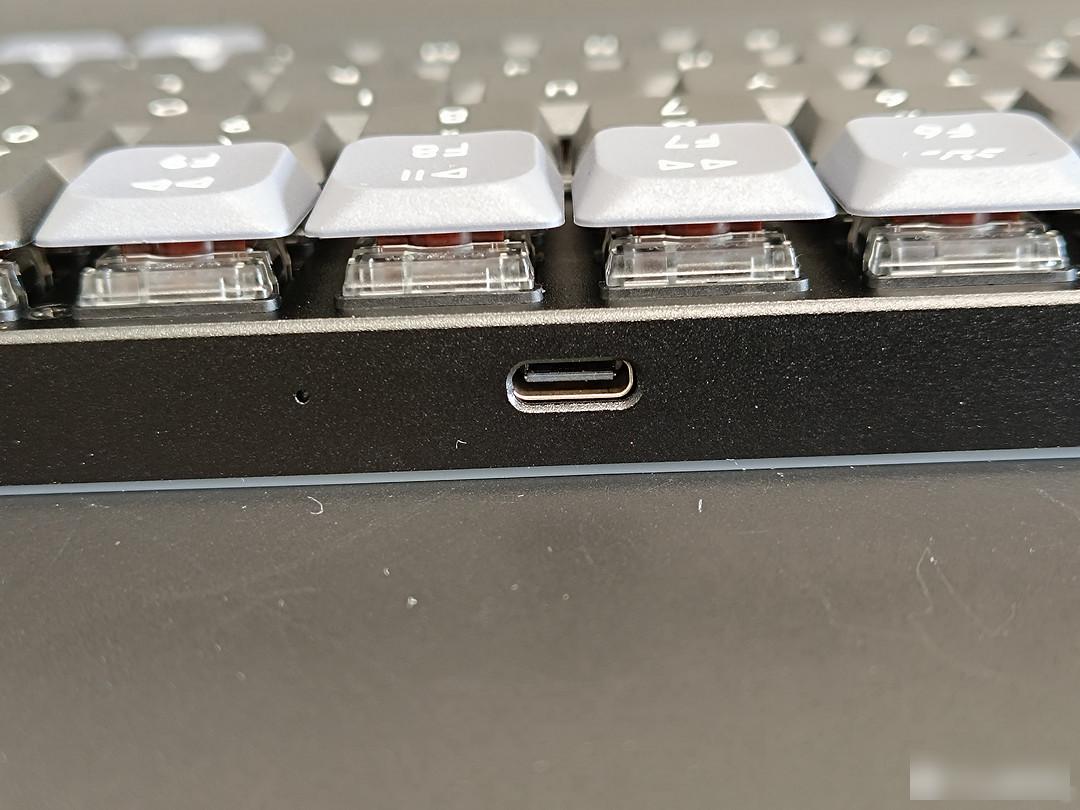
Next to the interface is the charging indicator light.
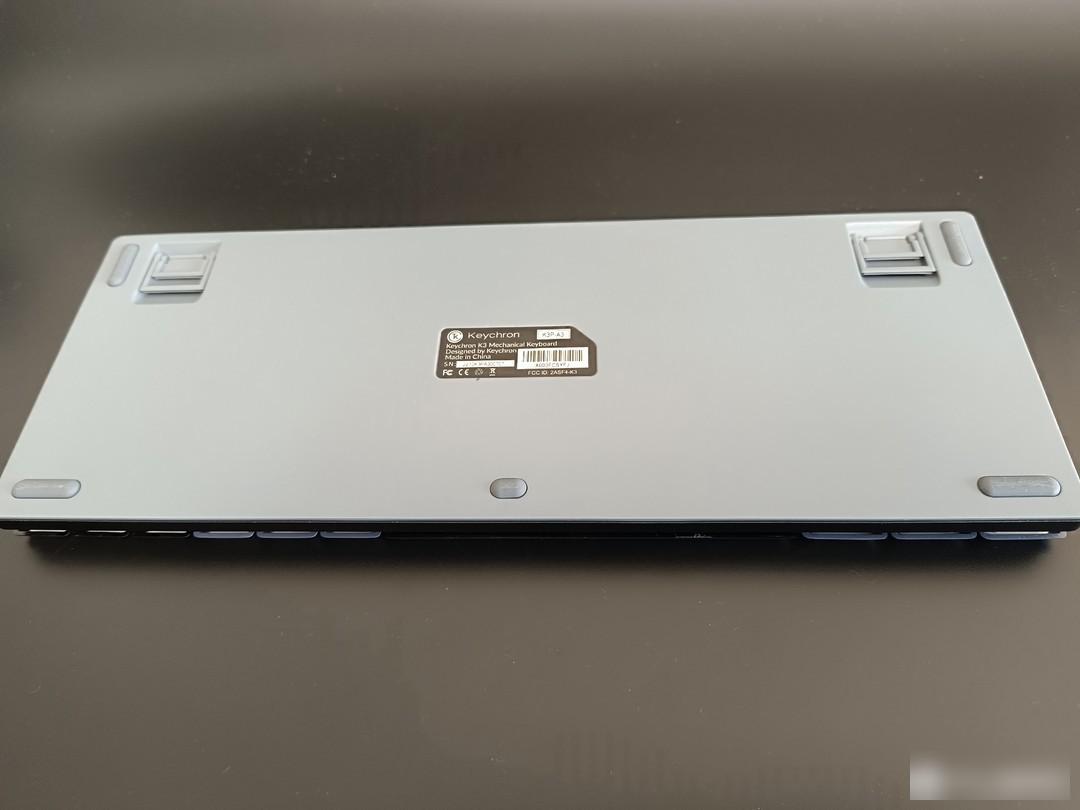
There are five non-slip blocks with strong friction at the bottom of the keyboard.
Comes with ergonomic body angle adjustment, noticed that the keyboard bracket is divided into two types, one large and one small, and the tripods designed with three ergonomic angles can be switched at will.

Because I usually use the windows system. So use a key puller to pull out the corresponding keyboard and replace it. The removal and installation process was smooth.
This set of keyboards supports both wired and wireless Bluetooth.
Let’s try the Bluetooth connection first, turn the switch of the keyboard to Bluetooth mode, press and hold fn+1 for 4 seconds, and the keyboard will enter the pairing mode.

Turn on the bluetooth of the notebook, and soon the keyboard is found, and the connection is fine.

After trying it out, typing and function keys respond very quickly. The damping of the keyboard is moderate, and the key travel is very comfortable. It's the same with a wired connection, while still charging.
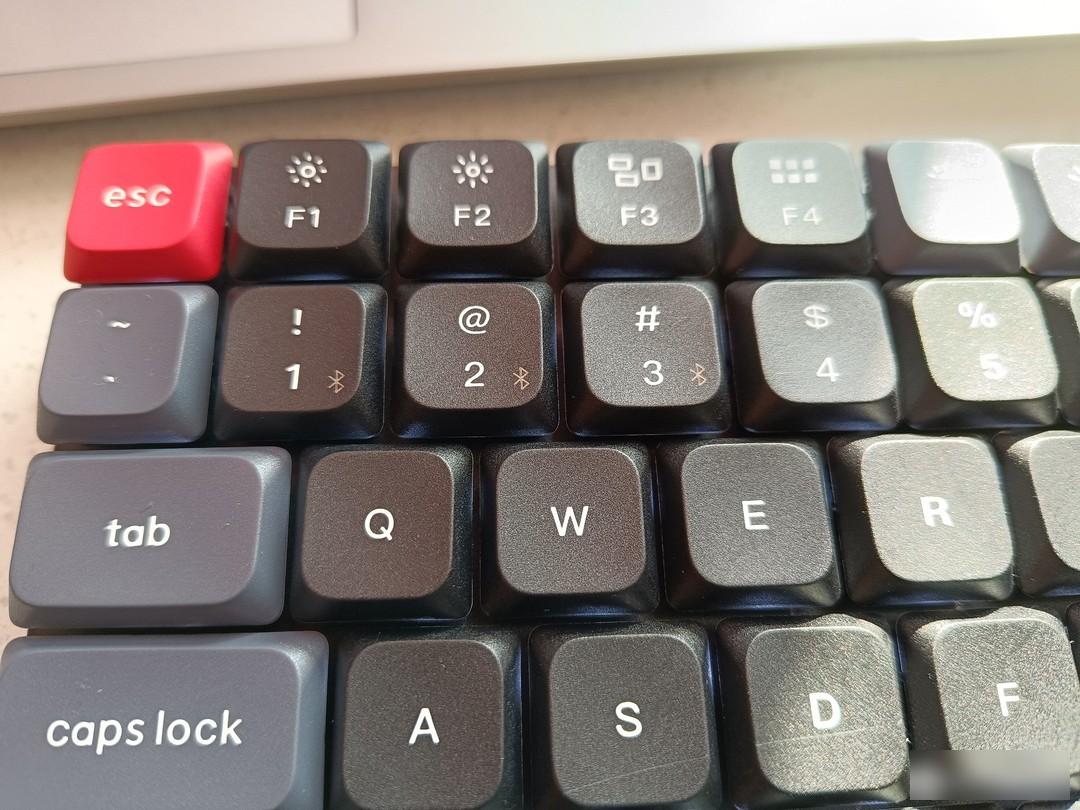
This keyboard is compatible with 3 devices at the same time, and can be switched quickly. Use Fn+1/Fn+2/Fn+3 to quickly switch the required device. The 1, 2, and 3 number keys of the keyboard are marked with the Bluetooth logo.
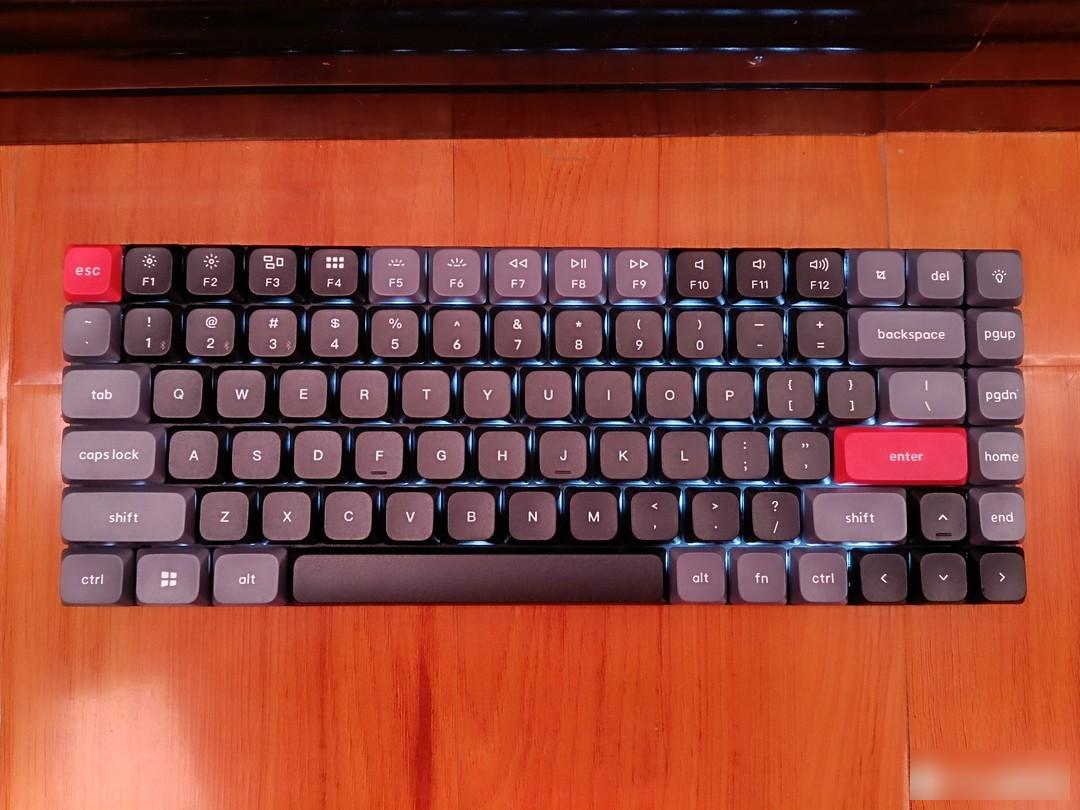
Next, let’s take a look at the lighting effect. This keyboard has two lighting versions to choose from. The RGB version has 22 lighting effect modes, which are gorgeous and bright; the white light version has 14 lighting effect modes, which can be switched at will.
Because I think the marquee effect is too dazzling, so this time I specially chose the white light version.
In addition to adjusting the lighting effect, you can also adjust the dimming of the light and the speed of the lighting effect.
Whether it is games, entertainment or work, it is quite interesting to cooperate with the lighting effect when operating the keyboard.
It is also a good detail to adjust the mood, which can be regarded as a sideways increase in productivity.
By the way, there is battery life.
This keyboard has a built-in 1550mAh capacity lithium battery, which can be used for 33 hours after charging for 4 hours. It is said that the longest use time is 3~4 days, it is estimated that after turning off the light effect.
If it is used as a productivity tool, remember to charge it when the time comes, or plug in the USB cable for more peace of mind.


In general, this is a good set of mechanical keyboards, which are relatively thin and light in appearance, and even easy to carry (the longest side is 306mm). The slightly frosted keycaps are very comfortable to the touch, the key travel is also very suitable, the rebound is fast, and the feedback is sensitive.
In terms of connection, use Bluetooth wireless and USB cable connection, ready for both hands.
In terms of quick operation, there are light and dark adjustments; resource manager switching; play, forward, and back keys; volume adjustment; and other shortcut keys. There is also a key to adjust the lighting effect in the upper right corner of the keyboard.
Removing and installing the keycaps is smooth. According to different functions, the entire keyboard is divided into three different color areas, namely red, gray and black.
The weight of a little more than a catty is not too heavy to hold in the hand.
Battery life is also okay. It's pretty good as a game or as a productivity tool.
Friends in need can think about it. Share it with me today.
My gear list. CHERRY Cherry MX10.0 Mechanical Keyboard RGB Light LP Red Axis Gaming Office Wired Ultra-thin Keyboard
First of all, I think the eight shortcut keys of this keyboard are very easy to use.
I usually use Fn + other keys on my notebook to complete the shortcut key operation. On this keyboard, it can be completed with one keystroke. I think this setting is very user-friendly.
And the sound of this keyboard is also relatively low. When I use it in the dormitory at night, I will not be complained by my roommates.
The surface of this keyboard is frosted, which makes it feel better after treatment. And its key travel is also very suitable, the damping coefficient is just right, and it is not tiring to use.
I think this keyboard is very suitable for long-term typing and playing games. The weight distribution of the bottom surface of the keyboard is very reasonable, and it can be placed on the desktop very stably when it is usually placed on a desktop with a relatively small friction coefficient. It will not slide around, and the seller also gave a foot pad, so that the tilt of the keyboard can be adjusted. In short, I think this keyboard is at an upper-middle level among the keyboards I have bought. Still worth buying.
Welcome to our comprehensive guide on dismantling mechanical keyboard keys, a must-read for all keyboard enthusiasts and novices alike! Whether you're looking to upgrade your keycaps, clean beneath the keys, or resolve an unresponsive key, we've got you covered. With step-by-step instructions and valuable tips, this article will equip you with the knowledge needed to effortlessly remove and reassemble your precious keyboard keys. Join us as we unravel the secrets of mechanical keyboards, making your typing experience more enjoyable and efficient. Let's dive in and discover the intricacies of key removal together!
Understanding the Anatomy of a Mechanical Keyboard
Mechanical keyboards have gained immense popularity among gamers, programmers, and typing enthusiasts due to their superior tactile feedback and durability. If you own an OEM mechanical keyboard and are interested in customizing or cleaning it, understanding the anatomy of this device is crucial. In this article, we will delve into the intricacies of an OEM mechanical keyboard, providing you with valuable insights on how to remove the keyboard keys efficiently and safely.
At Keyceo Tech, we understand the importance of maintaining and customizing your mechanical keyboard to suit your preferences. That is why we have prepared this comprehensive guide to help you navigate the process of removing the keys from your OEM mechanical keyboard. By following our step-by-step instructions, you can ensure that you will handle your keyboard keys with care, avoiding any unnecessary damage.
Before we dive into the removal process, it is essential to familiarize yourself with the key parts of an OEM mechanical keyboard. The keycap, the topmost component, is what your fingers press when you type. Beneath the keycap, you will find the key switch, which is the heart of the mechanical keyboard. Key switches come in various types, including Cherry MX, Kailh, and Gateron switches, each offering different levels of tactile feedback and actuation force.
To begin the removal process, start by powering off your mechanical keyboard and disconnecting it from your computer. This precautionary measure ensures your safety and prevents any accidental keystrokes during the process. Once your keyboard is disconnected, turn it over and gently shake it to dislodge any loose debris or particles that may be trapped between the keys.
Next, locate the keycap that you want to remove. Using a keycap puller tool, grasp the sides of the keycap and gently pull upward. If you do not have a keycap puller, you can also use a small flat-headed screwdriver or even your fingers, ensuring that you apply equal pressure on both sides. Gradually work your way around the keycap until it pops out of its place.
With the keycap removed, you will now have access to the underlying key switch. It is important to note that different OEM mechanical keyboards may have different mechanisms for attaching the keycap to the switch. Some keyboards feature a stabilizer bar, which can be easily removed by sliding it out from under the keycap. Other keyboards may require you to detach the keycap by pulling straight up.
Once the keycap and any associated mechanisms have been successfully removed, take the opportunity to clean the keycap and the exposed key switch. You can use a damp cloth or mild cleaning solution to remove any dirt or debris from the surfaces. However, be cautious not to saturate the keycap or the switch with liquid as it may damage the internal components.
After cleaning, reattach the keycap to the key switch by aligning it with the stem and gently pressing it down until it clicks into place. Ensure that all sides of the keycap are securely attached to the switch. Repeat this process for any additional keycaps you wish to remove or clean.
In conclusion, understanding the anatomy of a mechanical keyboard is essential when it comes to customizing and maintaining your OEM keyboard. By following the steps outlined in this guide, you can confidently remove, clean, and reinstall the keycaps on your mechanical keyboard with ease. Remember to exercise caution and pay attention to the specific mechanisms of your keyboard to avoid any damage. Enjoy the enhanced typing experience and personalized aesthetics that come with a well-maintained mechanical keyboard.
Preparing Yourself for Key Removal: Necessary Tools and Safety Precautions
Mechanical keyboards have garnered a loyal following among gamers, programmers, and keyboard enthusiasts due to their durability and superior typing experience. Whether you own an OEM mechanical keyboard or are considering purchasing one from Keyceo Tech, knowing how to remove and replace individual keys can greatly extend the lifespan of your beloved keyboard. In this article, we will guide you through the necessary tools and safety precautions required to safely remove and replace keycaps on your OEM mechanical keyboard.
I. Understanding the Importance of Key Removal:
Before delving into the details, it is important to highlight the benefits of key removal. By periodically removing and cleaning your keycaps, you eliminate the accumulation of dust, debris, and oils, which can hinder the responsiveness and longevity of your keyboard. Additionally, removing keycaps facilitates access to the underlying switches, enabling you to replace or modify them if needed.
II. Necessary Tools for Key Removal:
1. Keycap Puller:
A keycap puller, offered by Keyceo Tech or any reputable hardware store, is an essential tool for removing keycaps. It is designed to safely lift the keycaps without causing any damage to the switches or the surrounding keycaps.
2. Compressed Air Canister:
Before removing the keycaps, it is advisable to use a compressed air canister to blow away any loose dirt, crumbs, or debris that might be trapped under the keys. This ensures a clean working environment and prevents further contamination.
III. Safety Precautions:
1. Power Off the Keyboard:
It is imperative to switch off your computer or disconnect the keyboard's USB cable before embarking on key removal. This prevents accidental input or damage to your system.
2. Use Gentle Force:
While removing keycaps, remember to apply gentle and even force. Avoid using excessive force or any sharp objects that might scratch or damage the keycaps or switches.
3. Keycap Orientation:
To simplify the reinstallation process, it is recommended to keep track of the orientation of each keycap. Taking a picture of your keyboard layout before removal can serve as a helpful reference.
4. Store Keycaps in a Safe Place:
During key removal, it is crucial to keep the removed keycaps in a secure and dust-free container. This ensures that they remain clean and organized, ready for reassembly.
IV. Step-by-Step Guide to Key Removal:
1. Detach the Keycap:
Gently insert the keycap puller beneath the target keycap. Apply equal pressure on both sides and pull up slowly until the keycap pops out.
2. Repeat the Process:
Continue removing all desired keycaps individually, keeping track of their order and orientation.
3. Use Compressed Air:
After removing all keycaps, utilize the compressed air canister to blow off any remaining dust or debris from the keyboard surface and the exposed switches.
V.
Removing and cleaning the keycaps of your OEM mechanical keyboard is a simple yet effective way to maintain its performance and aesthetics. By following the recommended tools and safety precautions offered by Keyceo Tech, you can ensure a hassle-free key removal process, thereby prolonging the lifespan of your keyboard. Invest the time and care required, and you will be rewarded with a noticeably superior typing experience and a well-maintained keyboard for years to come.
Step-by-Step Guide to Removing Mechanical Keyboard Keys
Mechanical keyboards have gained immense popularity among gaming enthusiasts and typists due to their durability, enhanced tactile feedback, and customizable features. However, over time, the keys on these keyboards can accumulate dirt, debris, or even get stuck, affecting the typing experience. To maintain your OEM mechanical keyboard from Keyceo in its prime condition, it is crucial to know how to properly remove and clean the keyboard keys. In this step-by-step guide, we will walk you through the process of removing mechanical keyboard keys, ensuring that you can effectively clean and maintain your Keyceo keyboard.
Step 1: Gather the Necessary Tools
Before you proceed with removing the mechanical keyboard keys, ensure that you have all the tools required for the task. You will need a keycap puller, a soft brush (like a toothbrush), a microfiber cloth, and a bowl of warm soapy water.
Step 2: Remove the Keycaps
Start by using the keycap puller to gently pry off the keycaps from the mechanical keyboard. The keycap puller is designed to hook under the keycaps, allowing you to easily lift them off without causing any damage to the keyboard. Prioritize removing the larger keys, such as the space bar, Enter, Shift, and Backspace keys, first.
Step 3: Clean the Keycaps
Once the keycaps are removed, it's time to clean them thoroughly. Take the bowl of warm soapy water and dip the keycaps into it, ensuring they are fully submerged. Leave them to soak for a few minutes, then use the soft brush or microfiber cloth to scrub away any dirt or grime. Rinse the keycaps with clean water, ensuring no soap residue remains, and place them on a towel to air dry.
Step 4: Clean the Keyboard Surface
While the keycaps are drying, it's a good opportunity to clean the surface of the mechanical keyboard. Turn the keyboard over and gently tap it to remove any loose debris or crumbs. Then, using the soft brush, carefully brush away any remaining dirt or dust particles from the keyboard's surface. You can also use a can of compressed air to blow away any hard-to-reach debris.
Step 5: Reattach the Keycaps
Once the keycaps are completely dry, it's time to reattach them to the keyboard. Line up each keycap with its corresponding switch and gently press it down until it clicks into place. Ensure that each keycap is securely attached and doesn't wobble or feel loose.
Step 6: Test the Keyboard
After reattaching all the keycaps, it's important to test the keyboard to ensure everything is functioning properly. Type on each key to ensure they register accurately and smoothly. If you notice any issues, such as keys sticking or not registering, repeat the process of removing and cleaning the affected keycap.
Regularly cleaning your OEM mechanical keyboard is essential to maintain its performance and prolong its lifespan. By following this step-by-step guide to removing mechanical keyboard keys, you can effectively clean and maintain your Keyceo keyboard. Remember to gather the necessary tools, remove the keycaps, clean them thoroughly, and clean the keyboard surface before reattaching the keycaps. Enjoy a refreshed and impeccable typing experience with your Keyceo mechanical keyboard.
Troubleshooting Common Issues during Key Removal
When it comes to removing keys from your OEM mechanical keyboard, it might seem like a simple task at first. However, there are common issues that can arise during the process, causing frustration and potentially damaging your keyboard if not handled correctly. In this article, we will guide you through the troubleshooting of these common issues, ensuring a smooth key removal experience.
1. Stuck or Sticky Keys:
One common problem that users encounter when removing keys from their mechanical keyboards is keys that are either stuck or sticky. This can happen due to dust accumulation or spills on the keys. To resolve this issue, start by gently prying up the keycap with a keycap puller tool. If the key is sticky, try cleaning the keycap and switch underneath using a mild alcohol solution and cotton swabs. Avoid using excessive force as it might damage the key or the switch underneath.
2. Loose Keys:
Another issue that users face is keys that become loose after repeated use. This can make the key feel wobbly or prone to falling off unexpectedly. To fix loose keys, you'll need to access the keyboard's stabilizer. Most OEM mechanical keyboards use a wire stabilizer system. To tighten a loose key, locate the stabilizer bar and gently adjust it to increase tension. Be careful not to bend or break the wire.
3. Keys Not Coming Off:
Some mechanical keyboards have keycaps that are more difficult to remove than others. If you are having trouble getting a keycap off, make sure you are using an appropriate keycap puller tool. It's important to align the prongs of the tool with the notches on the keycap before pulling. Applying equal force to both sides of the keycap simultaneously can help release it smoothly. Avoid twisting or yanking the keycap forcefully, as this can damage the switch underneath.
4. Damaged Key Surface:
During the key removal process, it's possible to accidentally scratch or damage the surface of the keycap. To prevent this, make sure to use a keycap puller tool with soft prongs or consider covering the prongs with a soft cloth before pulling the keycap. Additionally, handle the keycaps with care and avoid using any sharp or pointed objects near them.
5. Switch Damage:
While removing the keycaps, it's essential to be cautious and avoid damaging the switches underneath. Applying excessive force or using sharp tools can lead to switch damage or even break them entirely. When removing keycaps, always pull straight up with gentle force. If a switch becomes damaged, it may require professional repair or replacement.
In conclusion, removing keys from an OEM mechanical keyboard can be a straightforward process if done correctly. By troubleshooting common issues such as stuck or sticky keys, loose keys, keys not coming off, damaged key surfaces, and switch damage, you can ensure a successful key removal experience. Remember to be patient, handle the keycaps with care, and use appropriate tools to maintain the integrity of your mechanical keyboard. Regular cleaning and maintenance can also help prevent future issues and keep your keyboard in optimal condition.
At Keyceo Tech, we understand the importance of a smooth typing experience. Our line of OEM mechanical keyboards is designed to provide durability, comfort, and precision. By following the troubleshooting tips mentioned in this article, you can confidently remove and maintain the keys on your Keyceo keyboard, ensuring a long-lasting and enjoyable typing experience.
Tips and Tricks for Cleaning and Maintaining Your Mechanical Keyboard
Mechanical keyboards have gained immense popularity among gamers and professionals for their durability and responsiveness. However, over time, dust, debris, and grime can accumulate between the keys, affecting its performance and overall aesthetic. In this article, we will guide you through the process of removing mechanical keyboard keys and provide invaluable tips and tricks for cleaning and maintaining your OEM mechanical keyboard.
1. Gather the necessary tools:
Before you begin cleaning your mechanical keyboard, it is essential to have the right tools. To safely remove the keys, you will need a keycap puller or a small flathead screwdriver. Additionally, ensure you have a can of compressed air, a soft brush, mild cleaning solution, and a lint-free cloth.
2. Turn off and disconnect your keyboard:
To avoid any accidental key presses while cleaning, turn off your computer and disconnect your mechanical keyboard from the USB port.
3. Remove the keycaps carefully:
Using a keycap puller or a small flathead screwdriver, gently remove the keycaps one by one. Start from one end and work your way across the keyboard, exerting even pressure while pulling up. Be extra cautious not to apply excessive force to prevent any damage to the keys or the switches underneath.
4. Dust and debris removal:
After removing the keycaps, you will notice dust, debris, and hair accumulated underneath. Carefully tilt the keyboard and use a can of compressed air to blow away the loose particles. Hold the can in an upright position and keep it at a safe distance to prevent any liquid residue from being blown onto the keys or switches.
5. Deep cleaning the keycaps:
To thoroughly clean the keycaps, prepare a mixture of mild cleaning solution and water. Gently soak the keycaps in the solution for a few minutes. Then, use a soft brush to scrub away any dirt or stains. Rinse the keycaps with clean water and pat them dry with a lint-free cloth. Allow them to air dry completely before reattaching.
6. Sanitizing the switches:
While the keycaps are drying, it's an excellent opportunity to sanitize the switches on your mechanical keyboard. Apply a small amount of isopropyl alcohol onto a cloth or cotton swab and carefully wipe the top of each switch. This will effectively remove any lingering bacteria or germs on the surface.
7. Cleaning the keyboard frame:
Take a damp cloth with a mild cleaning solution and gently wipe the keyboard frame to remove any dirt or fingerprints. Ensure the cloth is not dripping wet to prevent any moisture from seeping into the keyboard.
8. Reattach the keycaps:
Once everything is thoroughly cleaned and dried, it's time to reattach the keycaps. Align each keycap over its respective switch and press firmly until it clicks into place. Start from one end and work your way across to ensure a uniform and secure fit.
9. General maintenance tips:
To keep your mechanical keyboard in pristine condition, consider the following maintenance tips:
- Regularly dust your keyboard using a can of compressed air or a soft brush.
- Avoid eating or drinking near your keyboard to prevent any spills or crumbs from causing damage.
- Store your keyboard in a clean and dust-free environment when not in use.
- If any spills occur, immediately disconnect your keyboard, remove the affected keycaps, and clean them thoroughly.
Cleaning and maintaining your OEM mechanical keyboard is vital for optimal performance and longevity. By following the steps outlined above and incorporating regular maintenance, you can enjoy a clean and responsive typing experience. Remember to always handle the keycaps and switches with care to avoid any unnecessary damage. With these tips and tricks, your Keyceo Tech mechanical keyboard will be as good as new for years to come.
Conclusion
In conclusion, after seven years of expertise in the industry, we have come to understand the intricacies of mechanical keyboards and their components. Through this article, we have explored the step-by-step process of removing keyboard keys, enabling users to clean, customize, or replace individual keys with ease. As we continue to invest our knowledge and experience in providing top-notch products and services, we strive to empower our readers with the resources and insights necessary to navigate the world of mechanical keyboards effortlessly. With our commitment to excellence, we are excited to embark on the next chapter of this journey, confident in our ability to serve the needs of both beginners and enthusiasts in this dynamic and ever-evolving industry. Together, let us unlock the full potential of your mechanical keyboard experience, one key at a time.
Factory Adress: No.11,FengpingRoad